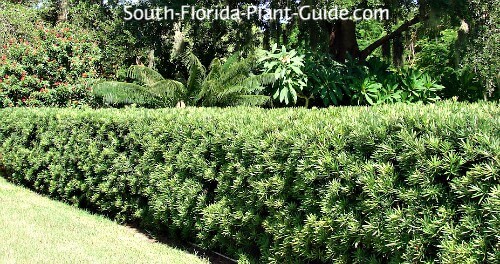
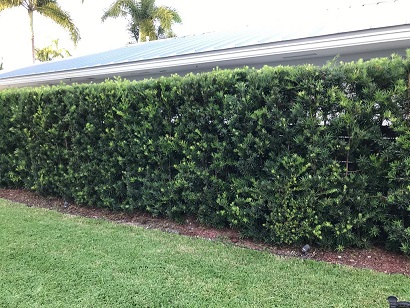
To plant a Podocarpus hedge, select a suitable location and dig a trench. Then, place the Podocarpus plants in the trench, ensuring proper spacing and alignment.
Credit: www.flnurserymart.com
Factors To Consider When Selecting A Planting Area
When selecting a planting area for your Podocarpus hedge, there are several factors to consider. First and foremost, sunlight requirements should be the top priority. Podocarpus hedges prefer full sun, but they can also tolerate partial shade. Make sure the area you choose receives adequate sunlight throughout the day.
Another important factor is the soil type and drainage. Podocarpus hedges thrive in well-draining soil. Ensure that the soil is not overly compacted and has good drainage to prevent waterlogging. Testing the soil pH level is also beneficial to ensure it is suitable for the plants.
Lastly, consider the space availability in the planting area. Podocarpus hedges require enough space to grow and spread their branches. Allow sufficient distance between each plant and any surrounding structures to accommodate their mature size. This will prevent overcrowding and allow proper airflow around the hedge.
How to Plant Podocarpus Hedge: Step by Step Guide
Preparing The Soil For Planting
When planting a Podocarpus Hedge, it is essential to properly prepare the soil to ensure healthy growth and development. The first step is to clear the area of any weeds and debris, as these can hinder the growth of the hedge. Testing the soil’s pH is crucial, as Podocarpus hedges thrive in slightly acidic soils with a pH level between 5.5 and 6.5. If the pH is too high or too low, it’s important to make the necessary amendments to adjust it to the appropriate range.
Adding organic matter to the soil is another crucial step in preparing it for planting. This helps improve fertility, drainage, and water retention. Organic matter such as compost or well-rotted manure should be incorporated into the soil before planting the Podocarpus hedge. It’s important to spread a layer of the organic matter evenly over the planting area and mix it into the soil to a depth of about 12 inches.
By following these steps and providing a well-prepared soil, you can create an optimal environment for your Podocarpus hedge to thrive and flourish.
Identifying The Best Podocarpus Species For Your Hedge
When choosing the best species for your podocarpus hedge, it is important to consider the height and growth characteristics of the plants. In the case of Podocarpus macrophyllus, also known as the Japanese Yew, it can grow up to 50 feet tall with a spread of 25 feet. It has dense, compact foliage and its growth rate is moderate to fast.
On the other hand, Podocarpus gracilior, commonly known as the Fern Pine, can reach heights of up to 80 feet and has a spread of 30 feet. Its foliage is more open and feathery compared to P. macrophyllus. The growth rate of P. gracilior is also moderate to fast. Both species are suitable for hedges, but the choice depends on your preferred height and growth characteristics.
Evaluating The Health And Quality Of Podocarpus Plants
|
When planting a Podocarpus hedge, it is crucial to evaluate the health and quality of the plants you choose. One essential aspect to inspect is the foliage for signs of diseases or pests. Look for discoloration, spots, or unusual growth patterns, as these can indicate underlying issues. Healthy foliage should be vibrant and free from any abnormalities. Furthermore, it is important to check the root system of the Podocarpus plants to ensure firmness and adequacy. Gently remove a plant from its container and examine the roots. They should be well-developed and spread out in the soil. Avoid plants with root systems that appear weak, overcrowded, or tangled. By thoroughly evaluating the health and quality of Podocarpus plants, you can ensure the success of your hedge. Healthy plants will establish better and be more resistant to diseases and pests, resulting in a beautiful and thriving hedge for years to come. |
Digging The Planting Holes
To ensure the optimal growth of your Podocarpus hedge, it is crucial to dig the planting holes correctly. The sizes and spacing of the holes play a significant role in providing enough room for the plant’s root system to develop and establish itself. Ideally, the depth and width of the holes should accommodate the root ball comfortably.
When digging the holes, it is essential to consider the mature size of the Podocarpus hedge and space them accordingly. This will allow the plants to grow and fill out without overcrowding. By providing the right hole size and proper spacing, you can encourage healthy root growth and ensure the overall success of your Podocarpus hedge planting project.
Planting The Podocarpus Hedge
Succesfully planting a Podocarpus hedge requires three main steps: removing the plants from their containers, placing them in the holes, and backfilling with soil. Start by gently removing the plants from their containers, taking care not to damage the roots. Once removed, dig holes that are deep enough and wide enough to accommodate the roots. Next, place the plants in the holes, making sure they are positioned upright.
Fill the holes with soil and gently tamp down to remove any air pockets. Lastly, provide adequate water to settle the soil around the roots and encourage healthy growth. Regular watering is essential during the establishment phase. Remember to monitor the hedge regularly, checking for signs of stress or disease. With proper care, your Podocarpus hedge will create a beautiful and functional landscape element.
Mulching And Fertilizing Your Hedge
Applying a layer of organic mulch to your Podocarpus hedge is essential for retaining moisture and controlling weeds. Mulch acts as a protective barrier for the roots, preventing water evaporation and weed growth. It also enhances the appearance of your hedge, giving it a neat and well-maintained look.
When it comes to choosing a balanced fertilizer, it is important to consider the specific nutrient requirements of Podocarpus. Select a fertilizer that is high in nitrogen, such as a 10-10-10 or 20-10-10 blend, to promote healthy leaf growth. Follow the recommended dosage provided on the fertilizer packaging to avoid overfeeding, which can be harmful to the hedge.
Establishing a routine fertilization schedule will ensure that your Podocarpus hedge receives the necessary nutrients throughout the year. Divide the total annual fertilizer amount into multiple applications, spacing them out evenly. This will provide a steady supply of nutrients for the hedge, promoting its overall health and vitality.
Watering And Pruning Tips
Proper watering is essential for the successful establishment and maintenance of a Podocarpus hedge. During the initial establishment phase, it is crucial to ensure that the plants receive adequate moisture. Water deeply and regularly to keep the soil consistently moist. Avoid overwatering, as excessive moisture can lead to root rot and other problems. Once the hedge is established, you can reduce the frequency of watering but still provide sufficient moisture to support healthy growth.
In terms of pruning, it is important to employ the right techniques to encourage dense growth and maintain the desired shape of the hedge. Regular pruning promotes branching and helps to create a thick hedge. Start by removing any dead or damaged branches. You can also shape the hedge by selectively trimming the top, sides, and bottom branches. This will help to maintain a neat and well-defined appearance. Remember to use sharp pruning tools and always follow the natural form of the plant.
Managing Pests And Diseases
Identifying common pests that affect Podocarpus hedges is crucial for successful hedge management. Common pests include spider mites, scale insects, and aphids. Spider mites are tiny pests that cause discoloration and damage by sucking sap from the leaves. Scale insects can be identified by their hard, shell-like bodies and can cause leaf yellowing and premature leaf drop. Aphids, on the other hand, feed on new growth and leave behind a sticky residue known as honeydew.
When it comes to pest control, you can choose between organic or chemical treatments. Organic treatments involve using natural insecticides or introducing beneficial insects such as ladybugs and lacewings that prey on pests. Chemical treatments, on the other hand, can be effective but may have environmental implications.
Recognizing and treating common diseases that affect Podocarpus hedges is also important. Common diseases include root rot, leaf blight, and powdery mildew. Root rot is caused by excessively wet soil and can be avoided by ensuring proper drainage. Leaf blight results in browning or blackening of leaves, and powdery mildew appears as white, powdery patches on the leaves.
Regular inspection and maintenance, including proper pruning and fertilization, can help keep the pests and diseases in check, ensuring healthy and thriving Podocarpus hedges.
Regular Watering And Fertilization
Establishing a watering routine based on weather conditions is crucial for the successful growth of your Podocarpus Hedge. The watering needs of Podocarpus plants can vary depending on factors such as temperature, rainfall, and humidity. During hot summer months, it is important to water your hedge deeply and regularly to ensure proper hydration.
In addition to watering, maintaining a consistent fertilization schedule is essential for optimal growth. Fertilizing your Podocarpus Hedge once every three months with a balanced slow-release fertilizer will provide the necessary nutrients for healthy foliage and vigorous growth. Be sure to apply the fertilizer evenly around the base of each plant and water thoroughly afterward to help the nutrients penetrate the soil.
By following these guidelines for regular watering and fertilization, you can ensure that your Podocarpus Hedge thrives and remains a stunning addition to your garden or landscape.
Monitoring For Pest And Disease Issues
Regularly inspecting the foliage and branches of your Podocarpus hedge is crucial to identify any signs of infestation or disease. Look out for common pests like scales, aphids, and spider mites, as well as diseases such as leaf spot or root rot. By closely examining the leaves, stems, and overall health of your hedge, you can detect any issues at an early stage. If you notice any signs of infestation or disease, take prompt action to prevent further damage.
Implementing effective pest and disease management strategies is essential for the overall health and appearance of your Podocarpus hedge. Consider using organic pest control methods, applying appropriate fertilizers, and ensuring proper irrigation practices. Regularly prune your hedge to maintain good airflow and encourage healthy growth, reducing the risk of disease. Additionally, keep the surrounding area clean and remove any debris that may attract pests or harbor disease. By proactively monitoring and addressing pest and disease issues, you can help your Podocarpus hedge thrive and flourish.
Proper Pruning Techniques
Proper pruning techniques are essential for maintaining the shape and size of your Podocarpus hedge. Trimming overgrown branches is a key part of this process. When pruning, it is important to use sharp and clean pruning tools to prevent damage to the plant. Begin by removing any dead or diseased branches. This helps to improve the overall health of the hedge. Next, focus on trimming back overgrown branches to achieve the desired shape.
Be careful not to remove too much foliage at once, as this can stress the plant. Encouraging lateral growth is another important step in maintaining a denser hedge. Prune the tip of each branch, which will encourage the growth of new branches from the dormant buds along the stem. Regular pruning will help your Podocarpus hedge to stay healthy and flourishing.
Addressing Common Hedge Maintenance Challenges
One of the challenges of planting a Podocarpus hedge is dealing with excessive growth and maintaining the desired height. To keep the hedge in check, regular pruning is necessary. Opt for a sharp pair of shears or hedge trimmers to ensure clean cuts. Remember to trim the hedge in a slightly tapered shape, wider at the bottom and narrower at the top, to promote even growth.
Another common challenge with Podocarpus hedges is leaf drop and browning. In order to minimize these issues, proper watering and fertilization are key. Ensure that the hedge receives enough water, especially during hot, dry periods, and apply a balanced slow-release fertilizer in the spring and fall.
In summary, to maintain a healthy Podocarpus hedge, stay on top of pruning to manage growth and height, and provide adequate water and fertilization to prevent leaf drop and browning.
Frequently Asked Questions Of How To Plant Podocarpus Hedge
How Far Apart Do You Plant Podocarpus For Hedge?
Plant Podocarpus for hedge at a distance of approximately 3-5 feet apart.
How Deep Should Podocarpus Be Planted?
Plant Podocarpus to a depth that aligns with the top of its root ball.
How Often Do You Water Podocarpus After Planting?
Water newly planted Podocarpus once a week for the first few months, ensuring the soil is evenly moist. Adjust watering frequency based on soil moisture levels, aiming for consistent moisture without overwatering.
How Far Apart Do You Plant Podocarpus For Privacy?
Plant Podocarpus trees for privacy by spacing them approximately 4 to 6 feet apart.
Conclusion
Overall, planting a Podocarpus hedge can be a rewarding and visually appealing addition to your landscape. By following the essential steps outlined in this guide, you can ensure a successful and healthy hedge. Remember to choose the right location, prepare the soil, select healthy plants, and provide adequate care and maintenance.
With proper attention, your Podocarpus hedge will thrive and become a beautiful asset to your outdoor space. Happy planting!