
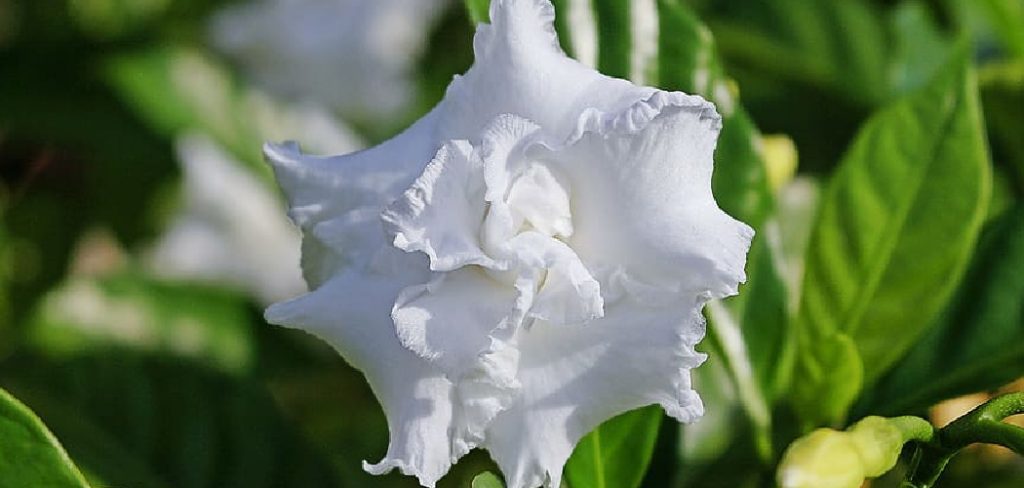
Gardenias are beautiful and fragrant plants that can add elegance to any garden or home. Growing gardenias from cuttings is a rewarding and cost-effective way to propagate this stunning plant. With the right techniques and care, you can successfully cultivate new gardenias and enjoy their lush foliage and delicate blossoms. This guide will provide you with step-by-step instructions on how to grow gardenia from cuttings.
Benefits of Propagating Gardenias from Cuttings
Propagating gardenias from cuttings offers several advantages for gardeners of all levels. Firstly, it is a cost-effective method, as it eliminates the need to purchase new plants, allowing you to expand your garden without additional expense. This approach also ensures that the new plants will be identical to the parent plant, preserving desirable traits such as flower color, fragrance, and growth habit.
Additionally, propagating from cuttings is environmentally friendly, reducing waste and promoting sustainable gardening practices. By mastering this technique, you can enjoy a continuous supply of healthy gardenias while building your gardening skills and deepening your connection to nature.
Tools and Materials Needed for Propagation
To successfully propagate gardenias from cuttings, it is important to have the right tools and materials on hand. Here’s a list of items you will need:
- Clean and Sharp Pruning Shears or Scissors – For cutting healthy stems without causing unnecessary damage to the plant.
- Rooting Hormone – A powder or gel that encourages root growth and increases the chances of successful propagation.
- Small Pots or Containers – Equipped with drainage holes to plant the cuttings in.
- Well-Draining Potting Mix – A mix designed for acid-loving plants, such as gardenias, to provide optimal growing conditions.
- Spray Bottle – Used to keep the cuttings and soil moist during the rooting process.
- Plastic Bags or Humidity Domes – To create a humid environment that promotes root development.
- Gardening Gloves – To protect your hands while handling plants and soil.
Having these tools and materials prepared in advance will make the propagation process smoother and more efficient, helping you achieve the best possible results.
10 Methods How to Grow Gardenia from Cuttings
1. Selecting the Right Cutting for Propagation
The first step in successfully growing a gardenia from a cutting is selecting a healthy stem. Choose a semi-hardwood cutting—one that is not too young and tender but not fully mature and woody. The ideal cutting should be about 4–6 inches long and taken from a branch that has recently bloomed.
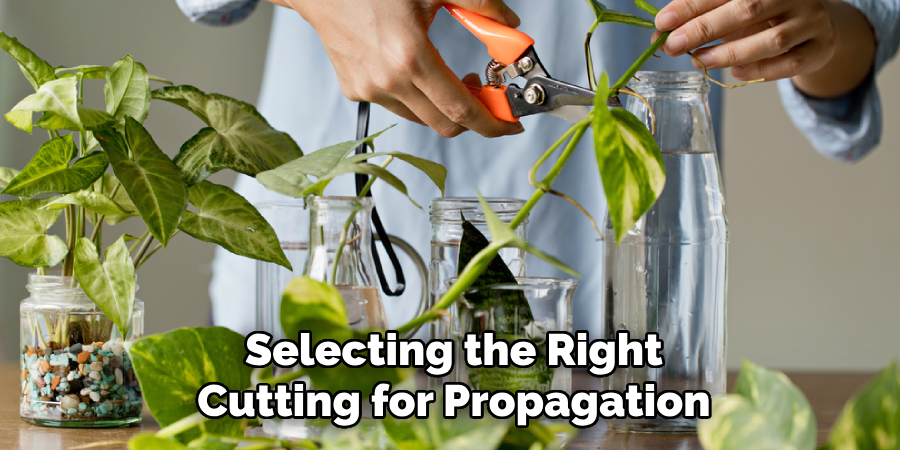
Avoid cuttings with flowers or buds, as they divert energy away from root development. Using clean, sharp pruning shears, make a diagonal cut just below a leaf node, as this is where the highest concentration of rooting hormones is present.
2. Removing Excess Leaves and Preparing the Cutting
Once you have taken the cutting, it’s essential to remove excess leaves to reduce water loss through transpiration. Trim off the lower leaves, leaving only two or three at the top. If the remaining leaves are large, cutting them in half can help reduce moisture loss while still allowing photosynthesis to occur. Removing excess foliage directs more energy toward root development, increasing the chances of successful propagation.
3. Using Rooting Hormone for Faster Root Development
Applying rooting hormone to the cut end of the gardenia cutting significantly improves the chances of successful propagation. Rooting hormone, available in powder, liquid, or gel form, stimulates root growth and helps prevent rot. Dip the bottom inch of the cutting into the rooting hormone, tapping off any excess powder before planting.
This step is crucial, especially for plants like gardenias, which can be slow to root. Using rooting hormone enhances root production and ensures a stronger start for your new plant.
4. Choosing the Right Growing Medium
The soil or growing medium plays a crucial role in the success of gardenia propagation. The medium should be well-draining and light, allowing roots to develop without excessive moisture retention. A mix of peat moss and perlite or a combination of sand and vermiculite works well for cuttings.
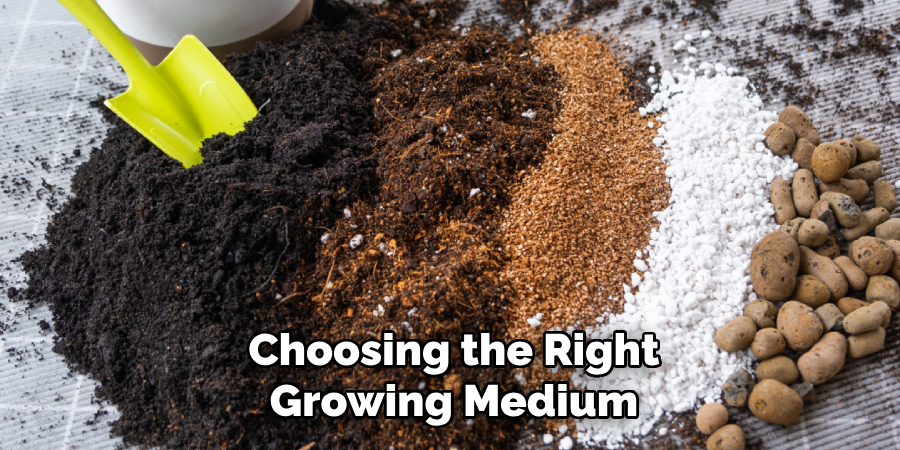
Avoid using regular garden soil, as it tends to be too heavy and may lead to root rot. Filling a small pot or propagation tray with the right medium ensures optimal conditions for the cutting to take root.
5. Planting the Cutting at the Right Depth
Once the cutting is prepared, it’s time to plant it in the growing medium. Using a pencil or stick, create a hole in the soil to prevent the rooting hormone from rubbing off when inserting the cutting. Place the cutting about 1–2 inches deep, ensuring that at least one leaf node is buried below the soil line.
Gently firm the soil around the cutting to provide stability, ensuring good contact between the cutting and the medium. Proper planting depth is essential for establishing strong root growth.
6. Providing the Right Humidity and Moisture
Gardenia cuttings require high humidity to prevent them from drying out before roots form. One of the best ways to create a humid environment is by covering the pot or tray with a clear plastic bag, dome, or humidity tent. Ensure the plastic does not touch the leaves by propping it up with small stakes.
Mist the leaves lightly with water before covering to increase humidity. Keeping the cuttings in a warm, humid environment encourages root development and prevents wilting.
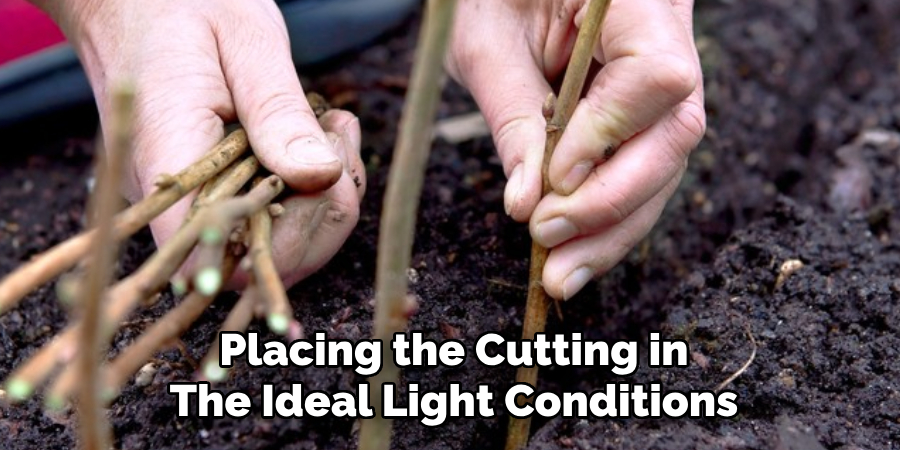
7. Placing the Cutting in the Ideal Light Conditions
Light plays a vital role in the success of gardenia cuttings. While they need bright, indirect light, direct sunlight can be too intense and cause dehydration. Place the cuttings in a warm location with filtered sunlight, such as near a window with sheer curtains or in a greenhouse. If growing indoors, using a grow light set to 12–14 hours per day can help provide the necessary light levels. Consistent, indirect light ensures that the cutting remains healthy and photosynthesizes without excessive stress.
8. Maintaining Optimal Temperature for Rooting
Gardenia cuttings thrive in warm temperatures, with the ideal range being between 70–75°F (21–24°C). Cooler temperatures can slow down the rooting process, while excessively high temperatures may dry out the cuttings. Using a heat mat under the propagation tray can help maintain consistent warmth, especially in cooler climates. Avoid placing the cuttings near drafts, air conditioners, or heaters, as sudden temperature changes can negatively affect root formation. Consistent warmth is key to encouraging strong root growth.
9. Monitoring and Watering Correctly
Proper watering is crucial for successful propagation. The soil should remain moist but not waterlogged, as excess moisture can lead to fungal infections and rot. Check the soil daily and water lightly if it begins to dry out. Using a spray bottle to mist the soil and leaves helps maintain the right moisture levels without overwatering. If mold or fungus appears, improve airflow around the cuttings by slightly opening the plastic cover. Maintaining balanced moisture conditions promotes healthy root development.
10. Transplanting Rooted Cuttings into Pots
After 6–8 weeks, gardenia cuttings should begin developing roots. To check for root formation, gently tug on the cutting—if there is resistance, roots have formed. Once the roots are well-established (about 1–2 inches long), it’s time to transplant the young plant into a larger pot. Fill the new pot with nutrient-rich, well-draining soil, such as a mix of peat moss, pine bark, and perlite. Carefully remove the cutting from the propagation tray, being mindful not to damage the delicate roots. Water thoroughly after transplanting and continue providing bright, indirect light. Proper transplantation ensures the plant can continue growing in a more spacious environment.
Troubleshooting Common Issues
While propagating gardenias is rewarding, challenges can arise during the process. Below are some common issues and their solutions to help ensure successful propagation:
- Leaf Yellowing or Drooping
- Cause: This is often a sign of excessive moisture, poor drainage, or insufficient humidity.
- Solution: Check that the soil is well-draining and not waterlogged. Ensure the cutting is exposed to high humidity by using a plastic cover or humidity tent. Reduce watering if the medium feels too wet.
- Cuttings Failing to Root
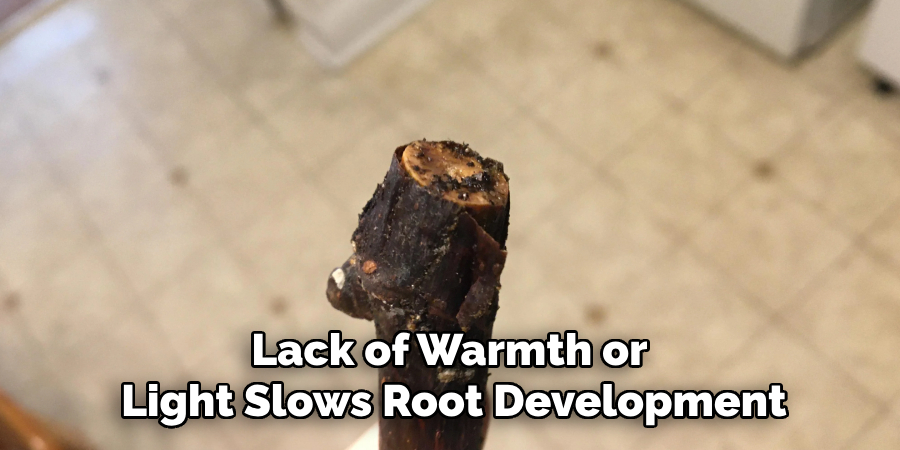
- Cause: Lack of consistent warmth or light may slow root development. Additionally, skipping rooting hormone might hinder the rooting process.
- Solution: Maintain a stable temperature between 70–75°F (21–24°C) using a heat mat if necessary. Place the cuttings in bright, indirect light and use rooting hormone during preparation to encourage root growth.
- Mold or Fungal Growth on Soil
- Cause: High humidity combined with poor airflow can lead to fungal growth.
- Solution: Ensure the propagation area has adequate ventilation. If mold appears, remove the plastic cover briefly to improve airflow, and allow the soil surface to dry out slightly before watering again.
- Browning or Crispy Leaves
- Cause: This issue may be caused by exposure to direct sunlight or insufficient moisture.
- Solution: Move the cuttings to a location with indirect light and ensure they are misted regularly to maintain humidity. Avoid letting the soil dry out completely.
Conclusion
Growing gardenias from cuttings is a rewarding and cost-effective way to expand your garden or indoor plant collection. By following these ten methods—selecting the right cutting, using rooting hormone, maintaining high humidity, and providing optimal light and temperature—you can successfully propagate gardenias with minimal effort.
While they require patience and careful monitoring, the result is a beautiful, fragrant plant that will bring joy for years to come. Thanks for reading our blog post on how to grow gardenia from cuttings! We hope you found it helpful and informative.