Are you tired of soil and other debris clogging the drainage holes in your pots? Mesh screens are a simple and effective solution to this problem.
When it comes to planting and ensuring proper drainage in pots, using mesh screens over drainage holes is a simple yet effective technique. These small screens prevent soil from washing out through the holes while still allowing excess water to escape, which is crucial for maintaining healthy plant roots and avoiding waterlogging. Whether you’re working with indoor plants or an outdoor garden, mesh screens provide an easy way to keep your space tidy and prevent potential drainage issues.

In this guide on how to use mesh screens over drainage holes, we’ll discuss the benefits of using this technique and provide step-by-step instructions on how to do it.
What Are the Benefits of Using Mesh Screens over Drainage Holes?
Mesh screens offer several benefits when used over drainage holes in plant containers. Here are some reasons why you should consider implementing this technique in your gardening or indoor plant care routine:
- Prevents Soil From Escaping: One of the main advantages of using mesh screens is that they prevent soil from escaping through the drainage holes. This can be especially helpful when working with finer soils that tend to slip through the holes easily.
- Keeps Pests Out: Mesh screens also act as a barrier for pests, preventing them from entering the pot through the drainage holes and potentially harming your plants.
- Improves Water Flow: By layering a mesh screen over the drainage hole, you can create a more even distribution of water throughout the pot, preventing any areas from becoming waterlogged.
- Prevents Root Rot: Mesh screens are also helpful in preventing root rot, as they allow excess water to drain out of the pot instead of pooling at the bottom and potentially damaging the plant’s roots.
- Reduces Soil Compaction: When watering your plants, it is common for soil particles to become compacted and block drainage holes. By using a mesh screen, you can prevent this from happening and ensure proper drainage for your plants.
What Will You Need?
- Mesh Screen: You can purchase mesh screens at most gardening or hardware stores, or you can make your own by cutting a piece of mesh material to fit the bottom of your pot.
- Scissors: If you’re making your mesh screen, you’ll need scissors to cut the material to the correct size.
- Potting Soil: To ensure proper drainage and prevent soil compaction, use high-quality potting soil formulated explicitly for container gardening.
- Pots with Drainage Holes: Mesh screens are only necessary for pots with drainage holes. If your pot doesn’t have any holes, you may need to drill some in the bottom before adding a mesh screen.
- Plants: Choose plants that are suitable for container gardening and that will receive the same amount of sunlight as your pot. It is also essential to consider the size and shape of your pot when choosing plants, as some may quickly outgrow their containers.
- Watering Can or Hose: Container gardens require regular watering, so it’s essential to have a watering can or hose nearby for easy access.
- Fertilizer: Containers do not hold nutrients as well as garden soil, so it may be necessary to fertilize your plants regularly with a slow-release fertilizer or by adding compost to the potting soil.

8 Easy Steps on How to Use Mesh Screens Over Drainage Holes
Step 1. Gather Your Materials:
Before you start, ensure you have all the necessary supplies for this task. You will need mesh screens sized appropriately for the drainage holes of your pots, scissors to cut the mesh if necessary, and the containers or pots into which you will place the mesh.
Additionally, having gloves can be helpful to protect your hands while handling the mesh material, especially if it is sharp or rigid. It’s essential to select a type of mesh that allows water to drain freely while preventing soil or small debris from clogging the holes, ensuring proper drainage and root health for your plants.
Step 2. Cut the Screen to Size:
Measure the drainage holes of your pots carefully to determine the appropriate size for the mesh screen. Using sharp scissors or a utility knife, cut the mesh into small pieces that adequately cover the holes without overlapping excessively. If the drainage holes are huge, ensure the mesh pieces are slightly larger to prevent them from slipping through.
For pots with irregular or uniquely shaped holes, consider tracing the outline of the hole on the mesh before cutting for a precise fit. Taking the time to cut the mesh accurately will ensure it stays securely in place and performs its function effectively, allowing water to flow while keeping soil contained.

Step 3. Prepare the Container:
Once the mesh has been properly cut and fitted over the drainage holes, the next step in preparing the container is to ensure that the interior is clean and ready for planting. Start by thoroughly rinsing the container with water to remove any dust, debris, or residues left from previous use.
If the container was previously used to house other plants, consider gently scrubbing it with a mild soap solution and rinsing it well to remove any lingering bacteria, pests, or diseases that could harm your new plants. Allow the container to dry completely before proceeding, as damp interiors can promote mold or mildew growth.
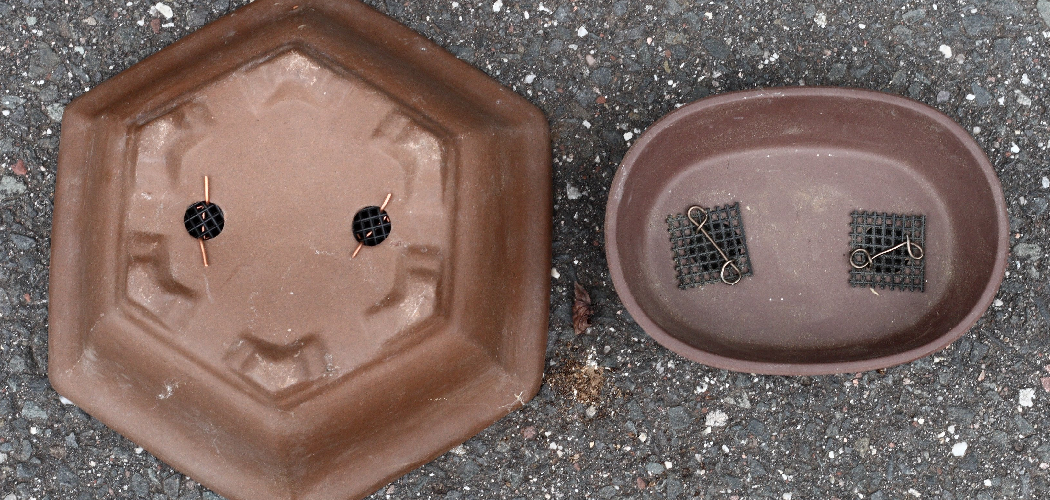
Step 4. Position the Screen:
Carefully position the screen at the bottom of the container to prevent soil from escaping through the drainage holes while still allowing excess water to flow out freely. Choosing a durable, breathable material like mesh or fine wire for the screen ensures it will serve its purpose without restricting drainage.
Make sure the screen fits snugly, covering the holes completely, but avoid overlapping too much, as this could compromise airflow. Taking this step not only minimizes messes but also helps maintain a healthy environment for your plants by preventing waterlogging and ensuring proper aeration at the base of the container.
Step 5. Secure the Screen:
To properly secure the screen, position it carefully over the drainage holes so that it completely covers them. Using a small amount of adhesive, such as waterproof gardening tape or an eco-friendly glue suitable for outdoor use, affix the edges of the screen to the container to prevent it from shifting over time.
Alternatively, for a more natural approach, you can use small, clean stones or gravel to weigh the screen down and keep it in place securely. This step ensures that the screen remains effective, even during repotting, watering, or when moving the container. A securely placed screen will not only protect against clogging but also improve the longevity of your plant container setup, ensuring an optimal environment for root growth and plant health.

Step 6. Add Potting Soil:
Carefully fill the container with high-quality potting soil, leaving enough room at the top for watering without causing overflow. Choose a potting mix that matches the specific needs of your plants; for example, succulents and cacti require a fast-draining mix, while tropical plants may need soil that retains moisture.
Gently pat the soil down as you fill to eliminate large air pockets, but avoid compacting it too much, as this can hinder root growth and proper water drainage. If you’re mixing your soil, consider incorporating materials like perlite, vermiculite, or organic compost to enhance aeration, moisture retention, and nutrient supply.
Step 7. Plant Your Plants:
Carefully remove your plants from their nursery pots, taking care not to damage the roots. If the roots are tightly bound or encircling the root ball, gently tease them apart to encourage new growth in their fresh soil. Position each plant in the prepared pot so that the top of the root ball is level with or slightly below the rim of the container.
For larger plants, you may need to add or remove soil from the base to achieve the appropriate height. Once the plant is appropriately positioned, fill the surrounding space with your chosen soil mix, ensuring that there are no gaps around the roots.
Step 8. Monitor Over Time:
After repotting, it is essential to carefully monitor your plants to ensure they adapt well to their new environment. Begin by observing the soil moisture; overwatering can lead to root rot, while underwatering may cause the plant to become dehydrated. Check the soil regularly and water only when the top inch feels dry to the touch. Additionally, watch for any signs of stress, such as wilting, yellowing leaves, or stunted growth, as these may indicate issues with light, temperature, or the potting mix. Gradually introduce your plant to any changes in lighting conditions if the repotting location differs significantly from its previous spot. Over time, prune any dead or damaged leaves to encourage healthy growth.
Using mesh screens over drainage holes is a simple yet effective step to maintain a healthy container garden while minimizing mess.

Conclusion
How to use mesh screens over drainage holes is a practical and efficient way to ensure your plants thrive while keeping your containers tidy.
These screens prevent soil from escaping through the drainage holes during watering, while still allowing excess water to flow out freely, which reduces the risk of waterlogging. They also act as a barrier against pests that might attempt to enter the pot from below.
By incorporating mesh screens into your container gardening routine, you can maintain a clean growing environment and support healthier plant growth with minimal effort.