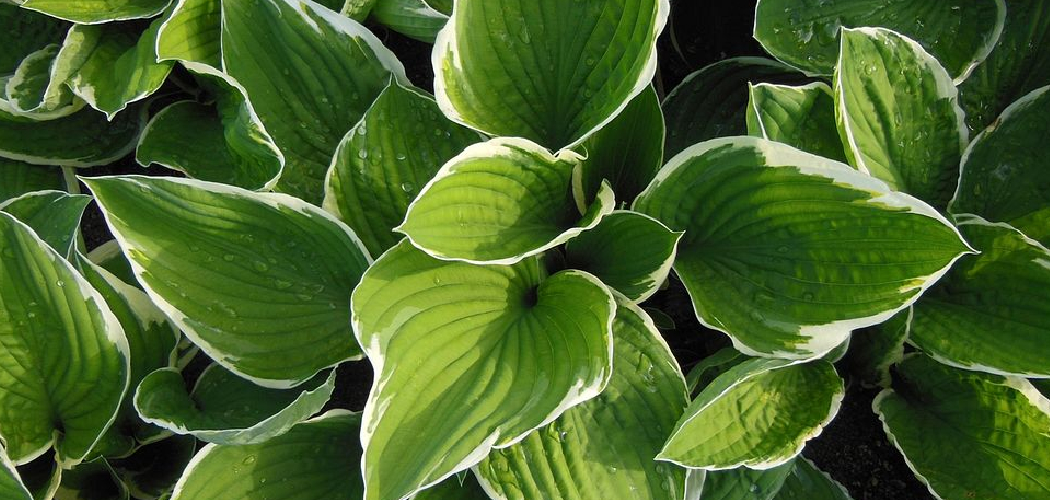
Are you new to gardening and not sure how to care for your hosta plants? Or, have you been growing hostas for a while but never learned the proper techniques for thinning them out?
How to thin out hostas plants is a simple yet essential gardening task to ensure their healthy growth and maintain their aesthetic appeal. Over time, hostas can become overcrowded, leading to reduced air circulation, stunted growth, and an increased risk of disease. By properly thinning or dividing these perennials, gardeners can encourage robust development, enhance the overall appearance of their garden, and even propagate new plants. Additionally, hostas are relatively low-maintenance and can thrive in a variety of growing conditions, making them a popular choice among gardeners.

This process not only revitalizes your hostas but also helps them thrive year after year.
What Are the Benefits of Thinning and Dividing Hostas?
Thinning and dividing hostas offer many benefits for both the health and appearance of your plants. Here are a few reasons why you should consider incorporating this practice into your gardening routine:
- Stimulates Robust Growth: By thinning out crowded hostas, you provide the remaining plants with more space to grow and develop strong root systems. This leads to healthier, larger foliage and more vibrant colors.
- Enhances Garden Aesthetics: Overcrowded hostas can create a messy and disorganized look in your garden. Thinning them out allows for better spacing between plants, creating a more visually appealing landscape.
- Increases Air Circulation: Thickly packed hosta clumps can restrict air circulation, leading to increased humidity and a potential for fungal diseases. Thinning out the clumps allows for better air flow and decreases the risk of plant diseases.
- Reduces Pests and Diseases: Crowded hosta plants can attract pests such as slugs and snails, which thrive in damp and dark environments. By thinning out your hostas, you are reducing their hiding spots and making it less desirable for them to stay in your garden.
- Promotes Division: Hostas that have been thinned out are easier to divide when they become too large. This allows you to propagate healthy new plants, expand your collection, or share with fellow gardening enthusiasts.
What Will You Need?
- Pruning shears or scissors
- Gardening gloves (optional)
- A bucket or a wheelbarrow for collecting cuttings
Once you have gathered all the necessary tools, let’s proceed with the steps for thinning out your hostas.
10 Easy Steps on How to Thin Out Hostas Plants
1. Choose the Right Time
Timing is crucial when it comes to thinning out your hostas. The best time to thin them is either in early spring, just as they begin to emerge from the ground, or in the early fall after their active growth period has slowed down. Performing this task during these times reduces stress on the plants and promotes proper root healing.

Spring provides the added benefit of being able to see and separate the fresh growth more easily, while fall thinning helps prepare the plants for the following growing season. Avoid thinning during the peak of summer, as high temperatures can stress the plants and hinder their ability to recover effectively after division.
2. Water the Plant
Watering the plant is a crucial step that ensures its survival and promotes healthy growth after thinning or dividing. Once the process of separating and replanting has concluded, it is essential to thoroughly water the plant to help it establish its roots in the new environment. Providing consistent moisture ensures that the plant can access the hydration it needs to recover and thrive.
However, care must be taken to avoid overwatering, as this can lead to root rot and other issues. Aim for watering the plant deeply but less frequently, allowing the soil to dry slightly between waterings while still maintaining a regular schedule. Using mulch around the base of the plant can also aid in moisture retention and temperature regulation, giving the plant the best possible conditions as it begins to settle into its new growing phase.
3. Prepare the Area
Preparing the area is crucial to providing an optimal environment for the plant to establish itself and grow healthily. Start by clearing the space of any weeds, debris, or unwanted vegetation to ensure the plant has no competition for nutrients. Loosen the soil in the area to improve aeration and drainage, and consider mixing in compost or organic matter to enrich the soil with essential nutrients.
If the soil is particularly compacted or poor in quality, you can amend it with sand or other materials as needed to create a balanced and fertile planting medium. It’s also essential to assess the sunlight exposure and choose a spot that matches the plant’s specific requirements.
4. Identify Crowded Areas
Overcrowded planting can lead to unhealthy competition among plants for essential resources like sunlight, water, and nutrients. Carefully inspect your garden or planting area to identify spots where plants are growing too close together. Overcrowding can also restrict airflow, increasing the risk of fungal diseases and pest infestations. For optimal growth, ensure there is adequate spacing between plants, following the recommended guidelines for each species. If needed, thin out or transplant plants to create a more balanced and healthy growing environment.

5. Dig Around the Plant
Digging around a plant is a crucial step in ensuring its health and growth. Start by gently loosening the soil around the base of the plant, being careful not to damage the roots. This helps improve aeration, allowing oxygen to reach the roots more effectively. Additionally, it facilitates water absorption and ensures that nutrients are distributed evenly. Use a small garden trowel or hand fork for precision and control, especially when working with delicate plants. Regularly digging around plants also helps identify any issues, such as pests, weeds, or compacted soil, that may hinder growth.
6. Lift the Plant
Gently lift the plant from the ground, ensuring you hold it by the base and not by the stems or leaves, as this could cause damage. Use a garden fork or spade to loosen the soil around the plant carefully, making it easier to remove. Ensure that the root system remains intact during this process, as disturbing the roots excessively can stress the plant and impair its ability to thrive in a new location. Once lifted, inspect the roots for any signs of disease or damage before proceeding to transplant or replant.
7. Divide the Roots
Using a clean, sharp knife or garden shears, carefully divide the root ball into smaller sections. Ensure that each section has a healthy portion of roots and, if possible, some stems or shoots attached. This helps to promote successful regrowth once the divisions are replanted. Examine the divided sections for any signs of pests, rot, or damage, and trim away any unhealthy parts to encourage robust growth. Keep the roots moist while working to prevent them from drying out.
8. Replant the Divisions
Once the divisions are ready, carefully select a well-prepared area in the garden or suitable containers for replanting. Ensure the soil is enriched and loosened to provide a hospitable environment for the roots to establish. Dig planting holes large enough to accommodate the divided sections without crowding the roots.

Place each section into its respective hole, ensuring the crown is at or slightly above soil level to prevent rotting. Fill the holes with soil, gently tamping it down to eliminate air pockets while allowing for proper drainage. After planting, water thoroughly to help the roots settle and maintain consistent moisture during the establishment period.
9. Water the New Plants
After planting, it is crucial to water the new plants generously to ensure they establish strong roots in their new location. Use a gentle stream of water to avoid displacing the soil or damaging the tender roots. Aim for a consistent level of soil moisture during the first few weeks, as this is a critical period for root development. Depending on the weather and soil type, watering may be required daily or several times a week.
10. Mulch and Maintain
Apply a layer of mulch around the base of the plants to help retain soil moisture, regulate temperature, and suppress weed growth. Organic mulches such as bark, straw, or shredded leaves work well and also contribute nutrients to the soil as they decompose. Ensure the mulch is spread evenly, keeping it a few inches away from the plant stems to prevent rot. Regular maintenance is equally important—inspect your plants for pests, prune dead or damaged foliage, and continue checking soil moisture levels. Proper care will help ensure your plants thrive in their new environment.
By following these tips, you can create a beautiful and thriving flower garden that will bring joy to your outdoor space.

Conclusion
How to thin out hostas plants is an essential gardening task that promotes healthier growth and prevents overcrowding.
Begin by identifying clumps that have become too dense or are spreading beyond their desired area. Carefully dig around the base of the plant, ensuring you do not damage the root system. Once lifted, use a sharp, clean knife or spade to divide the root clump into smaller sections, each with a healthy portion of roots and foliage. Replant the divisions in well-prepared soil, spacing them adequately to allow for future growth and development. Water thoroughly after replanting and maintain consistent moisture levels as the divisions establish themselves.
With proper care and attention, your hostas will continue to thrive and enhance the beauty of your garden.