Are you struggling with growing healthy and full Dusty Miller plants in your garden? One of the key steps to achieving this is by pruning them regularly.
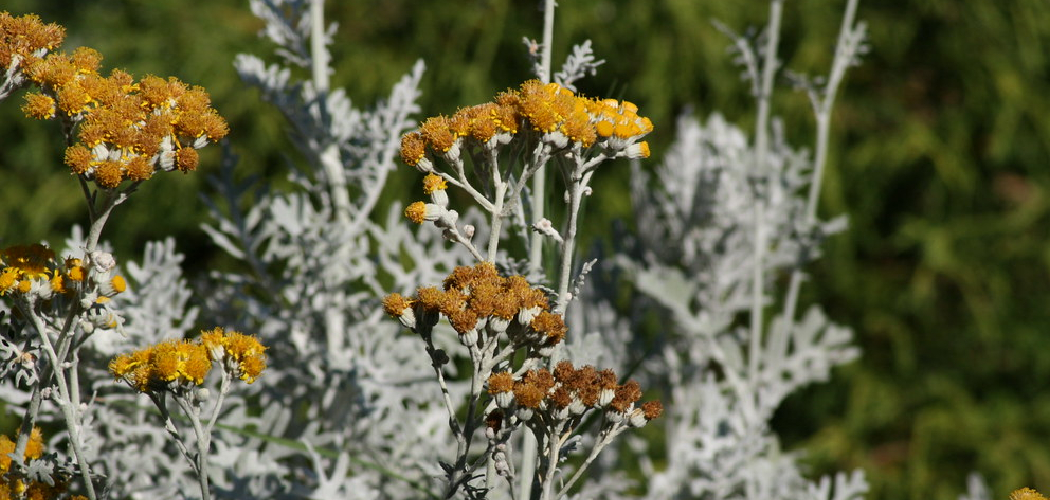
How to prune dusty miller plants is an essential part of maintaining their health and appearance. Known for their striking silvery foliage, dusty miller plants are a popular choice in gardens and landscapes. Regular pruning helps to encourage new growth, retain the bushy and compact shape, and prevent the plant from becoming leggy. Additionally, trimming away dead or damaged leaves allows the plant to focus its energy on producing vibrant, healthy foliage.

Whether you’re a novice gardener or an experienced green thumb, learning to prune dusty miller plants correctly is a simple and rewarding task. Let’s dive into the process and tips for pruning these stunning plants.
What Are the Benefits of Pruning Dusty Miller?
Pruning dusty miller plants offers several benefits, including:
- Encourages New Growth: Pruning stimulates the production of new branches and leaves, resulting in a fuller and more compact plant.
- Maintains Shape and Appearance: Regular pruning helps to keep the plant’s shape and size in check, preventing it from becoming leggy or overgrown.
- Promotes Healthy Foliage: Removing dead or damaged leaves allows the plant to focus its energy on producing strong and vibrant foliage.
- Increases Air Circulation: Pruning opens up dense areas within the plant, allowing for better air flow, which can help prevent diseases.
What Will You Need?
- Pruning Tools: Depending on the size and type of plant, you may need hand pruners, loppers, or a pruning saw.
- Protective Gear: Gloves and safety glasses are recommended to protect your hands and eyes from sharp branches.
- Disinfectant: It is important to disinfect your pruning tools before and after each use to prevent the spread of disease between plants.
10 Easy Steps on How to Prune Dusty Miller Plants
Step 1: Choose the Right Time
Pruning Dusty Miller plants is best done during their active growing season, typically occurring in spring or early summer. During this time, the plant is healthier and better able to recover from trimming. Avoid pruning during extreme heat or freezing temperatures, as these conditions can stress the plant and slow its recovery.
Early morning or late afternoon is an ideal time to prune, as the cooler temperatures provide a less stressful environment for the plant. It’s essential to assess the plant carefully before beginning to ensure that pruning happens at the most opportune moment for growth and maintenance.
Step 2: Inspect the Plant
Before you begin pruning, take the time to inspect the plant thoroughly. Look for any signs of disease, pests, or damage, as these may require special attention or treatment before pruning. Identify dead, damaged, or diseased branches that need to be removed to prevent further spread of issues and to promote overall plant health.
Additionally, observe the plant’s structure to determine how pruning can enhance its natural shape and promote balanced growth. Pay close attention to overlapping or crowded branches, which may need to be thinned to improve airflow and allow light to penetrate the canopy. A careful inspection ensures that your pruning efforts are purposeful and beneficial to the plant’s long-term vitality.

Step 3: Sterilize Your Tools
Properly sterilizing your tools is a crucial step to prevent the spread of diseases and pests between plants. Use a solution of one part bleach to nine parts water, or a commercial disinfectant designed explicitly for gardening tools. Dip the blades of your tools into the solution, ensuring all cutting surfaces are thoroughly sanitized.
Wipe off any excess liquid and allow the tools to dry completely before use. Sterilizing your tools not only protects the health of your plants but also ensures the longevity of your equipment. Make this a regular part of your pruning routine for optimal results.
Step 4: Remove Dead or Diseased Material
Start by carefully inspecting your plants for any dead, damaged, or diseased branches, leaves, or stems. These sections often appear discolored, brittle, or show signs of rot. Removing them promptly helps prevent the spread of disease and allows the plant to direct its energy toward healthy growth. Use sterilized pruning tools to make clean cuts just above a healthy node or branch. Dispose of the removed material properly, ideally by bagging it or burning it, as diseased plant matter can harbor pests or pathogens that may contaminate other plants.
Step 5: Trim Back Overgrown Stems
Overgrown stems can hinder a plant’s growth by restricting airflow and sunlight penetration, which are vital for its health. Start by identifying stems that appear excessively long or are crowding other parts of the plant. Using sharp, sterilized pruning tools, trim these stems back to a healthy node or just above a leaf junction. This encourages the plant to develop a fuller, more balanced shape while redirecting its energy to promote new growth.
Step 6: Shape the Plant
Shaping the plant is a crucial step to ensure it maintains an attractive and healthy appearance. Begin by envisioning the ideal shape you want your plant to achieve, keeping its natural growth patterns in mind. Next, carefully prune branches and stems that grow in awkward directions or disrupt the plant’s overall symmetry. Focus on creating an open structure that allows adequate airflow and light to reach all parts of the plant. Regular shaping helps prevent overgrowth and contributes to sustained health and vigor.

Step 7: Pinch Off Flower Buds
Pinching off flower buds is a crucial step for encouraging your plant’s energy to focus on growth and strength rather than reproduction. To do this, gently remove small flower buds as they appear, using your fingers or a clean, sharp tool. This process is essential for young plants as it prevents them from diverting nutrients to flowering too early. By removing these buds, the plant can develop a robust root system and stronger stems, ultimately leading to healthier blooms and fruits in the future.
Step 8: Clear Debris
Clearing debris around your plants is essential for maintaining a healthy growing environment. Remove fallen leaves, spent flowers, and any other organic matter that can harbor pests or diseases. This not only keeps the area tidy but also improves air circulation and reduces the risk of fungal infections. Use a small rake or your hands to gently clear the soil surface, taking care not to disturb the plant’s roots.
Step 9: Check for Pests
Regularly inspecting your plants for pests is crucial to ensuring their health and productivity. Look closely at the leaves, stems, and undersides for signs of infestation, such as discoloration, holes, or sticky residue.
Common garden pests include aphids, caterpillars, and spider mites, which can damage or weaken your plants. If you notice any pests, take immediate action by manually removing them, applying organic insecticidal soap, or introducing natural predators like ladybugs. Early detection and management can prevent further problems and keep your plants thriving.
Step 10: Monitor Growth
Regularly monitoring your plants’ growth is essential to ensure they remain healthy and develop as expected. Check for consistent growth patterns, vibrant foliage, and the emergence of flowers or fruits, depending on the type of plants you are cultivating. Monitor environmental factors, such as sunlight, temperature, and soil moisture, and adjust care routines as necessary.
Additionally, document changes or observations in a gardening journal to track progress and identify any recurring issues. Monitoring growth allows you to celebrate successes and intervene promptly if problems arise, ensuring the best possible outcome for your garden.

By following these tips and incorporating them into your gardening routine, you can cultivate a beautiful and thriving garden that will bring joy and satisfaction for years to come.
5 Things You Should Avoid
- Over-Pruning the Plant
Avoid removing too much foliage at once, as this can stress the dusty miller plant and hinder its growth. Prune conservatively to allow the plant to recover and thrive.
- Pruning at the Wrong Time
Don’t prune dusty miller during extreme weather conditions, such as intense heat or frost. The best time to prune is during the active growing season to encourage healthy regrowth.
- Using Dull or Dirty Tools
Always use sharp and clean pruning tools. Dull tools can damage the stems, while dirty tools may introduce infections or diseases to the plant.
- Ignoring Dead or Damaged Leaves
Neglecting to remove dead or damaged leaves can attract pests and diseases. Be proactive in trimming away any unhealthy parts to maintain the plant’s overall health.
- Cutting Too Close to the Base
When pruning, avoid cutting too close to the plant’s base or crown, as this can harm its core structure. Always leave enough stem to support new growth and maintain the plant’s integrity.

Conclusion
How to prune dusty miller plants is a straightforward process that plays a vital role in maintaining their health and appearance.
By avoiding common mistakes such as cutting too close to the base or neglecting damaged foliage, you can ensure the plant remains vibrant and thrives throughout the growing season. Regular and careful pruning not only encourages new growth but also helps prevent pests and diseases, keeping your dusty miller plants looking their best.
With these tips in mind, you can confidently care for your plants and enjoy their silvery, resilient beauty.