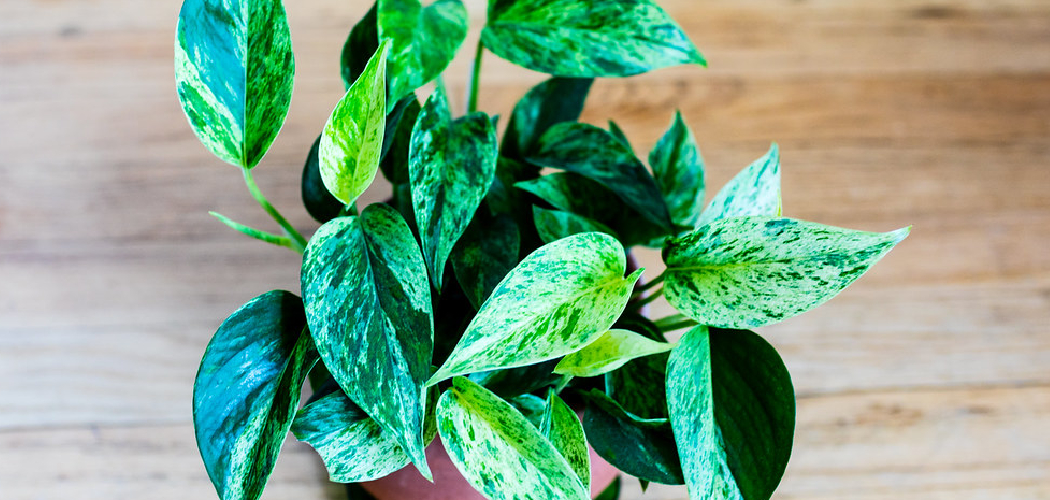
Propagating vining plants is a rewarding way to expand your greenery collection while saving money. These plants, known for their long, trailing growth, can easily be propagated through simple techniques that require minimal equipment and time. Whether you’re looking to share cuttings with friends or fill empty spaces in your home or garden, learning to propagate vining plants is a valuable skill for any plant enthusiast.

This guide on how to propagate vining plants will walk you through the essential steps to successfully propagate your favorite vining plants.
Understanding Vining Plant Growth
Vining plants are characterized by their ability to grow long stems that climb, trail, or sprawl depending on their environment and support. These plants use various methods to achieve their characteristic growth, such as twining stems, tendrils, or adventitious roots that cling to surfaces. Their natural growth habits make them versatile for both indoor and outdoor settings, as they can be trained along trellises, hung from baskets, or allowed to cascade gracefully from shelves.
Understanding how vining plants grow is crucial for successful propagation, as it helps identify where to take healthy cuttings and how to encourage roots to develop. By recognizing growth nodes and ensuring proper care, plant enthusiasts can help vining plants thrive and multiply.
Best Time to Propagate Vining Plants
The best time to propagate vining plants is during their active growing season, which typically occurs in spring and summer. During this period, plants have more energy to allocate towards producing new roots and shoots, increasing the success rate of propagation. Warmer temperatures and longer daylight hours encourage rapid growth, which makes it easier for cuttings to establish themselves in soil or water.
While propagation can be attempted year-round, avoiding the dormant months of fall and winter is recommended, as plants are generally less active and may struggle to develop. Proper timing, combined with optimal conditions such as adequate humidity and indirect sunlight, ensures that vining plants have the best chance to flourish.
Tools and Materials Needed
- Pruning Shears or a Sharp Knife
- Small Pots or Containers
- Potting Mix or Rooting Hormone (Optional)
- Clear Plastic Bag or Humidity Dome (Optional)
8 Steps on How to Propagate Vining Plants
Step 1: Select a Healthy Stem
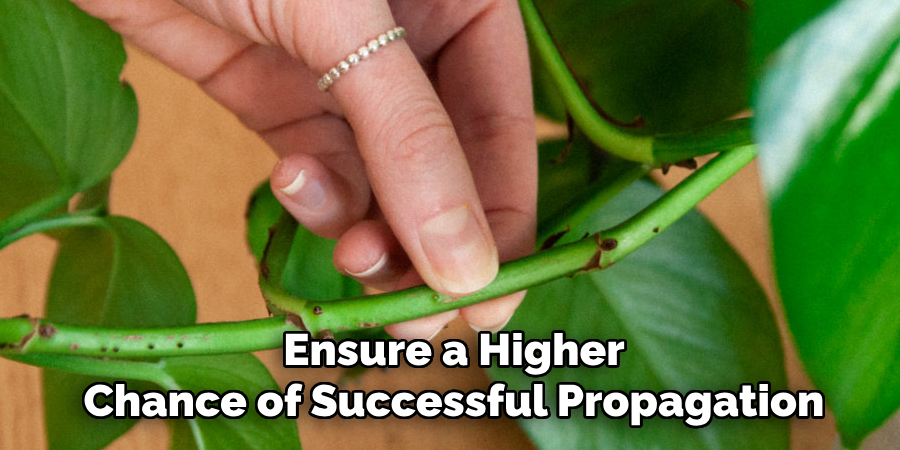
Start by identifying a strong and healthy stem on your vining plant. Look for a stem that is free of pests, diseases, or discoloration, as this will ensure a higher chance of successful propagation.
Ideally, the stem should have several leaves and at least one node—a small bump where leaves, roots, or shoots develop. Selecting a robust stem sets the foundation for the plant to grow and thrive during the propagation process.
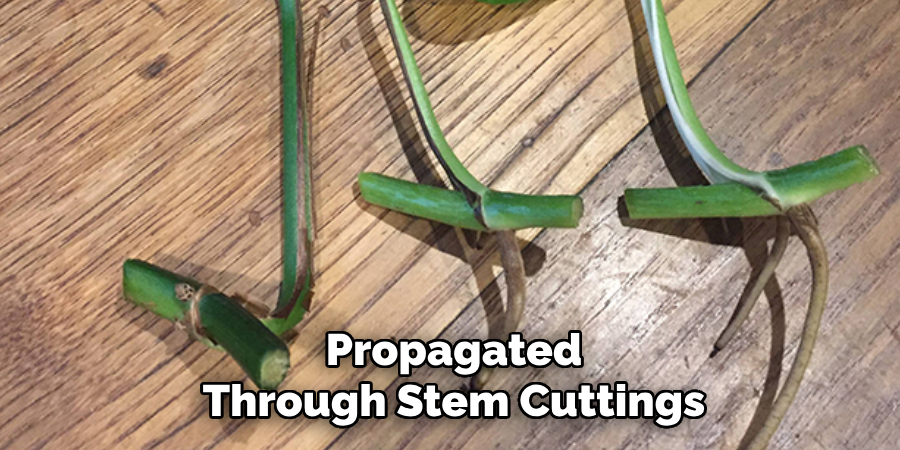
Step 2: Prepare the Cutting
Using a clean, sharp pair of scissors or pruning shears, carefully cut the stem just below a node. Aim for a cutting that is 4-6 inches long, with at least two to three leaves intact. Remove any leaves near the bottom of the cutting to expose the node, as this is where new roots will begin to grow.
Ensuring the cutting is properly prepared minimizes the risk of rot and gives your plant the best chance for successful propagation.
Step 3: Dip in Rooting Hormone (Optional)
For an extra boost to root development, consider dipping the bottom end of the cutting into rooting hormone. Rooting hormone can encourage faster and stronger root growth, increasing the chances of successful propagation.
Simply coat the exposed node and lower stem in the powder or gel, tapping off any excess to avoid clumping. While this step is optional, it can be particularly helpful for plants that are more challenging to propagate.
Step 4: Pot Up the Cutting
Once the cutting is prepared, it’s time to plant it in a suitable growing medium. Choose a small pot with drainage holes to prevent waterlogging, and fill it with a well-draining soil mix, such as a combination of potting soil, perlite, and peat moss. Create a small hole in the center of the soil using your finger or a pencil, and gently place the cutting into it, ensuring that the exposed node is buried beneath the soil.
Lightly press the soil around the base of the cutting to provide stability. After potting, water the cutting thoroughly, allowing excess water to drain out, and place the pot in a warm, bright spot with indirect light. This environment will encourage healthy root development and support the cutting as it begins to establish itself.
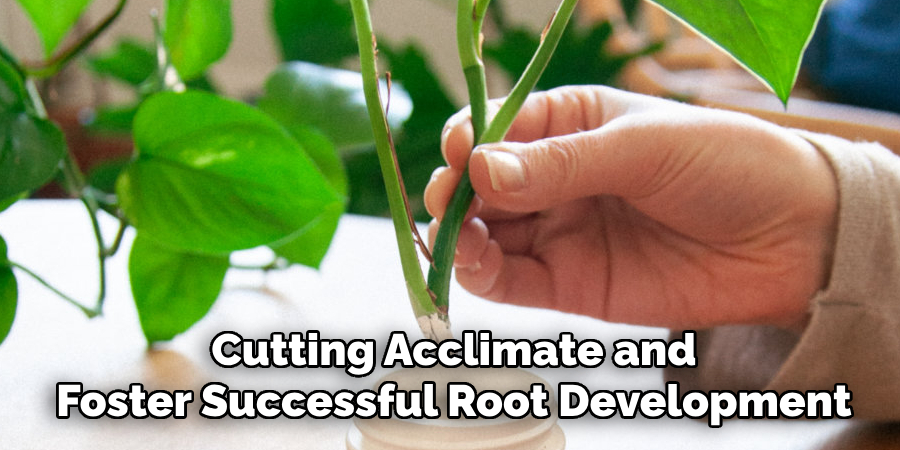
Step 5: Water and Place in a Warm, Bright Location
Once your cutting is securely planted, water it thoroughly to moisten the soil, ensuring that any excess water drains away to prevent waterlogging. Proper drainage is crucial to avoid root rot and encourage healthy growth.
After watering, position the pot in a warm location with bright, indirect light. Avoid direct sunlight, as it may be too harsh for the young cutting and could cause damage. Maintaining a consistent, warm environment will help the cutting acclimate and foster successful root development.
Step 6: Mist Daily and Keep Soil Moist
To help promote root growth, mist your cutting daily with a spray bottle filled with room temperature water. This will also help keep the leaves hydrated while they begin to develop roots.
Additionally, it’s important to keep the soil consistently moist but not waterlogged. Check the soil regularly and water as needed, making sure not to let it dry out completely.
Step 7: Be Patient and Monitor Progress
Rooting a plant cutting takes time and patience. It can take anywhere from a few weeks to several months for roots to fully develop. During this time, it’s important to monitor your cutting and make adjustments as needed.
If you notice any yellowing or wilting leaves, trim them off to allow the cutting to focus its energy on root growth.
Step 8: Potting Your Cutting into a Larger Container
Once your cutting has developed a healthy root system, it’s time to transfer it to a larger container. Choose a pot with adequate drainage holes to prevent waterlogging, and fill it with a quality potting mix suitable for your plant. Gently remove the cutting from its initial container, being careful not to damage the delicate roots.
Place the cutting in the new pot, adding soil around the roots and pressing lightly to secure it in place. Water the newly potted plant thoroughly and place it in an appropriate location based on the plant’s light and temperature requirements. This step will allow your plant to continue growing and thriving in its new environment.
Following these steps on how to propagate vining plants through stem cuttings will give you the opportunity to expand your plant collection and share them with others. It is also a great way to save money on purchasing new plants, as propagating can be done at little to no cost.
Troubleshooting Common Propagation Issues
While propagating vining plants is a relatively simple process, issues can occasionally arise. One common problem is stem cuttings failing to root. This issue may be caused by using unhealthy or overly mature cuttings, so always ensure you select vibrant, green stems for the best results. Additionally, insufficient moisture can hinder root development—maintain consistent humidity and keep the soil slightly damp but not overly wet.
Another issue could be rotting of the cuttings, which is often a result of overwatering or poor drainage. To avoid this, use well-draining soil and containers with drainage holes. If cuttings show signs of fungus or mold, improve air circulation and ensure the water you use is clean.
Lastly, slow or stunted growth might indicate insufficient light. Vining plants typically require bright, indirect light to establish roots effectively. Addressing these common challenges promptly can help ensure a higher success rate in your propagation endeavors.

Frequently Asked Questions
Q: Can I Propagate Any Type of Plant?
A: While many plants can be propagated, some may not respond well to certain methods or conditions. It’s best to research the specific needs and requirements of your desired plant before attempting propagation.
Q: How Long Does It Take for Cuttings to Root?
A: The time it takes for cuttings to root can vary depending on the type of plant and environmental factors. On average, it can take anywhere from 2 to 6 weeks for roots to form.
Q: Do I Need Special Equipment or Tools for Propagation?
A: In most cases, you won’t need any special equipment or tools for propagation. However, having sharp scissors or pruning shears, a clean pot or container, and some rooting hormone (optional) can make the process easier.
It’s also recommended to have a well-draining potting mix specifically designed for propagation, as well as access to water and a warm, well-lit space for your cuttings to thrive.
Q: Can I Propagate Any Plant?
A: While many plants can be propagated through stem cuttings, not all plants are suitable for this method. Some may require specialized techniques such as air layering or division. It’s important to research and understand the specific needs of your plant before attempting any propagation methods.
Conclusion
Propagating plants can be a rewarding and cost-effective way to expand your garden while learning more about the growth habits of different species. By understanding the specific requirements for successful propagation and equipping yourself with the right tools and knowledge, you can improve your chances of success.
Whether you’re propagating your favorite houseplants or experimenting with new varieties, the process offers a unique opportunity to connect with nature and cultivate a thriving green space. Thanks for reading this article on how to propagate vining plants.