Violets are charming and versatile flowers that can brighten up any garden or indoor space. Known for their vibrant purple hues and delicate appearance, they are a favorite among gardeners and plant enthusiasts. Growing violets is relatively simple and rewarding, making them an excellent choice for beginners and experienced gardeners alike.

With the right care and attention, these blooms can thrive and add a touch of elegance to your surroundings. In this article on how to grow violet, we will discuss everything you need to know about these lovely flowers, from their origin and types to the best growing conditions and care tips.
Origin and Types of Violets
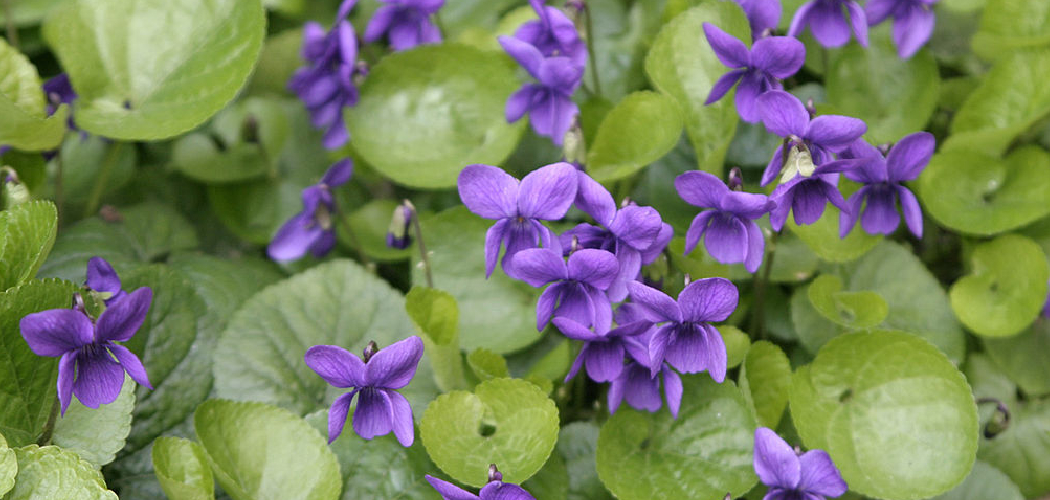
Violets (Viola) have a long history dating back to ancient Greece, where they were considered symbols of love and fertility. They are native to Europe, Asia, and North Africa but have been naturalized in many parts of the world.
There are over 500 species of violets with various colors ranging from purple to blue, white, yellow, and even bicolored blooms. The most common type is Viola odorata or sweet violet, known for its fragrant scent. Some other popular types include Viola tricolor (known as Johnny-jump-up), Viola hederacea (Australian native violet), and Viola sororia (a North American woodland violet).
Choosing the Right Location
Selecting the ideal location is essential for ensuring violets thrive in your garden. Violets generally prefer partially shaded areas, as too much direct sunlight can scorch their delicate leaves and flowers. However, some species, like Viola tricolor, can tolerate full sun if the soil remains consistently moist. It is important to choose a spot with well-drained, nutrient-rich soil to support healthy growth.
Avoid planting violets in areas where water tends to accumulate, as overly wet conditions can lead to root rot. By providing a balanced environment with adequate sunlight, shade, and proper soil conditions, you can create the perfect habitat for these charming and versatile flowers.
Needed Materials:
To successfully grow violets, you will need the following materials:
Potting Soil:
Violets thrive in well-drained, nutrient-rich potting soil. You can either purchase pre-made potting soil specifically for violets or create your own mix using equal parts of peat moss, vermiculite, and perlite. Avoid using garden soil, which can contain pests and diseases that could harm your violets.

Pots or Containers:
Choose pots or containers with good drainage holes. Violets prefer smaller containers, so a pot that is 3-4 inches wide should be sufficient for one plant. You can also use terracotta pots, which allow for better air circulation and help prevent the soil from becoming waterlogged.
Watering Can:
A watering can with a long spout can help you water your violets without getting the leaves wet. Try to water at the base of the plant to avoid causing damage to the delicate leaves.
Fertilizer:
To encourage healthy growth and blooming, it is recommended to fertilize your violets every 2-3 weeks during the growing season. Use a balanced fertilizer specifically designed for violets or a general houseplant fertilizer diluted to half strength.
Light Requirements:
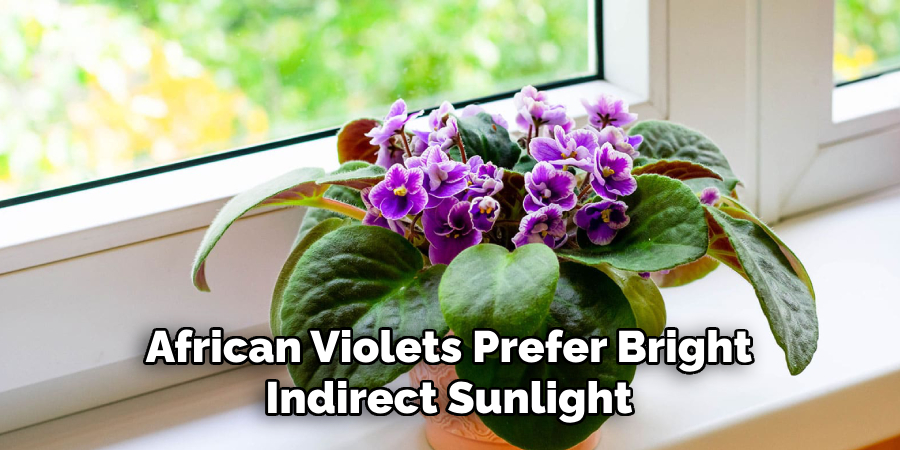
Violets prefer bright, indirect light but can also thrive in low-light conditions. Avoid placing them in direct sunlight as it can cause their leaves to burn.
Temperature:
Violets thrive in temperatures between 65-75 degrees Fahrenheit (18-24 degrees Celsius). They are sensitive to extreme temperature changes, so avoid placing them near drafty areas or heating/cooling vents.
Pruning:
To keep your violets looking healthy and well-shaped, you may need to prune them occasionally. Remove any dead or dying leaves, as well as spent flowers. You can also trim back leggy stems to encourage new growth.
Repotting:
Violets should be repotted every 6-12 months, depending on their size and rate of growth. Use a pot that is only slightly larger than the current one and use a well-draining potting mix specifically designed for African violets. Gently loosen the roots and remove any dead or unhealthy ones before transferring to the new pot. Water thoroughly after repotting.
Propagation:
African violets can be easily propagated from leaf cuttings. Take a healthy, mature leaf and trim off the stem at an angle. Place the stem in a small container of water, making sure that the bottom of the leaf is submerged but the top remains dry. Roots should begin to form within a few weeks. Once they are well established, transplant them into soil.
9 Step-by-Step Guides on How to Grow Violet:
Step 1: Choose a Healthy Plant
Begin by selecting a healthy African violet as your starting point. Look for a plant with vibrant, evenly colored leaves and no signs of damage, pests, or disease. A strong, healthy plant will serve as the foundation for successful growth and propagation.
Avoid plants with yellowing, wilting, or spotted leaves, as these may indicate underlying health issues that could hinder development.
Step 2: Select the Right Container
Choose a container that provides adequate drainage to prevent water from pooling around the roots, which can lead to root rot. African violets thrive in small pots, as their roots prefer to be slightly confined.
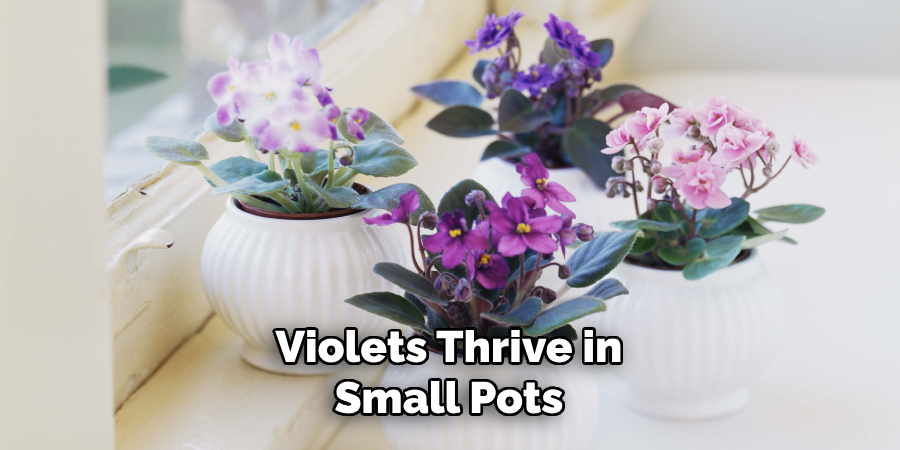
Opt for a pot that is 2 to 4 inches in diameter, depending on the size of your plant. Ensure the container has drainage holes at the bottom, and consider using a plastic or glazed ceramic pot to retain the right amount of moisture.
Step 3: Prepare Potting Soil
African violets require soil that is light, well-draining, and aerated to support healthy growth. Regular garden soil is too dense and may hold too much moisture, which can harm the plant. Instead, use a specialized potting mix designed for African violets or create your own mix by combining equal parts of peat moss, vermiculite, and perlite.
This ensures the soil retains enough moisture while allowing excess water to drain properly. Before planting, moisten the potting mix slightly so it is damp but not waterlogged, providing an ideal environment for the roots to establish.
Step 4: Transplant the Plant
Gently remove the African violet from its current container and loosen the roots by lightly brushing them with your fingers.
Place the plant in the new pot, making sure the crown of the plant sits slightly above the soil level to prevent stem rot. Fill in any gaps with additional potting soil mix and gently pat down.
Step 5: Water and Fertilize
After transplanting, water the African violet thoroughly, ensuring the soil is evenly moist but not soggy. Avoid getting water on the leaves, as this can cause spotting or damage. Use room-temperature water for the best results.
Once the plant has settled, apply a diluted, balanced fertilizer specifically designed for African violets to encourage healthy growth and blooming. Repeat fertilization every few weeks as part of regular care.
Step 6: Provide Adequate Lighting
African violets thrive in bright, indirect light. Place the plant near a window with filtered sunlight, such as through a sheer curtain, to prevent the leaves from scorching. If natural light is insufficient, consider using artificial grow lights for 12–16 hours per day to ensure optimal growth.
Rotate the plant occasionally so it receives light evenly from all sides, promoting symmetrical growth and blooming. Avoid exposing the plant to direct, harsh sunlight, as this can cause leaf damage.
Step 7: Monitor for Pests and Diseases
Like any plant, African violets can be susceptible to pests and diseases. Common pests include aphids, mealybugs, and spider mites.

Keep an eye out for any signs of infestation such as sticky residue on leaves or webbing between stems and leaves. If pests are present, treat with an organic insecticidal soap or neem oil spray.
Step 8: Prune and Propagate
To keep your African violets looking neat and tidy, prune off any dead or damaged leaves and flowers. You can also propagate new plants by taking stem cuttings from healthy, mature plants.
Simply cut a few inches of stem with at least 2-3 leaves attached and place in moist potting soil. Keep the soil consistently moist until roots begin to develop.
Step 9: Enjoy Your Beautiful Blooms
With proper care, African violets can bloom year-round, providing you with stunning flowers in a variety of colors. As they are compact plants, they make great additions to windowsills or small spaces in your home. With their delicate beauty and ease of care, African violets are a popular choice for both beginner and experienced gardeners.
Following these steps on how to grow violet plants will ensure that your African violets thrive and continue to bloom for years to come. Remember to provide adequate sunlight, water, and fertilizer, and to maintain a consistent temperature and humidity level.
Frequently Asked Questions:
Q1: How Often Should I Water My African Violets?
A: African violets should be watered regularly, typically once a week. However, the frequency may vary depending on factors such as temperature and humidity levels. It is important to keep the soil evenly moist but not too wet.
Q2: Can I Grow African Violets in Low Light Conditions?
A: While African violets prefer bright indirect sunlight, they can still thrive in low light conditions. Just make sure to provide them with at least 6 hours of filtered or indirect light per day.
Conclusion
African violets are beautiful and versatile plants that can thrive with the right care and attention. By providing them with proper watering, adequate lighting, and a bit of routine maintenance, these charming flowers can brighten up any indoor space.
Whether you are a seasoned plant enthusiast or a beginner, African violets offer a rewarding and enjoyable experience for all. Thanks for reading this article on how to grow violet.