
Planting canna bulbs is an excellent way to add vibrant color and lush greenery to your garden. These tropical plants are known for their striking flowers and large, dramatic foliage, making them a favorite among gardeners.
Cannas are relatively low-maintenance and thrive in warm climates, making them a great choice for beginners and experienced gardeners alike. This guide will walk you through how to plant canna bulbs effectively and with minimal effort.
When to Plant Canna Bulbs
The best time to plant canna bulbs is in the late spring or early summer, after the last frost has passed and the soil has warmed up.
Cannas thrive in warm conditions, so planting them too early, when the ground is still cold, can hinder their growth and development. If you live in a cooler region, you may want to start the bulbs indoors in pots and then transplant them outside once the weather is consistently warm. Keep an eye on your local climate and aim for soil temperatures of at least 60°F for optimal results.
Preparing the Soil for Planting
Proper soil preparation is key to ensuring healthy and vibrant canna plants. Start by selecting a location that receives full sun, as cannas thrive with plenty of light. The soil should be well-draining yet capable of retaining enough moisture to support the plants. Loosen the soil to a depth of at least 12 inches and mix in plenty of organic matter, such as compost or well-rotted manure, to enrich the soil and improve its structure.
Aim for a slightly acidic to neutral pH level, typically between 6.0 and 7.0, to provide the ideal environment for cannas to thrive. Remove any weeds, rocks, or debris from the planting area to prevent competition and give the bulbs a clean space to grow. Proper soil preparation lays the foundation for robust growth and stunning blooms.
10 Methods How to Plant Canna Bulbs
1. Choose the Right Location
Selecting the ideal planting spot is the first critical step. Cannas thrive best in full sun, requiring at least six hours of direct sunlight daily. A sunny location ensures vigorous growth and prolific flowering. Additionally, they prefer well-draining soil that is rich in organic matter. Avoid low-lying areas where water may collect and cause bulb rot.
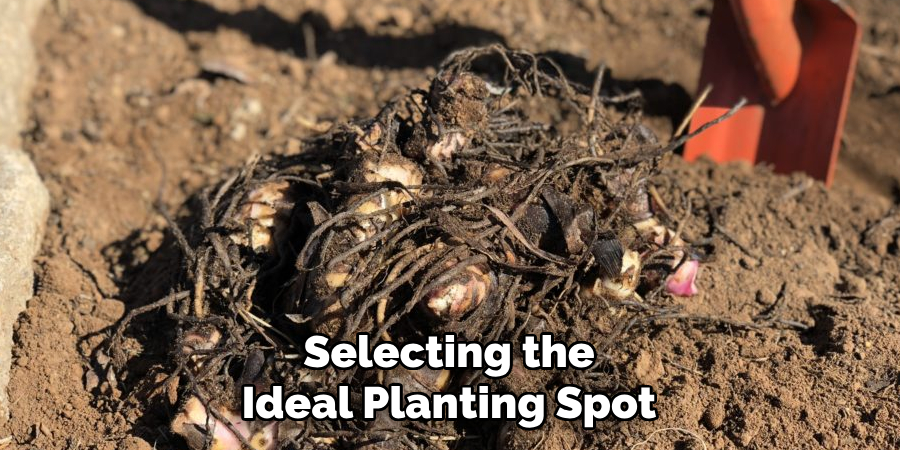
If your garden soil is heavy clay or sandy, amend it with compost or well-rotted manure to improve texture and fertility, giving your canna bulbs the best start possible.
2. Prepare the Soil Thoroughly
Before planting, prepare the soil by loosening it to a depth of about 12 inches. This allows the roots to spread easily and access nutrients. Use a garden fork or tiller to break up compacted soil and remove stones, weeds, or debris. Incorporate organic matter such as compost, leaf mold, or aged manure into the soil to boost nutrient content and drainage.
The pH should ideally be neutral to slightly acidic (around 6.0 to 6.5). Good soil preparation helps the canna bulbs establish quickly and grow robustly.
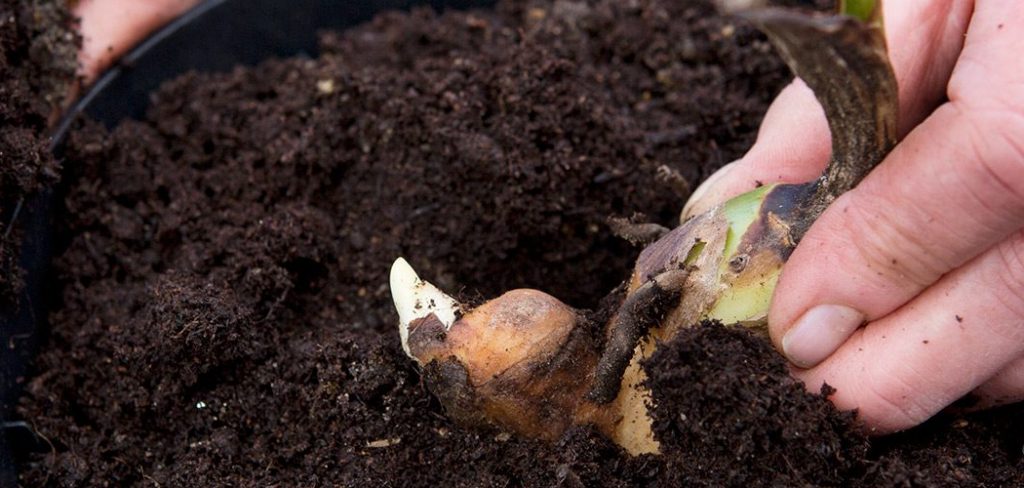
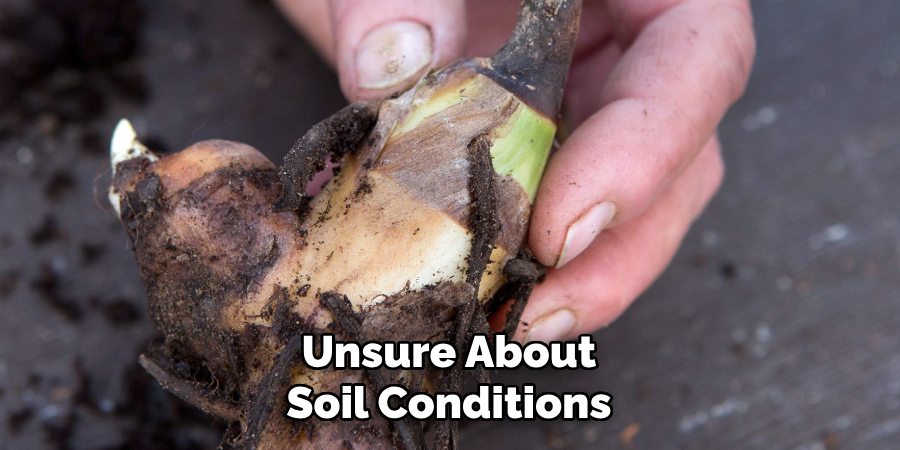
3. Inspect and Soak the Bulbs
Before planting, inspect your canna bulbs for any signs of disease, mold, or damage. Healthy rhizomes are firm and plump with visible “eyes” or growth points. If you purchase dry bulbs, soaking them in lukewarm water for about 30 minutes to an hour can help rehydrate them and jumpstart growth. Soaking also softens the outer skin, making it easier for roots to emerge once planted. This step is especially useful if bulbs appear a bit shriveled or dry.
4. Plant at the Proper Depth
Planting depth is crucial for canna success. Dig holes approximately 4 to 6 inches deep, depending on the size of the bulb. Place the bulb horizontally with the eyes or growth points facing upward, as this encourages vertical shoot development. Cover the bulb with soil, gently firming it down to eliminate air pockets. Planting too shallow can expose the bulbs to drying out, while too deep may delay sprouting. Maintaining the correct depth balances protection and growth.
5. Space the Bulbs Correctly
Proper spacing ensures that each canna plant has enough room to grow and develop without overcrowding. Typically, space the bulbs about 12 to 18 inches apart, depending on the variety’s mature size. Smaller cultivars can be spaced closer, while larger types need more room. Overcrowding can reduce airflow, increase disease risk, and result in smaller flowers. By giving each bulb adequate space, you foster healthier plants and a more impressive floral display.
6. Water Immediately After Planting
After placing the bulbs and covering them with soil, water the planting area thoroughly. Moist soil helps settle the soil around the bulbs and kickstarts root development. Consistent moisture is essential during the early growth stages but avoid waterlogging, which can cause rot. If the weather is dry after planting, continue watering regularly to keep the soil evenly moist.
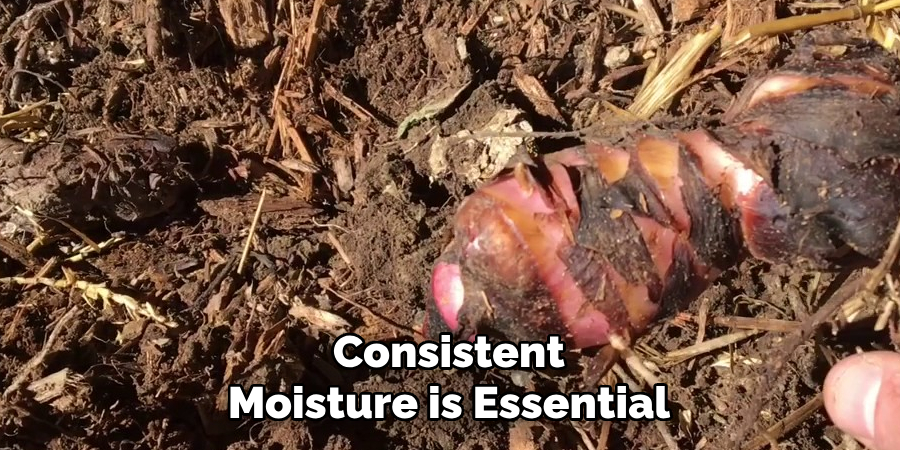
Once established, cannas are somewhat drought tolerant but flourish with consistent moisture.
7. Apply Mulch to Retain Moisture
Adding a layer of mulch around the newly planted bulbs conserves soil moisture, moderates temperature fluctuations, and suppresses weeds. Use organic mulches like shredded bark, straw, or leaf mold, applying a 2 to 3-inch layer without covering the bulb crown directly. Mulching helps maintain a stable root environment and reduces stress during hot or dry spells. Refresh the mulch layer as needed during the growing season to maintain its benefits.
8. Fertilize Appropriately
Cannas are heavy feeders, so regular fertilization is important for vibrant growth and flowers. At planting time, mix a balanced slow-release fertilizer into the soil or side-dress with compost. During the growing season, feed the plants every 4 to 6 weeks with a balanced liquid fertilizer or one higher in phosphorus to encourage blooms.
Avoid excessive nitrogen fertilizers as they promote leaf growth at the expense of flowers. Proper fertilization ensures lush foliage and prolific flowering.
9. Protect from Pests and Diseases
Although cannas are generally resilient, they can fall prey to pests like Japanese beetles, aphids, and caterpillars, as well as fungal diseases such as rust and leaf spot. Regularly inspect plants for signs of damage or disease. Handpick pests or use insecticidal soap or neem oil if infestations occur. Good air circulation, proper spacing, and avoiding overhead watering reduce fungal risks. Keeping your plants healthy through good cultural practices minimizes pest and disease issues.
10. Monitor and Support Growth
Once planted, monitor the bulbs as shoots emerge. Young shoots are delicate and may benefit from light support if your variety grows tall. Stake tall canna varieties to prevent wind damage or lodging. Remove any damaged or yellowing leaves promptly to maintain plant health and appearance.
As the season progresses, keep watering, fertilizing, and watching for pests or diseases. Healthy, well-maintained plants will reward you with abundant, stunning blooms.
Things to Consider When Planting Cannas
When planting cannas, choosing the right location is crucial. These tropical plants thrive in areas with full sun, requiring at least 6 to 8 hours of sunlight each day for optimal growth and flowering. Additionally, ensure the soil is well-draining yet retains some moisture, as cannas prefer consistently damp conditions but cannot tolerate waterlogging. Be mindful of spacing—leaving around 12 to 18 inches between each bulb allows enough room for their expansive foliage and root systems.
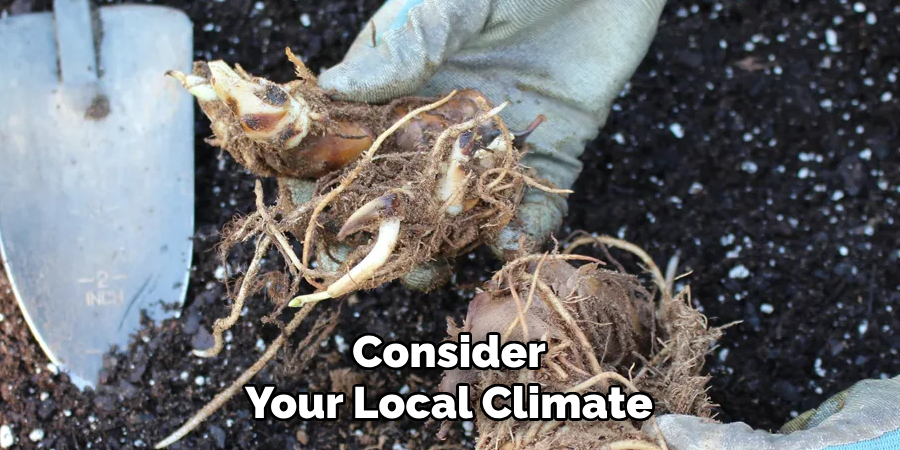
Finally, consider your local climate and the timing of planting; cannas should be planted after the last frost to prevent cold damage, as they are sensitive to freezing temperatures. Taking these factors into account will set the foundation for healthy plants and vibrant blooms.
Common Mistakes to Avoid
When planting and caring for cannas, there are a few common mistakes that gardeners should be cautious of. Overwatering is a frequent issue; while cannas thrive in moist soil, excessive watering can lead to root rot and other fungal problems. Neglecting to provide proper spacing is another pitfall, as overcrowding can limit air circulation and increase the risk of disease.
Additionally, planting too early in the season, before the danger of frost has passed, can damage the bulbs and stunt growth. Failing to deadhead spent blooms or remove faded foliage may also diminish the plant’s overall appearance and vitality. Avoiding these mistakes will help ensure your cannas grow healthy and produce stunning, vibrant flowers.
When to Contact a Professional
While growing cannas can often be a straightforward and rewarding process, there are times when reaching out to a professional can make all the difference. If your cannas show signs of persistent disease or pest infestations that cannot be resolved with standard treatments, a horticulturist or garden specialist can provide tailored solutions.
Additionally, if you are unsure about soil conditions, watering schedules, or the overall health of your plants, expert advice can help diagnose and address any underlying issues. For larger landscaping projects that involve cannas, professional landscapers can assist with design, installation, and maintenance to ensure your garden looks its best. Seeking professional help when needed can save time, prevent mistakes, and ensure your cannas thrive for seasons to come.
Conclusion
Planting canna bulbs properly is the foundation for a flourishing, colorful garden display. From site selection and soil preparation to watering, fertilizing, and pest control, each step plays a vital role in supporting healthy growth. Thanks for reading, and we hope this has given you some inspiration on how to plant canna bulbs!