Rooting eucalyptus cuttings is a rewarding way to propagate these versatile and aromatic trees. Known for their fragrant leaves and rapid growth, eucalyptus plants are a popular choice for gardens and landscapes. Propagation through cuttings allows gardeners to clone a parent plant, ensuring the new trees retain the same desirable traits.

This method is more efficient than growing from seeds and can result in a higher success rate with proper techniques and care. In this article on how to root eucalyptus cuttings, we will discuss the steps and tips for successful propagation.
Best Time to Take Eucalyptus Cuttings
The best time to take eucalyptus cuttings is during the warmer months of late spring to early summer. During this period, the plants experience active growth, which increases the likelihood of successful rooting. Avoid taking cuttings during winter or late fall, as the plant’s growth slows down, and the cuttings are less likely to establish roots.
Early morning is typically the ideal time of day to harvest cuttings, as the stems are well-hydrated and less stressed by the day’s heat. Selecting the right time ensures the cuttings are healthy and better prepared for propagation.
Selecting the Right Type of Cuttings
Choosing the appropriate type of cuttings is essential for successful propagation. There are generally four types of cuttings to consider—softwood, semi-hardwood, hardwood, and herbaceous. Softwood cuttings are taken from new, flexible growth and are ideal for shrubs and some trees during spring or early summer.
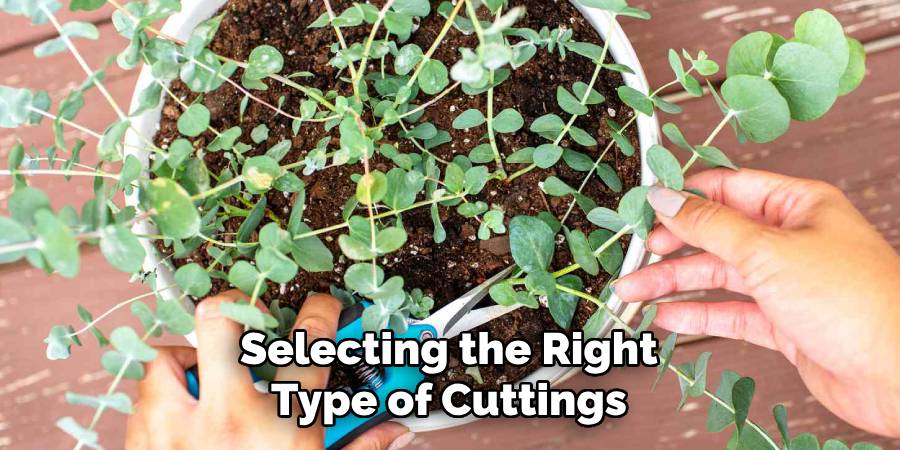
Semi-hardwood cuttings, on the other hand, are slightly more mature and are taken from partially hardened stems, often in late summer or early fall. Hardwood cuttings come from fully matured, dormant stems typically harvested during winter months and work well for deciduous plants. Lastly, herbaceous cuttings are from non-woody plants, like perennials, and can often be taken year-round. Knowing your plant’s growth stage and species helps determine which type of cutting will yield the best results.
Tools and Materials Needed
- Clean, Sharp Pruning Shears
- Rooting Hormone (Gel or Powder Recommended)
- Small Pots or Trays With Drainage Holes
- Well-draining Propagation Mix (Peat Moss, Perlite, or Coarse Sand Mix)
- Clear Plastic Bags, Humidity Dome, or Mini Greenhouse Setup
- Spray Bottle for Misting
11 Steps on How to Root Eucalyptus Cuttings
Step 1: Select the Right Stem to Propagate
Choose a healthy eucalyptus plant with vigorous growth and no signs of disease or pest damage. Look for semi-hardwood stems, which are neither too young and soft nor fully mature and woody; these are typically the most viable for propagation.

Ideally, select a stem that is about 6 to 10 inches long, with a few sets of leaves to ensure sufficient energy reserves for rooting. Make sure the stem is taken from a part of the plant receiving adequate sunlight, as this indicates good overall health and vigor.
Step 2: Prepare Your Tools and Materials
Before beginning the propagation process, it’s essential to gather and prepare the necessary tools and materials to ensure success. You will need a sharp, sterilized pair of pruning shears or scissors to make clean cuts, minimizing the risk of damaging the plant or introducing infections.
Additionally, prepare a container filled with moist, well-draining potting mix or a propagation medium such as perlite or vermiculite. Have rooting hormone on hand, as this can enhance the chances of successful root development. Finally, ensure access to a clear plastic bag or a propagator to create a humid environment, which promotes healthy rooting. Having all these tools and materials ready will streamline the process and set the stage for effective propagation.
Step 3: Cut the Stem
Using a clean, sterilized pair of pruning shears or a sharp knife, make a precise cut on the plant stem to prepare it for propagation. Choose a healthy stem with several nodes, as these are key points where roots or new growth will develop. Make the cut just below a node, at a 45-degree angle, to maximize surface area for rooting.
Ensure the cutting is 4-6 inches long and remove any leaves from the lower portion, leaving only a few at the top. Properly cutting the stem increases the chances of successful rooting and healthy plant development.
Step 4: Remove Lower Leaves
Carefully remove the leaves from the lower part of the cutting, ensuring that at least two to three inches of the stem are bare. This is important because any leaves left on the portion of the stem that will be submerged in water or planted in soil may rot, leading to potential failure of propagation.

Use clean and sharp scissors or pruners to avoid damage to the stem, and be cautious not to bruise or tear the remaining leaves. Leaving only a few leaves at the top ensures the cutting can focus its energy on developing roots.
Step 5: Apply Rooting Hormone
To support successful root development, dip the lower end of the cutting into a rooting hormone powder or gel. Rooting hormone helps accelerate root growth and increases the chances of successful propagation, especially for plants that are more challenging to root.
Ensure the cut end is evenly coated by gently tapping off any excess hormone before proceeding. This step is optional for some plants, as certain species root readily without additional assistance, but it can be particularly helpful for promoting robust growth.
Step 6: Plant in Propagation Mix
Prepare a well-draining propagation mix, such as a combination of perlite, sand, or a light potting mix, to provide the ideal environment for root development. Create a hole in the mix using a pencil or your finger, ensuring it’s large enough to accommodate the cutting without damaging the coating of rooting hormone (if applied).
Gently insert the cutting into the hole and press the surrounding mix lightly to secure it in place. Keep the soil moist but not waterlogged, as excess moisture may lead to rotting. Position the container in a warm, bright area with indirect light to encourage healthy root growth.
Step 7: Water and Cover
After planting the cutting, give it a gentle watering to ensure the soil is evenly moist, but avoid overwatering, as this can lead to waterlogging. Once watered, cover the container with a clear plastic bag or a propagation dome to maintain high humidity levels, which are essential for successful rooting.
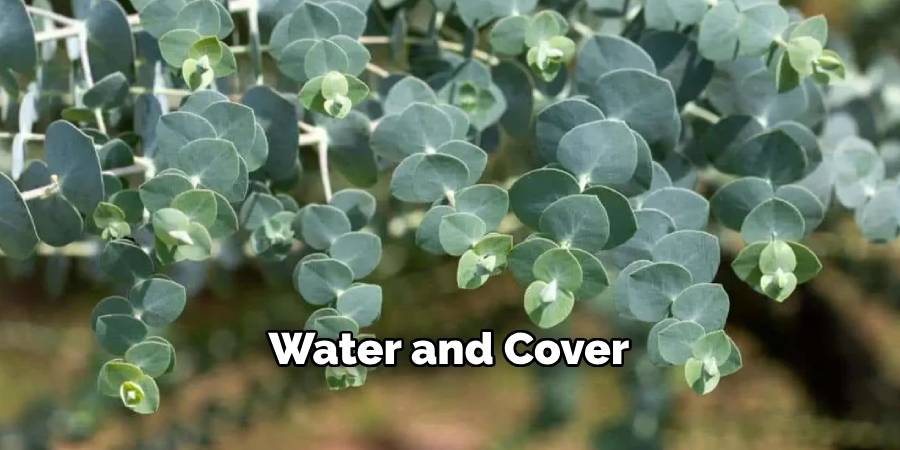
Ensure that the covering does not touch the cutting by propping it up with supports if necessary. Leave a small opening for air circulation to prevent mold growth. Place the covered container back in its warm, bright location and regularly check for moisture levels, adjusting as needed.
Step 8: Provide Indirect Light
Position the container in a location where it can receive plenty of bright, indirect light. Direct sunlight can overheat the container or dry out the cutting, which may hinder the rooting process. A well-lit windowsill with filtered light or a spot under a grow light can work effectively.
Ensure that the cutting is not exposed to prolonged periods of direct sun, as this could cause stress or damage to the tender new growth. Monitor the light conditions regularly to maintain an optimal environment for healthy development.
Step 9: Monitor and Care for Cuttings
Consistent monitoring is crucial to ensure the successful growth of your cuttings. Check the soil or medium regularly to maintain appropriate moisture levels, as overwatering can lead to rot, while underwatering may dry out the cutting. If the container has a cover or plastic bag to retain humidity, ensure it doesn’t trap excessive moisture, which can encourage mold or mildew.
Look for signs of new growth, such as the emergence of small leaves or roots, as these indicate the cutting is thriving. Remove any dead or decaying plant material promptly to prevent it from affecting the healthy parts of the cutting. Providing gentle care during this stage will help establish strong, healthy plants.
Step 10: Transplant Rooted Cuttings
Once your cuttings have developed a healthy root system, it is time to transplant them into individual pots or their final growing location. Select a well-draining potting mix suitable for the plant species and choose a container with adequate drainage holes. Gently remove the cutting from its rooting container, being careful not to damage the delicate roots.
Place it into the prepared potting mix, ensuring the root system is fully covered and the plant is positioned upright. Water the newly transplanted cutting lightly to help settle the soil around the roots. Gradually acclimate the plant to its new environment, increasing its exposure to light and outdoor conditions if necessary. This careful transition will give your plant the best start in its new home.
Step 11: Harden off and acclimate new plants
Before fully planting your propagated plants outside, they will need to be hardened off and acclimated to their new environment. This involves gradually introducing the plants to outdoor conditions over the course of a week or two. Start with just a few hours of outdoor exposure and gradually increase the time each day until they are ready for permanent placement in the ground.
Following these steps on how to root eucalyptus cuttings can help you successfully propagate and grow your own eucalyptus plants. With a little patience and care, you can enjoy the beautiful aroma and benefits of these versatile trees in your own garden.
Frequently Asked Questions
Q1: How Long Does It Take for Eucalyptus Cuttings to Root?
A1: It can take anywhere from 4-8 weeks for eucalyptus cuttings to root, depending on the variety and environmental conditions.
Q2: Can I Use Rooting Hormone on My Eucalyptus Cuttings?
A2: Yes, using a high-quality rooting hormone can help promote faster and stronger root growth in your eucalyptus cuttings.
Conclusion
Growing eucalyptus trees from cuttings is a rewarding process that allows you to cultivate these fragrant and useful plants with ease. By following proper techniques on how to root eucalyptus cuttings and providing the ideal conditions, you can successfully propagate and enjoy the benefits of eucalyptus in your garden.
With patience and care, your efforts will result in thriving trees that enhance both the beauty and functionality of your outdoor space.