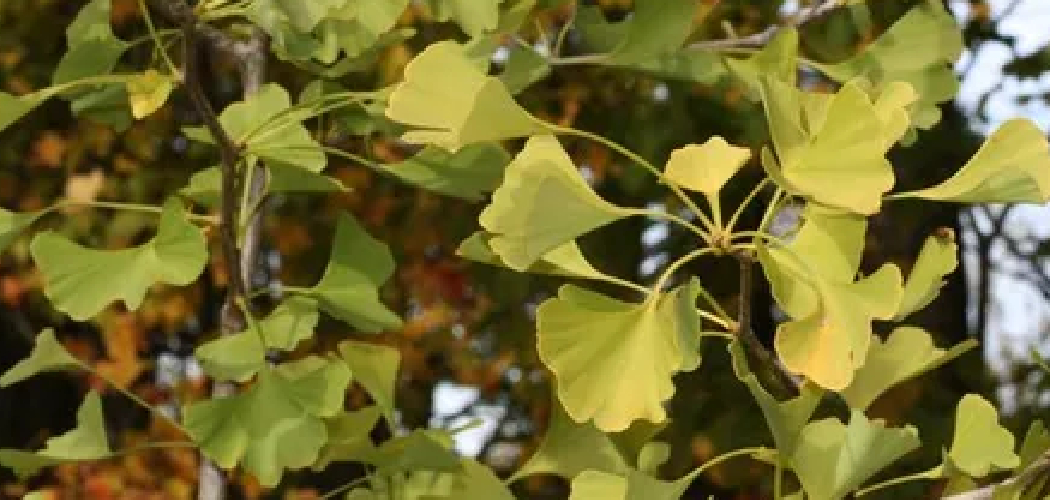
Ginkgo biloba, often referred to as a “living fossil,” is a resilient and distinct tree known for its fan-shaped leaves and numerous health benefits. Propagating ginkgo biloba from cuttings is an effective way to grow these beautiful trees, allowing gardeners to preserve their unique characteristics.
This method is both economical and rewarding, making it an excellent choice for enthusiasts interested in adding this ancient species to their gardens. With the right techniques and care, you can successfully cultivate ginkgo biloba from cuttings and enjoy its beauty for years to come.
In this article on how to grow ginkgo biloba from cuttings, we will discuss the necessary steps and tips for successful propagation.
Understanding Ginkgo Biloba Propagation
Ginkgo biloba propagation requires patience and attention to detail as this ancient tree species has specific needs for successful growth. The process typically involves taking semi-hardwood cuttings during the growing season, as this is when the branches are flexible yet mature enough to support new root development.
Propagation begins with selecting healthy parent trees free from disease or stress, ensuring the cuttings have the best chance of survival. The environmental conditions, such as temperature, humidity, and light, also play a crucial role in fostering root formation. By carefully controlling these factors and taking the time to understand the unique characteristics of this species, you can improve the likelihood of achieving a thriving ginkgo biloba plant.
Selecting the Right Cutting Material
Choosing the appropriate cutting material is essential for the successful propagation of ginkgo biloba. The ideal cuttings are typically semi-hardwood, taken from branches that are neither too young nor fully mature. These cuttings should be about 4 to 6 inches in length, with at least two or three healthy leaf nodes.
Make sure to use a clean, sharp tool to make the cut at a slight angle just below a node, as this maximizes the surface area for root development. Additionally, inspect the chosen material for any signs of disease, pests, or damage, as these can severely hinder the propagation process. By dedicating attention to the selection process, you’ll lay the groundwork for a successful and healthy new plant.
Tools and Materials Needed
- Sharp, Sterilized Pruning Shears or Scissors
- Rooting Hormone (Optional but Improves Success Rates)
- Small Pots or Trays With Well-draining Soil or Rooting Medium
- Plastic Bags, Humidity Dome, or Propagator
- Spray Bottle for Misting
7 Step-by-Step Guidelines on How to Grow Ginkgo Biloba From Cuttings
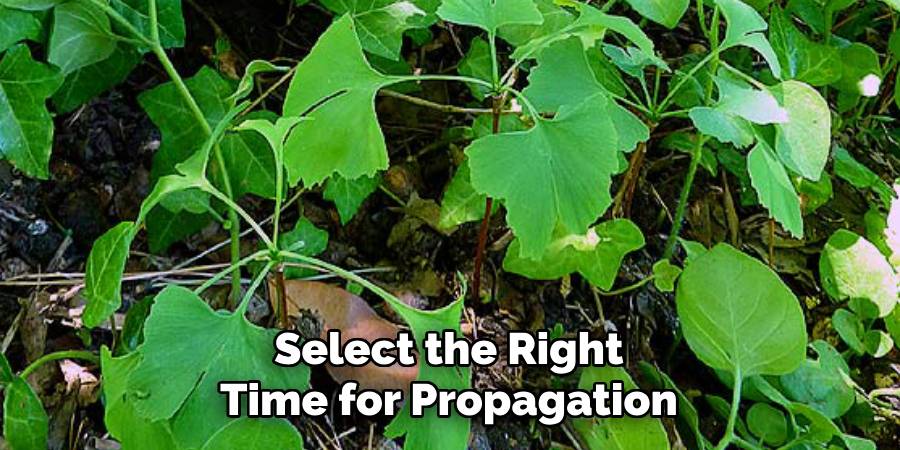
Step 1: Select the Right Time for Propagation
The best time to take cuttings from a Ginkgo biloba tree is during its active growing season, typically in late spring to early summer. During this period, the semi-hardwood stems are at the ideal stage for rooting—firm enough to hold their shape but still flexible and capable of absorbing moisture.
It’s essential to avoid overly mature or fully hardened stems, as they are less likely to root successfully. Early morning is the optimal time of day to collect cuttings, as the plant tissues are well-hydrated and less stressed from heat.
Step 2: Choose Healthy Stems for Cuttings
When selecting stems for cuttings, prioritize healthy, disease-free branches to ensure the best chance of successful propagation. Look for stems that are free from discoloration, pests, or damage, as these issues can hinder the rooting process.
Select semi-hardwood stems that are approximately 4 to 6 inches long and feature at least two to three sets of healthy leaves. Choosing vigorous stems from a strong, healthy parent plant can significantly enhance the likelihood of rooting and promote robust growth in the new plants.
Step 3: Prepare Your Tools and Materials
Before beginning the propagation process, gather all the necessary tools and materials to ensure a smooth and efficient workflow. Essential items include a clean, sharp pair of pruning shears or scissors for cutting the stems, as well as a sterile knife if trimming is required. Prepare a container filled with fresh, well-draining potting mix to plant the cuttings.
You may also need rooting hormone powder or gel to encourage root development. Additionally, ensure you have clean water for hydrating the cuttings and a plastic bag or humidity dome to maintain adequate moisture levels during the rooting stage. Having all tools and materials ready in advance will help streamline the propagation process and prevent unnecessary delays.
Step 4: Take Cuttings
Select healthy, disease-free stems from the parent plant for your cuttings. Using the sterilized knife or pruning shears, cut just below a node, ensuring each cutting is about 4-6 inches long and contains at least 2-3 leaf nodes.
Remove any flowers or buds to redirect energy toward root development. If the plant has large leaves, trim them to reduce water loss through transpiration. Once the cuttings are prepared, you can dip the cut ends in rooting hormone to promote quicker root growth. Handle the cuttings gently to avoid damage and keep them hydrated as you prepare for planting.
Step 5: Optional: Dip in Rooting Hormone
Dipping the cut end of the prepared stem in rooting hormone can significantly enhance the chances of successful root growth. Rooting hormone, available in powder, liquid, or gel form, contains nutrients and plant hormones that stimulate root development.

Simply dip the cut end in water first to help the hormone adhere, then lightly coat it with the rooting hormone. Tap off any excess to avoid overapplication, which could hinder growth. While this step is optional, it is particularly useful for plants that are more challenging to propagate or when conditions are less than ideal for rooting.
Step 6: Plant Your Cuttings
Once your cutting is prepared and coated with rooting hormone (if used), it’s time to plant it. Fill a small pot with a well-draining potting mix, ideally one formulated for propagation or with a combination of perlite, peat moss, and vermiculite to support root growth. Use a pencil or your finger to create a small hole in the soil, gently place the cutting into the hole, and firm the soil around it to hold it upright.
Be cautious not to wipe off the rooting hormone during this step. Water the soil lightly to settle it around the cutting, ensuring it remains moist but not saturated. Proper drainage is crucial to prevent waterlogging, which can lead to rot. Place the pot in a warm, well-lit area out of direct sunlight to give your cutting the best start.
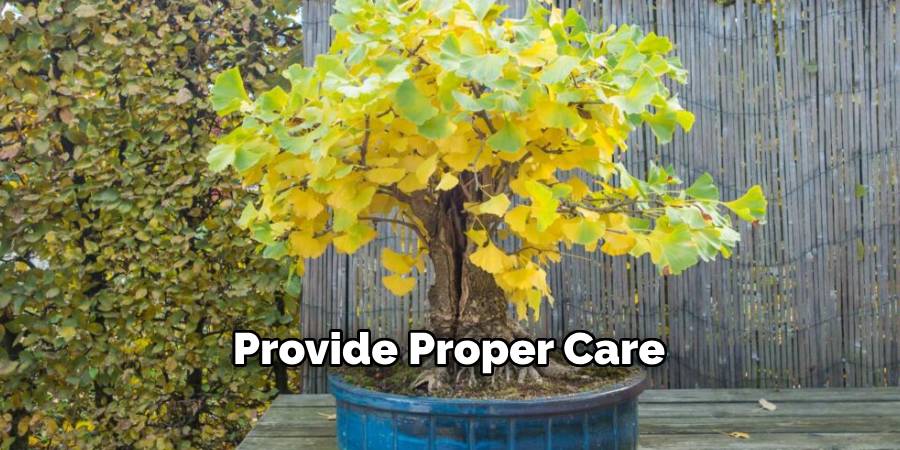
Step 7: Provide Proper Care
After planting your cuttings, place them in a warm and bright location, but not in direct sunlight. Keep the soil consistently moist but not waterlogged, as excess moisture can lead to rotting. You may also cover the pot with a clear plastic bag to create a mini greenhouse effect, which will help retain moisture and increase humidity for better root growth.
Following these steps on how to grow ginkgo biloba from cuttings, you should see new growth within a few weeks. Once the cuttings have established roots and are actively growing, you can remove the plastic bag and relocate them to a spot with indirect sunlight.
Additional Tips
- Make sure to water your Ginkgo Biloba plant the day before taking cuttings to ensure it is well hydrated.
- Instead of rooting hormone, you can also use a natural rooting aid like willow water.
- If you live in a colder climate, consider starting your cuttings indoors and then transplanting them outside once they have established roots.
- You can also try propagating Ginkgo Biloba through air-layering, where you encourage roots to grow on a stem that is still attached to the mother plant.
- It’s always a good idea to research and follow specific instructions for the plant species you are trying to propagate.
- Once your cuttings have rooted, gradually acclimate them to their new environment by slowly introducing more sunlight and reducing humidity levels.
- Regularly check on your propagated cuttings and remove any dead or unhealthy ones to prevent mold or disease from spreading.
- It may take several weeks or months for your Ginkgo Biloba cuttings to fully establish roots, so be patient and continue caring for them in the meantime.
Frequently Asked Questions
Q: How Do I Choose the Best Ginkgo Biloba Cuttings for Propagation?
A: Look for healthy, disease-free branches that are at least 6 inches long and have several nodes. The ideal time to take cuttings is during dormancy (late fall to early spring).
Q: Can I Propagate Ginkgo Biloba From Seeds Instead of Cuttings?
A: Yes, Ginkgo Biloba can also be propagated from seeds, but it requires more time and effort as the seeds have a hard outer shell that needs to be scarified before planting.
Conclusion
Propagating Ginkgo Biloba may require patience and consistent care, but the rewards of growing this ancient and resilient plant are well worth the effort. By following the steps on how to grow ginkgo biloba from cuttings outlined and providing the right conditions, you can successfully cultivate healthy and thriving cuttings.
Remember, propagation is both a science and an art, so don’t be discouraged by setbacks—each attempt is a step toward mastering this rewarding process.