Paw paw trees are a unique and rewarding addition to any garden or orchard. Known for their sweet, custard-like fruits and attractive foliage, these trees are native to North America and thrive in temperate climates. Whether you’re a seasoned gardener or just starting out, planting and growing paw paw trees can be a fulfilling endeavor.

This guide on how to plant paw paw trees will walk you through the essential steps to successfully plant and care for your paw paw trees, ensuring a bountiful harvest in the years to come.
Understanding Pawpaw Trees
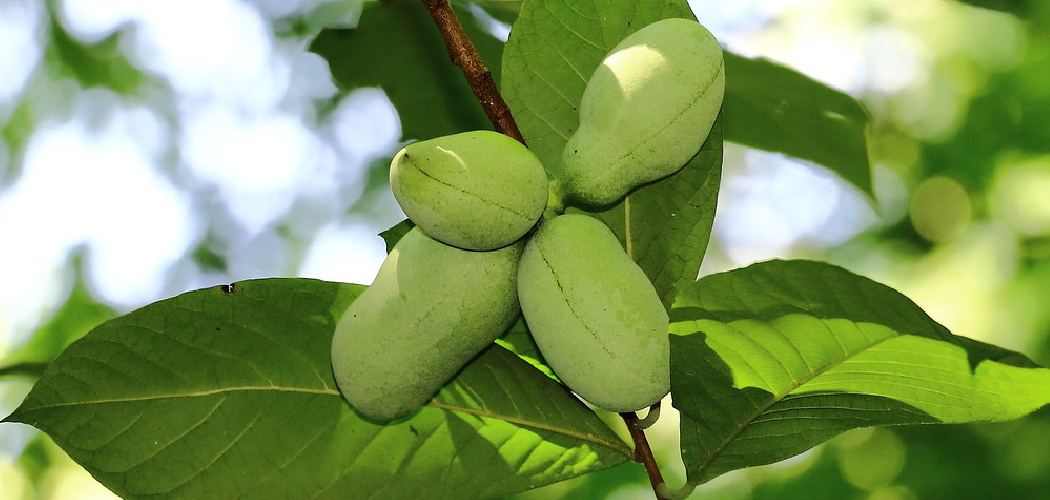
Pawpaw trees (Asimina triloba) are small to medium-sized deciduous trees that belong to the Annonaceae family, commonly referred to as the custard apple family. They are revered for their distinctive, oblong fruits with a creamy texture and a tropical flavor reminiscent of banana, mango, and melon.
These fruits are not only delicious but also packed with nutrients, making them a healthy treat. Pawpaw trees typically grow in fertile, well-drained soil and prefer a location with partial to full sunlight.
They are also known for their large, drooping leaves and unique maroon flowers that bloom in the spring. Native to eastern North America, pawpaw trees are an integral part of the region’s ecosystem, providing food for wildlife and adding ornamental value to gardens. Understanding their growth habits and natural conditions is key to cultivating healthy and productive trees.
Needed Materials:
- Pawpaw Tree Seedling or Sapling
- Shovel or Spade
- Compost or Organic Matter
- Mulch
- Pruning Shears
- Fertilizer
- Water Source
8 Step-by-Step Guidelines on How to Plant Paw Paw Trees:
Step 1: Choose the Right Location
Selecting the proper location is crucial for the healthy growth of pawpaw trees. These trees thrive in areas with well-drained, fertile soil and prefer locations that receive partial to full sunlight. However, younger pawpaw trees benefit from some shade to prevent leaf scorch as they establish themselves.

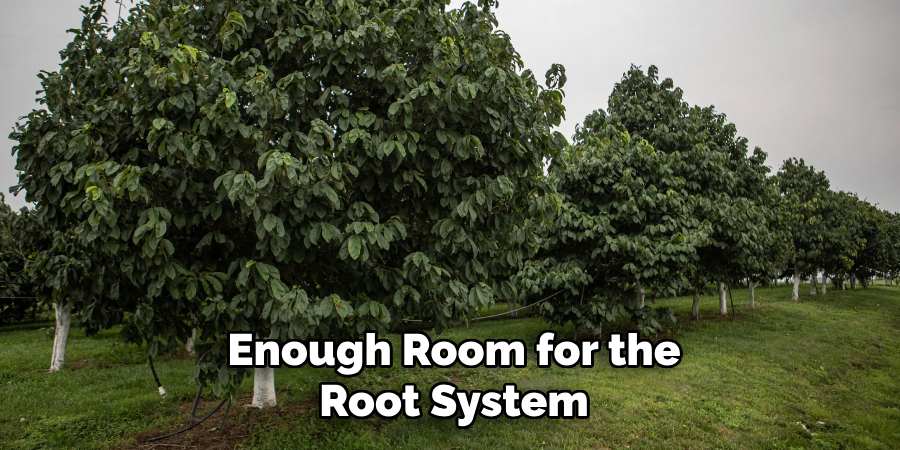
Avoid planting them in low-lying areas prone to waterlogging, as this can damage the roots. Ensure the chosen spot has enough space for the tree to grow, as pawpaw trees can reach heights of 15-30 feet when mature.
Step 2: Prepare the Soil
Proper soil preparation is essential for the successful growth of pawpaw trees. Begin by testing the soil to ensure its pH levels range between 5.5 and 7.0, as pawpaw trees prefer slightly acidic to neutral soil. If needed, amend the soil with compost or organic matter to enrich its fertility and improve drainage.
Loosen the topsoil to a depth of at least 12-18 inches to help the roots establish themselves more easily. Remove any weeds, rocks, or debris from the planting area, as these can inhibit healthy root development. Taking the time to prepare the soil thoroughly will set the foundation for a thriving pawpaw tree.
Step 3: Dig a Hole
Once the soil is prepared, dig a hole that is twice as wide as the pawpaw tree’s root ball and of equal depth. This ensures that the roots have ample room to spread out horizontally without being crowded.
Be careful not to dig the hole too deep, as planting the tree too low can lead to issues with water pooling around the base, which may cause root rot. Loosen the soil at the bottom and sides of the hole to promote better root penetration and growth. Properly sizing and positioning the hole is a crucial step in ensuring the tree’s long-term health and stability.
Step 4: Planting
Carefully place the tree into the prepared hole, ensuring that it is upright and positioned at the correct depth. The top of the root ball should be level with or slightly above the surrounding ground to prevent the tree from being planted too deep. Gently fill the hole with the excavated soil, packing it lightly as you go to remove air pockets.
Avoid compacting the soil too tightly, as this could restrict root growth. Once the tree is securely planted, create a shallow basin around the base to help retain water and direct it to the roots. Finally, give the tree a thorough watering to settle the soil and encourage root establishment.
Step 5: Mulching
To help retain moisture and suppress weed growth, apply a layer of mulch around your newly planted tree. Make sure to leave a few inches of space between the trunk of your tree and the mulch to prevent rotting.

Organic mulch, such as wood chips or shredded bark, is the best option for trees as it will slowly decompose and provide nutrients to the soil. Avoid using plastic or rubber mulch as they can trap moisture and cause fungal growth.
Step 6: Watering
Proper watering is crucial for the successful establishment of your newly planted tree. Immediately after planting, thoroughly water the tree to help settle the soil and eliminate air pockets around the roots. For the first few weeks, water your tree regularly to ensure the soil remains consistently moist but not waterlogged.
A general rule of thumb is to provide deep watering once or twice a week, depending on the weather and soil type. As the tree establishes, you can gradually reduce the frequency of watering. Always monitor the moisture level of the soil to avoid overwatering or underwatering, as both can harm the tree’s growth.
Step 7: Stakeholder if Necessary
Staking a tree can provide essential support, especially if it is planted in a windy area or has a weak trunk. When staking, use soft ties that won’t damage the tree’s bark and ensure the stakes are placed at a slight angle away from the tree.
The ties should be secure but allow some natural movement, as this promotes stronger trunk development. Avoid leaving stakes in place for too long; generally, one growing season is sufficient. Remove the stakes once the tree is stable and capable of standing upright on its own.
Step 8: Mulching
Mulching is an important step in caring for your newly planted tree. It helps retain moisture in the soil, suppresses weeds, and regulates soil temperature. Use organic mulch like bark chips or shredded leaves, and spread it evenly around the base of the tree, leaving a few inches of space around the trunk to prevent rotting.

Following these steps on how to plant paw paw trees will ensure that your tree has a strong and healthy start in its new home. With proper care, your paw paw tree will soon be producing delicious fruits for you to enjoy. Remember to continue monitoring and caring for your tree as it grows, and seek professional help if needed.
Additional Tips:
- Water your newly planted paw paw tree regularly, at least once a week or more, depending on the weather.
- Prune any damaged or diseased branches to promote healthy growth.
- Fertilize your tree annually with a balanced fertilizer in early spring before new growth appears.
- Keep an eye out for pests and diseases, and address them promptly to prevent damage to your tree.
- Consider planting companion plants around your paw paw tree, such as clover or vetch, to help fix nitrogen in the soil and provide additional nutrients.
Common Mistakes to Avoid
Overwatering:
While paw paw trees need consistent moisture, overwatering can lead to root rot. Ensure proper drainage and avoid leaving the soil waterlogged.
Ignoring Soil Quality:
Paw paw trees thrive in well-drained, fertile soil. Neglecting to test and amend the soil as needed can stunt growth and reduce fruit production.
Planting in Full Shade:
Although paw paw trees tolerate some shade, planting them in full shade can limit fruiting. Aim for a location with partial to full sun for optimal growth.
Poor Spacing:
Planting trees too close together can restrict airflow, inviting pests and diseases. Maintain adequate spacing to allow each tree room to grow.
Skipping Pollination Support:
Paw paw trees are not self-pollinating, so it’s crucial to plant at least two genetically different trees for cross-pollination. Neglecting this will result in no fruit production.
Neglecting Young Trees:
Young paw paw trees need extra care, including protection from strong winds and consistent watering during their establishment phase. Failing to provide this support could hinder their development.
Frequently Asked Questions:
Q1: Do Paw Paw Trees Require Full Sun Exposure?
A1: Yes, paw paw trees prefer full sun exposure but can also tolerate partial shade.
Q2: How Long Does It Take for a Paw Paw Tree to Produce Fruit?
AA2: It takes around 3-4 years for a Paw Paw tree to produce fruit. However, some varieties may take up to 7 years.
Q3: Can I Grow a Paw Paw Tree in a Container?
AA3: Yes, you can grow a paw paw tree in a container, as long as it has enough room for the root system and is well-draining.
Conclusion
Paw paw trees are unique and rewarding additions to any garden or home. With proper care, including adequate sunlight, well-draining soil, and patience for fruit production, they can thrive in a variety of environments.
Whether grown in the ground or in a container, these remarkable trees offer delicious fruit and a striking presence, making them a favorite among many gardeners and plant enthusiasts. Thanks for reading this article on how to plant paw paw trees.