
Loofah plants, also called sponge gourds, are a fascinating addition to any garden. Known both for their use as a vegetable in certain cuisines and as a natural sponge alternative when fully matured, they are a symbol of versatility and sustainability. Cultivating loofah plants can be a fulfilling endeavor.
By growing them at home, you gain access to organic produce and eco-friendly sponges, all while contributing to a greener lifestyle. Whether you’re a beginner in gardening or a seasoned enthusiast, this guide on “how to grow loofah plant” will equip you with everything you need for success. From planting tips to pest management, let’s explore how you can successfully grow and reap the benefits of this unique plant.
Understanding the Loofah Plant
Types of Loofah Plants
There are two main types of loofah plants to choose from—ridged loofah (Luffa acutangula) and smooth loofah (Luffa aegyptiaca). Ridged loofahs are commonly grown for culinary purposes, prized for their tender texture and slightly earthy flavor. Smooth loofahs, on the other hand, are ideal for sponge production due to their softer, less fibrous interior. Understanding these types allows you to select the best plant based on your goals, whether it’s cooking, crafting natural sponges, or both.
Loofah’s Basic Growth Requirements
Loofah plants thrive in tropical and subtropical climates with warm temperatures, abundant sunlight, and moderate humidity. These conditions mimic their native environment in Asia and Africa. They are vigorous growers, often reaching lengths of 20–30 feet when trellised properly. Additionally, loofahs require rich, well-draining soil and consistent care during their growing season to achieve their full potential.
Preparing to Grow Loofah
When and Where to Plant
Timing is critical when planting loofah seeds. The best time to start is in spring or early summer, once the last frost has passed and the soil has warmed to at least 60°F (15°C). Choose a sunny location with access to at least 6–8 hours of direct sunlight daily. Loofah plants can grow well in outdoor garden spaces or large containers, but they thrive best when given vertical support, such as trellises, for their climbing vines.
Gathering Seeds and Supplies
High-quality seeds are the foundation of successful loofah cultivation. Look for seeds from reputable sellers or save seeds from a previous harvest if you’re replanting. Besides seeds, you’ll need gardening essentials like trowels, seed trays, a well-draining soil mix, and compost. For those in cooler climates, consider a greenhouse or a sunny windowsill to start your seeds indoors.
How to Grow Loofah Plant: Soil Preparation and Planting
Preparing the Soil
Loofah plants prefer soil that is nutrient-rich and drains easily. Before planting, loosen the topsoil and mix in compost or aged manure to improve its organic content. Aim for a slightly acidic to neutral pH level (6.0 to 7.5). If your soil tends to retain too much moisture, incorporate sand or perlite to enhance drainage.
Planting the Seeds
Loofah seeds have a hard outer shell, so soaking them in warm water overnight before planting can significantly speed up germination. Plant the seeds about 1 inch deep, spaced 12–18 inches apart if sowing directly outdoors. If starting indoors, sow seeds in biodegradable pots to reduce root disturbance when transplanting. The seeds typically germinate within 7–14 days under the right conditions.

Irrigation and Watering
Loofah Watering Needs
Loofah plants require consistent watering throughout their growth stages. While young seedlings need frequent light watering to establish their roots, mature loofah plants prefer deep watering 1–2 times a week. Ensure the soil is moist but not waterlogged, as stagnant water can lead to root rot.
Maintaining Soil Moisture
To maintain consistent soil moisture, apply a layer of mulch around the base of the plants. Mulch also helps regulate soil temperature and minimize evaporation, especially in hotter climates. Be sure to water early in the morning to allow excess moisture to evaporate throughout the day.
Supporting Loofah Plants
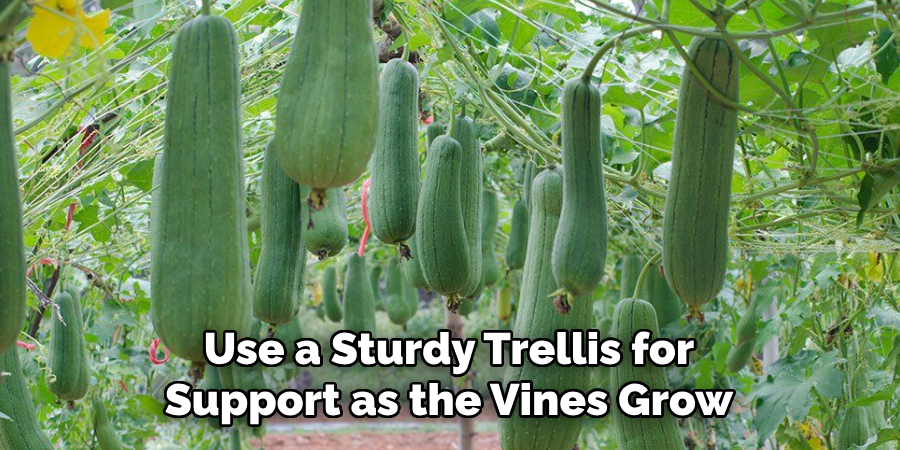
Using Trellises and Support Structures
Loofah plants are climbers by nature, making vertical support essential for healthy growth. A sturdy trellis or fence not only helps the vines grow upward but also prevents the fruits from sprawling across the ground, where they are more susceptible to pests and diseases. Set up your trellis with a height of at least 6–8 feet to accommodate the plant’s rapid growth.
Training the Vines
Encourage the vines to climb the trellis by gently guiding them as they grow. Use soft ties or garden clips to secure the shoots in place without damaging the stems. Regular pruning is essential to manage overgrowth and improve air circulation, reducing the likelihood of fungal infections.
Fertilizing and Feeding
Nutritional Needs of Loofah
Loofah plants have high nutritional demands as they progress through their growth stages. Use a balanced fertilizer with an equal ratio of nitrogen, phosphorus, and potassium to promote healthy foliage, root development, and flowering. Incorporating organic fertilizers like fish emulsion or compost tea can also provide a sustainable nutrient source.
Fertilization Schedule
Apply fertilizer every 3–4 weeks during the growing season, especially when the plant is actively producing flowers and fruits. Avoid over-fertilization, as excess nitrogen can encourage leaf growth at the expense of fruit production.
Pest and Disease Management
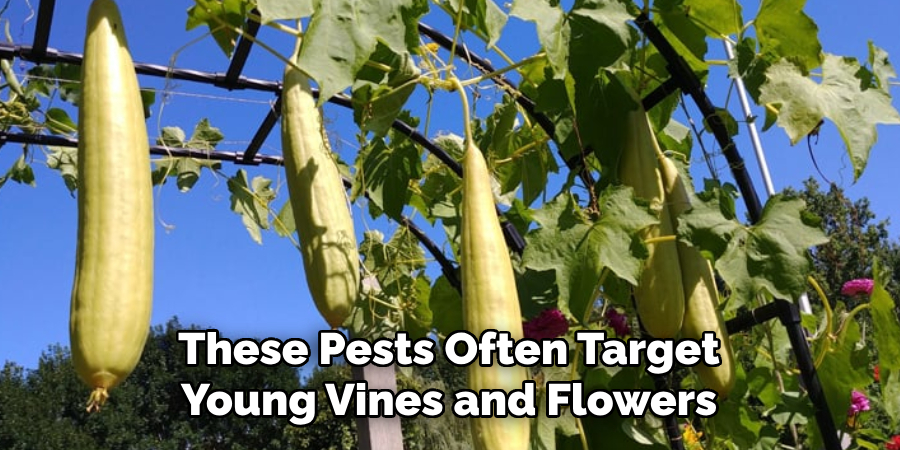
Pests that Affect Loofah
Loofah plants are relatively resilient but can fall victim to pests like aphids, spider mites, and cucumber beetles. These pests often target young vines and flowers, impacting the plant’s ability to bear fruit. Employ an integrated pest management approach by introducing beneficial insects like ladybugs or using neem oil sprays.
Preventing Common Diseases
Fungal diseases, such as powdery mildew and downy mildew, can be problematic in humid environments. Ensure good air circulation by spacing plants appropriately and pruning excess foliage. Additionally, avoid overhead watering to keep the leaves dry and reduce the risk of fungal growth.
Flowering and Fruiting Stages
Pollination of Loofah Plants
Pollination is a crucial step in fruit production, and bees are the primary pollinators for loofah plants. If natural pollination is insufficient, consider transferring pollen manually using a small brush. Hand pollination can significantly increase your yield, especially in urban settings with fewer pollinators.
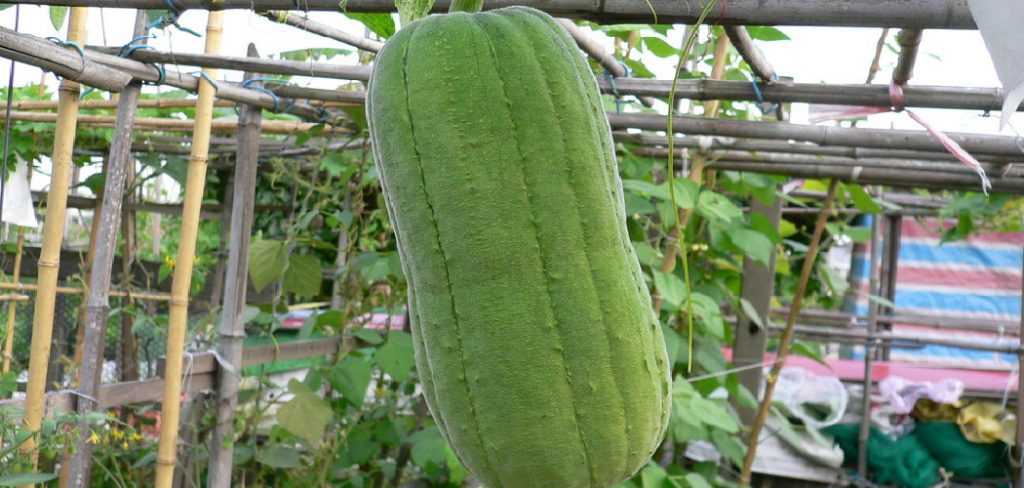
Signs of Healthy Fruit Development
Healthy loofah fruits are typically long and firm, with a vibrant green color during their early stages. Monitor fruit development closely, addressing issues like discoloration or stunted growth promptly to ensure a productive harvest season.
Harvesting Loofah
Knowing the Right Time to Harvest
Harvesting depends on the loofah’s intended use. Young fruits are ideal for cooking and should be picked when they’re 6–12 inches long. For sponges, allow the fruit to mature fully on the vine until it turns yellow or brown and the skin becomes hard.
Post-Harvest Steps
After harvesting mature loofahs, peel away the skin to reveal the fibrous interior. Rinse thoroughly to remove any remaining pulp and dry the sponges in a sunny, breezy location. Store dried sponges in a cool, dry place to extend their shelf life.
Loofah Plant Uses and Benefits
Culinary Uses
Tender loofah fruits are versatile and commonly used in soups, stir-fries, and curries. Their mild, slightly sweet flavor pairs well with other vegetables and spices, making them a staple in Asian cuisines.
Household and Skincare Applications
Mature loofah sponges are all-natural, biodegradable, and chemical-free. They are ideal for cleaning surfaces and exfoliating skin, offering an eco-friendly alternative to synthetic options.
Tips for Maximizing Growth
Avoiding Common Mistakes
Common pitfalls like overwatering, poor soil preparation, and insufficient sunlight can hinder growth. By addressing these issues early, you can set your loofah plants up for success.
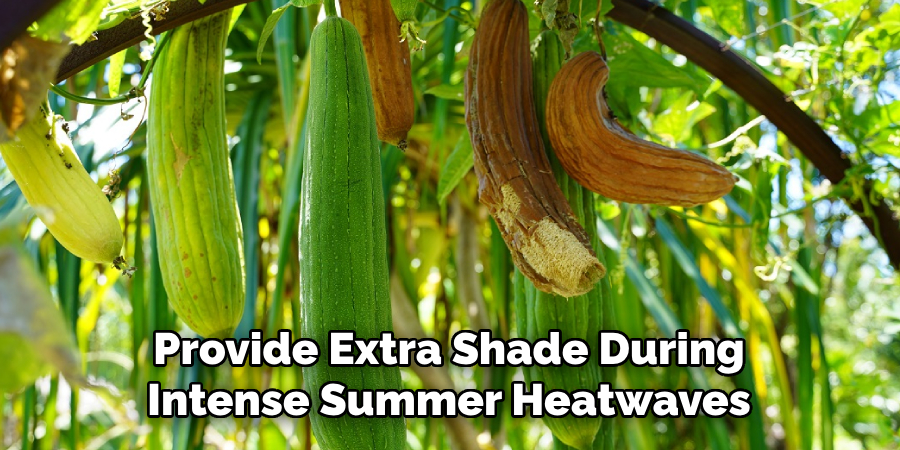
Seasonal Adjustments
Adjust your care routine based on seasonal changes to keep plants healthy. For example, reduce watering during cooler months and provide extra shade during intense summer heatwaves.
Frequently Asked Questions About Growing Loofah Plants
What Is The Best Time To Plant Loofah Seeds?
The ideal time to plant loofah seeds is in the spring, after the last frost. Warmer soil and consistent temperatures promote better germination and early growth.
How Long Does It Take For Loofah Plants To Grow?
Loofah plants typically take about 150 to 200 days to mature fully. This includes the time required for flowering, fruit development, and drying the fruit for sponge use.
What Kind Of Soil Do Loofah Plants Prefer?
Loofahs thrive in well-draining, nutrient-rich soil with a slightly acidic to neutral pH level, typically between 6.0 and 7.0. Adding compost can significantly improve soil quality.
How Do I Harvest Loofah Sponges?
Loofah sponges should be harvested when the fruit turns yellow or brown and the skin begins to dry. Peel the skin, remove the seeds, and clean the sponge thoroughly before use.
Can Loofah Plants Be Grown In Containers?
Yes, loofah plants can be grown in large containers with proper drainage. Ensure the container is at least 5 gallons, and use a sturdy trellis for support as the vines grow.
Conclusion
Growing loofah plants is a rewarding experience that offers both environmental and personal benefits. By following the steps outlined in this guide on “how to grow loofah plant,” you can enjoy a sustainable supply of vegetables and eco-friendly sponges. With proper care and a little patience, your loofah plants will thrive, bringing natural beauty and functionality to your garden. Why not start your loofah-growing adventure today?