Plumerias, with their tropical flair and intoxicating fragrance, have long captured the imaginations of gardeners and plant lovers across the world. Also called frangipani, these stunning flowering plants are famous for their large, waxy blossoms and lush green foliage, often gracing leis in Hawaiian tradition or adding exotic appeal to gardens and patios in warmer climates.

Rather than investing in mature plants, learning how to propagate plumerias lets you multiply your collection and share their beauty with friends and family—all from just a handful of stems. Propagation is not only cost-effective but also deeply satisfying as you watch your own efforts result in thriving new growth. This guide will walk you through every element of propagating plumerias, so you can confidently grow and care for your own vibrant blooms.
The Benefits of Propagating Plumerias
Propagation opens up a world of possibilities for garden enthusiasts. By taking a few responsible steps, you transform a single well-established plumeria into many new plants at a fraction of the cost of buying new specimens.
Propagation allows you to replicate your favorite varieties, whether for their unique color, fragrance, or growth form. This process provides the personal satisfaction of nurturing a plant through every stage of its life, enhancing your expertise as a gardener. Furthermore, established plants in your care become a legacy, as cuttings shared with others can be grown and enjoyed for generations.
The ability to propagate plumerias also means you’re less dependent on nursery runs or online orders. Once you adopt the right techniques, you can fill beds, borders, and containers all by yourself. It’s a rewarding practice, connecting you more deeply to the lifecycle of these magnificent tropical plants.
Understanding Plumeria Propagation Methods
There are several methods for propagating plumerias, but cuttings remain the clear favorite due to speed and reliability. Most gardeners find it both straightforward and effective. Seed propagation is possible, but plumeria seeds do not always produce plants resembling their parent in color or shape. In contrast, cuttings generate true copies, making them ideal for preserving cherished features.

Grafting is sometimes used by professionals seeking to combine particularly hardy rootstocks with the desirable traits of showy plumeria varieties. While grafting can yield excellent results, it typically requires more skill and patience than the average gardener needs for home-scale propagation.
The best time to propagate plumerias by cuttings is in spring or early summer when the plant’s active growth period is underway. Warm temperatures and plenty of sunlight create the ideal conditions for new roots to form quickly and successfully.
Tools and Materials Needed
Before you begin, gathering the right tools ensures a hassle-free propagation process and helps minimize damage to both the parent and new plants.
Essential Tools and Materials
You’ll need sharp, clean pruning shears or a gardening knife to make precise cuts on stems. Rooting hormone, while not strictly essential, dramatically improves the chances of successful root formation and helps combat rot. Prepare lightweight pots or containers with sufficient drainage holes, and fill them with a quality potting mix—a blend containing compost and perlite or coarse sand works well for aeration and drainage.
It’s important to sterilize your tools before you cut: a quick wipe with rubbing alcohol prevents the spread of disease and protects the health of both parent and new cuttings. Also, have gloves on hand for sap-sensitive skin, and set aside labels if you want to keep track of dates or varieties.
Choosing Healthy Cuttings for Propagation
Learning how to identify and select healthy plumeria cuttings is the foundation of successful propagation.
Picking the Right Stem
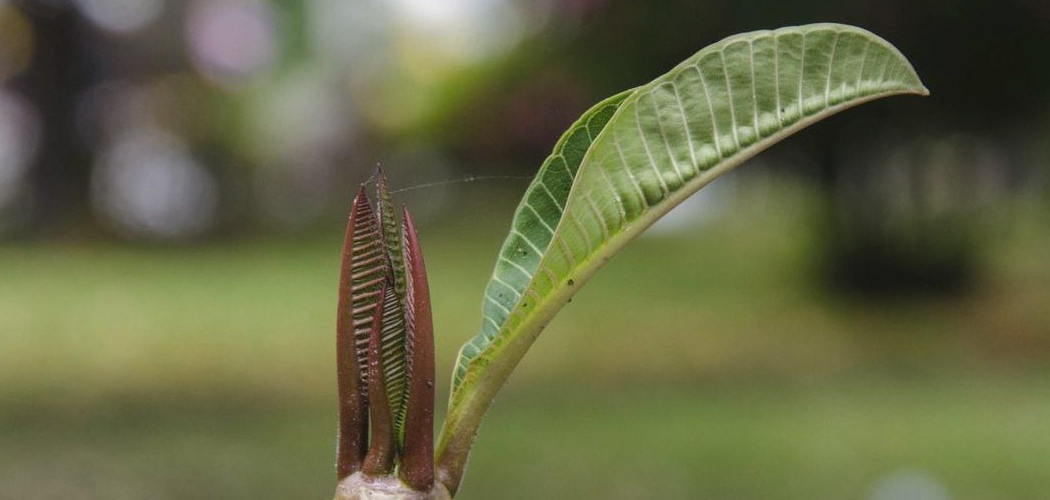
Choose a strong, mature branch from a healthy parent plant. The stem should be at least twelve to eighteen inches long, with a thickness similar to your finger, and show no signs of disease, soft spots, or pest damage. Mature wood—firm and slightly grayish rather than new green growth—is generally preferable, as it roots more consistently.
Use sharp shears to make a clean, diagonal cut just below a node (the swollen area where leaves or branches sprout). Cutting at a slant increases the rooting surface and helps direct moisture toward the developing roots. Remove any leaves or flower buds from the lower half of the cutting, leaving a few leaves at the top for photosynthesis.

Preparing the Cutting for Rooting
After cutting, it’s vital to let the plumeria stem callous. This process involves placing the cutting in a dry, shaded spot for about five to seven days, giving the severed end time to dry and toughen. Callousing greatly reduces the risk of rot when the cutting is placed in soil. While the cutting dries, avoid direct sun and humidity, which can slow or prevent proper callousing.
Preparing Plumeria Cuttings for Rooting
Once sufficiently calloused, your plumeria cutting is ready to root. Using rooting hormone is an excellent practice at this stage. Moisten the cut end and dip it in the powder or gel, tapping off excess. Rooting hormone encourages quicker and more reliable root development and offers some protection against fungal infections that cause rot.
Select a pot deep enough for the lower third of the stem to be buried. Fill it with well-draining soil; a mix of equal parts potting soil, perlite, and coarse sand is ideal. Create a hole with your finger or a stick, insert the cutting, and gently firm the soil around it. Water the potting mix lightly, ensuring it’s damp but not wet. Too much moisture at this early stage is the most common reason for failed propagation, so err on the side of slightly dry rather than soggy.
How to Propagate Plumerias: The Process
Rooting Plumeria Cuttings
The placement of your cut will significantly impact its success. Plumerias prefer warmth and plenty of sunlight, though indirect light is best while the cutting is still rootless. Position the pot in a bright, sheltered spot, with temperatures consistently above 65°F (18°C).
During rooting, resist the urge to overwater. The soil should remain just barely moist to the touch. Plumerias root best when their medium is a little on the dry side. Avoid covering pots with plastic domes or bags, as this can trap excess humidity and encourage rot. Rooting may take anywhere from three to eight weeks, depending on the climate and health of the cutting.
A gentle tug on the stem after a month will reveal emerging roots if there’s resistance. When roots are a few inches long—often visible from the bottom of the pot—it’s safe to introduce the cutting to a little more nourishment and attention.
Caring for Rooting Plumerias
As roots develop, your focus should shift to creating an environment where new growth flourishes. Light remains crucial—move the cutting gradually into brighter sunlight as it shows signs of vigor. Monitor soil moisture carefully, as young roots are still susceptible to rot.

Plumeria leaves may wilt or yellow slightly during rooting, but should recover with steady care. If pests like spider mites or aphids appear, address them promptly with gentle sprays of water or neem oil. Limiting excess humidity while keeping air moving around the pot helps deter fungal growth.
While you don’t need to fertilize during the earliest stage, using a diluted, balanced fertilizer once significant new growth appears will support ongoing health and vigor.
Transplanting Rooted Plumeria Cuttings
When your cutting is robust and displaying strong root growth, it’s time for transplantation. The transition from the initial rooting pot to a larger container or its final garden location must be handled with care.
The Transplant Process
Gently loosen the soil around the base of the cutting, supporting the stem to avoid breaking new roots. Prepare the new pot or garden bed with well-amended, free-draining soil. Space is important: ensure each plant will have room for mature spread, typically around three to six feet apart in the garden.
After transplanting, water thoroughly, allowing water to run outof the bottom of the pot or saturate the soil bed. Keep the environment bright but protect young plants from harsh midday sun until they adapt. Gradual exposure to full sunlight is best, preventing the shock that can set back early development.
Troubleshooting Common Problems
Plumeria propagation, while forgiving, comes with its share of challenges.
Common Issues and Solutions
The most frequent issue is stem rot, which is almost always caused by excess moisture before the cutting is fully rooted or by an uncalloused end. If your cutting turns mushy or blackened at the base, discard it and start fresh, adjusting your callousing and watering approach.
Failure to root can sometimes be due to taking cuttings too late in the season or from overly mature or unhealthy stems. Pests, though relatively rare, can target stressed new plants; address them promptly with non-toxic remedies. If growth stalls or leaves drop, check for root development—sometimes patience is all that’s needed. With each attempt, your skill will improve, and your success rate will climb.

Long-Term Care for Propagated Plumerias
Once your propagated plumerias are established, long-term care will ensure they develop into gorgeous, flowering plants.
Watering and Sunlight
Plumerias are drought-tolerant but appreciate deep, infrequent watering, especially once settled. Let the top few inches of soil dry before watering again. These tropical beauties demand full sun for at least six hours a day for optimal bloom production.
Fertilizing and Pruning
Fertilize during the growing season with a high-phosphorus fertilizer to encourage flower production. Prune in late winter or early spring to shape the plant, remove dead material, and promote vigorous branching. Pruning also helps control size, particularly if you’re growing plumerias in containers.
Seasonal Considerations
If you live in a cooler climate, be ready to move container-grown plumerias indoors or protect them from frost, as they are highly sensitive to cold. Overwintering plumerias indoors requires a cool, dry location with minimal water and light—don’t panic if the plant drops its leaves, as it will regrow them in spring.

Conclusion
Discovering how to propagate plumerias unlocks an incredible opportunity to grow your collection, experiment with varieties, and share the magic of these lush tropical plants with others. With the right selection, preparation, and care, plumeria propagation is simple and immensely rewarding.
Don’t hesitate—give it a try. Celebrate each tiny root and emerging leaf, and soon enough, your efforts will reward you with spectacular blossoms, luxurious fragrance, and the satisfaction of knowing these gorgeous blooms began in your own hands. Whether you’re an experienced gardener or a beginner, propagating plumerias brings color, life, and a touch of the tropics to any garden.