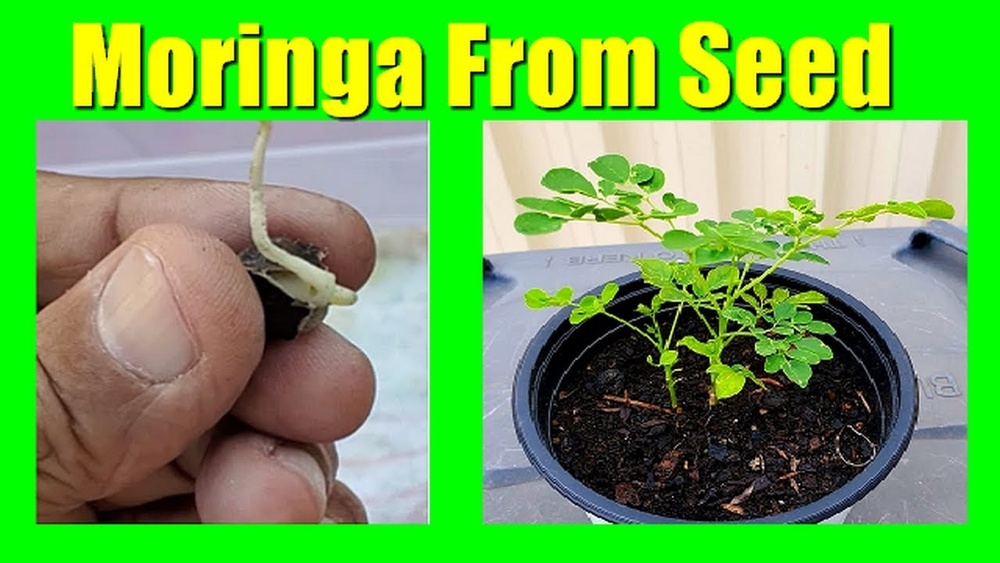
Are you ready to discover a simple way to grow your own superfood right at home? Moringa seeds hold incredible health benefits, and growing them yourself is easier than you might think.
Whether you want fresh leaves for your meals or a natural boost to your garden, this guide will show how to grow moringa seeds. Keep reading, and you’ll soon enjoy the satisfaction of watching your own moringa tree grow strong and healthy.
Your journey to fresh, nutritious greens starts here!

Credit: www.youtube.com
Choosing Quality Moringa Seeds
Choosing quality moringa seeds is the first step to growing healthy plants. Healthy seeds have a better chance to sprout and grow strong. Poor seeds may not grow well or at all. It is important to pick seeds that are fresh and whole. This makes your growing process easier and more successful.
Selecting Viable Seeds
Look for seeds that are firm and dry. Avoid seeds that feel soft or show cracks. Good seeds usually have a dark brown or black color. Check for any signs of mold or damage. Fresh seeds have a higher germination rate. You can also try a simple water test. Put seeds in water. Seeds that sink are usually good for planting. Floating seeds might not grow well.
Where To Buy Seeds
Buy seeds from trusted garden centers or nurseries. These places often sell seeds that are tested and fresh. Online stores can be useful too. Choose sellers with good reviews and clear seed information. Avoid buying seeds from unknown sources. This lowers the risk of poor quality seeds. Local farms can also be a good choice for fresh seeds.

Credit: www.wikihow.com
Preparing Seeds For Planting
Preparing moringa seeds before planting helps improve germination rates. Seeds have a hard outer shell. This shell can slow down water absorption. Proper seed preparation makes it easier for the seed to sprout. Two common ways to prepare moringa seeds are soaking and scarification.
Soaking Techniques
Soaking moringa seeds softens the seed coat. Use clean, room temperature water. Place seeds in a bowl and cover with water. Let them soak for 12 to 24 hours. Do not soak longer than 24 hours to avoid seed damage. After soaking, drain the water and plant seeds immediately. This method speeds up germination and helps seeds sprout faster.
Scarification Methods
Scarification breaks or weakens the hard seed coat. Use sandpaper or a small file to gently rub the seed surface. Be careful not to damage the inner seed. Alternatively, nick the seed coat with a knife. Scarification allows water to enter the seed more easily. After scarification, soak seeds in water for a few hours. This combination boosts germination success. Scarified seeds usually sprout quicker than untreated seeds.
Ideal Planting Conditions
Moringa seeds need certain conditions to grow well. The right environment helps the plant develop strong roots and healthy leaves. Preparing the soil and choosing the right time to plant can make a big difference. Light and temperature also play a key role in the growth of Moringa plants.
Soil Requirements
Moringa grows best in well-drained soil. Sandy or loamy soil works great. Avoid heavy clay soil that holds too much water. The soil should be loose to allow roots to spread easily. A neutral to slightly acidic pH between 6.3 and 7.0 is ideal. Adding organic matter can improve soil quality and fertility.
Best Planting Time
The best time to plant Moringa seeds is during the warm season. Plant seeds after the last frost in spring or early summer. This gives the plant enough time to grow before colder months. In tropical areas, planting can happen year-round. Avoid planting during rainy seasons to prevent seed rot.
Sunlight And Temperature
Moringa plants need full sun to thrive. They require at least six hours of direct sunlight daily. Warm temperatures between 77°F and 95°F (25°C to 35°C) are perfect. Moringa can tolerate heat but is sensitive to frost. Protect young plants from cold winds and chilly nights.
Step-by-step Planting Guide
Growing moringa from seeds is simple and rewarding. Follow these clear steps for healthy plants. Proper planting sets the stage for strong growth and rich leaves. Prepare your soil and seeds carefully. Then sow with attention to depth and spacing. Watering right after planting helps seeds sprout fast.
Sowing Depth And Spacing
Plant moringa seeds about 1 inch deep in the soil. Too deep can stop sprouting. Space seeds 12 inches apart to give room to grow. Crowded plants compete for nutrients and water. Use loose, well-draining soil for best results. Sunlight is important, so choose a bright spot.
Watering After Planting
Water seeds gently but thoroughly after planting. Keep soil moist but not soaked. Overwatering can cause seeds to rot. Check soil daily during the first two weeks. Once sprouts appear, water every few days. Adjust watering if the weather is very hot or dry.
Caring For Young Moringa Plants
Caring for young moringa plants is vital for strong growth. These plants need special attention in their early stages. Proper care helps them develop healthy roots and leaves. It also prepares them for tough outdoor conditions. Follow these steps to keep your moringa seedlings thriving.
Watering Schedule
Young moringa plants need regular watering. Keep the soil moist but not waterlogged. Water the plants every two to three days. Adjust watering based on weather and soil dryness. Avoid overwatering to prevent root rot. Early morning watering is best for absorption.
Fertilizing Tips
Feed young moringa plants with balanced fertilizer. Use organic compost or diluted liquid fertilizer. Apply fertilizer once every two weeks. Avoid strong chemical fertilizers that can harm seedlings. Nutrients help plants grow strong and healthy leaves. Stop fertilizing once plants mature.
Pest And Disease Control
Check young plants daily for pests like aphids or caterpillars. Remove pests by hand or use mild insecticidal soap. Keep the area clean to reduce disease risk. Avoid wetting leaves during watering to prevent fungus. Use natural remedies for common plant diseases.
Transplanting Seedlings
Transplanting moringa seedlings is a key step in growing healthy trees. It helps the plants grow strong roots and get enough space. This process moves seedlings from small containers to the garden or bigger pots. Proper transplanting supports better growth and higher survival rates.
When To Transplant
Transplant seedlings when they have two to three sets of true leaves. This usually happens four to six weeks after germination. The seedlings should be about 6 to 8 inches tall. Wait until the weather is warm and there is no risk of frost. Morning or late afternoon is best for transplanting to avoid heat stress.
Transplanting Procedure
Start by preparing the new planting area or pots. The soil should be loose, well-drained, and rich in nutrients. Water the seedlings before transplanting to keep roots moist. Gently remove each seedling from its container without damaging the roots.
Dig a hole slightly larger than the seedling’s root ball. Place the seedling in the hole and cover roots with soil. Press the soil gently around the base to remove air pockets. Water the transplanted seedlings immediately to help them settle. Keep the soil moist but not waterlogged during the first two weeks.
Harvesting And Using Moringa
Harvesting and using moringa is a rewarding part of growing this versatile plant. The right timing and method ensure the best quality and taste. Moringa offers many benefits, from food to natural remedies. Knowing when to harvest and how to use moringa helps you enjoy its full potential.
Harvest Timing
Harvest moringa leaves when the tree is young and healthy. Pick leaves early in the morning for the freshest taste. Leaves are best harvested before the tree flowers. Pods should be collected when they turn green and start to dry. Avoid waiting too long, or the pods become tough. Regular harvesting encourages new growth and more leaves.
Common Uses
Moringa leaves are popular in salads, soups, and teas. They add a mild, nutty flavor and lots of nutrients. Pods can be cooked like green beans or added to stews. Moringa powder, made from dried leaves, is great in smoothies. The seeds can be pressed to extract healthy oil. This oil is useful for cooking and skin care. Moringa’s uses make it a valuable plant in many kitchens.
Credit: blog.kulikulifoods.com
Frequently Asked Questions
How Long Do Moringa Seeds Take To Germinate?
Moringa seeds typically germinate within 7 to 14 days under optimal conditions. Warm temperatures and moist soil speed up germination. Ensure the soil is well-drained and kept consistently moist for best results.
What Is The Best Soil For Growing Moringa Seeds?
Moringa grows best in sandy, well-drained soil with a pH of 6. 3 to 7. 0. Avoid waterlogged or heavy clay soils. Adding organic compost can improve soil fertility and support healthy seedling growth.
How Often Should I Water Moringa Seedlings?
Water Moringa seedlings moderately, keeping the soil moist but not soggy. Water every 2 to 3 days during dry periods. Overwatering can cause root rot, so ensure good drainage and reduce watering as plants mature.
Can Moringa Seeds Be Grown Indoors Before Transplanting?
Yes, you can start Moringa seeds indoors in small pots. Use seed-starting mix and keep them in a warm, sunny spot. Transplant seedlings outdoors after 3 to 4 weeks when they have a few true leaves.
Conclusion
Growing moringa seeds takes patience and care. Water the seeds regularly and keep them in sunlight. Watch for sprouts and thin the strongest plants. Healthy soil and good drainage help the plants grow well. Soon, you will enjoy fresh moringa leaves for cooking or tea.
This simple process brings many health benefits to your home garden. Start small, stay consistent, and enjoy the natural goodness of moringa.