Are you ready to grow your own beautiful daylilies from seed? Germinating daylily seeds might seem tricky, but with the right steps, you can watch your garden come alive with vibrant colors.
Imagine the satisfaction of seeing tiny seedlings sprout under your care, knowing you made it happen. You’ll discover simple, proven methods to get your daylily seeds to germinate quickly and successfully. Keep reading, and you’ll be one step closer to a stunning garden full of blooming daylilies.

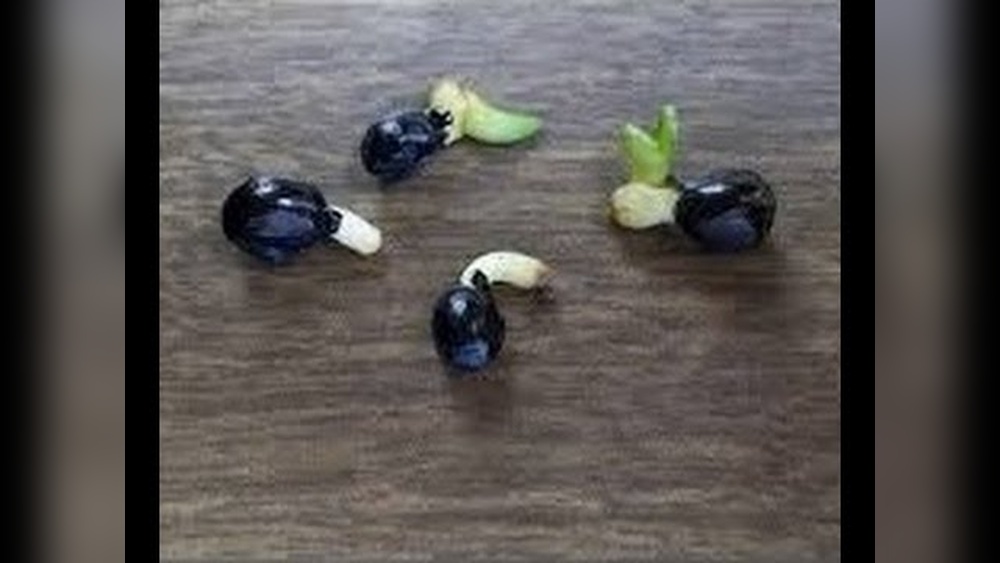
Credit: www.youtube.com
Preparing Daylily Seeds
Preparing daylily seeds properly is the first step to successful germination. Healthy seeds grow into strong plants. Careful preparation improves your chances of sprouting vibrant daylilies.
Start by selecting the best seeds. Then clean and dry them correctly. These simple steps set a solid foundation for growth.
Selecting Quality Seeds
Choose seeds that look healthy and full. Avoid shriveled or broken seeds. Pick seeds with a firm texture and a rich color. Fresh seeds have a better chance to sprout. Check the seed packet for the harvest date. Older seeds may have lower germination rates.
Cleaning And Drying Seeds
Remove any fruit pulp or debris from the seeds. Gently wash seeds under cool water to clean them. Pat seeds dry with a soft cloth or paper towel. Spread seeds out in a single layer on a dry surface. Let them air dry completely for several days. Proper drying prevents mold and rotting. Store dry seeds in a cool, dry place until planting time.
Pre-germination Techniques
Pre-germination techniques prepare daylily seeds for better growth. They help seeds absorb water and break dormancy. These steps increase the chance of strong seedlings. Using simple methods can make germination faster and more successful.
Soaking Seeds
Soaking daylily seeds softens their hard outer shell. Use warm water and soak seeds for 12 to 24 hours. This helps seeds absorb moisture and wake up from dormancy. Change the water if it becomes cloudy. After soaking, plant seeds immediately for best results.
Scarification Methods
Scarification makes the seed coat thinner or rougher. It allows water to enter easily. Rub seeds gently with sandpaper or a nail file. Avoid damaging the inner part of the seed. Another way is to nick the seed coat with a small knife. Do this carefully to prevent harming the seed.
Stratification Process
Stratification mimics winter conditions to break seed dormancy. Place seeds in a damp paper towel or mix with moist sand. Put them inside a plastic bag and refrigerate for 4 to 6 weeks. Keep the temperature around 40°F (4°C). After stratification, seeds are ready for planting and sprouting.
Sowing Daylily Seeds
Sowing daylily seeds starts with careful preparation. The right soil, planting depth, and containers help seeds grow strong. Small changes in how you plant affect seed germination and seedling health. Follow simple steps to give seeds the best start.
Choosing The Right Soil
Use light, well-draining soil for daylily seeds. A mix of peat moss and sand works well. Avoid heavy or clay soils that hold too much water. The soil should stay moist but never soggy. Healthy soil helps roots grow quickly and seeds to sprout.
Planting Depth And Spacing
Plant daylily seeds shallowly, about 1/4 inch deep. Too deep planting can stop seeds from sprouting. Space seeds about 2 inches apart to give each plant room. Crowded seeds may grow weak or not at all. Proper depth and spacing improve air flow and light access.
Ideal Containers And Trays
Choose shallow trays or small pots with drainage holes. Good drainage prevents water from pooling around seeds. Use clean containers to avoid disease. Seed trays make it easier to control moisture and temperature. Transplant seedlings carefully once they grow strong.
Creating Optimal Conditions
Creating the right environment helps daylily seeds sprout quickly and grow strong. Seeds need warmth, light, moisture, and air to start growing. Setting these conditions carefully improves your chance of success. This section explains how to prepare the best place for your seeds.
Temperature And Light Requirements
Daylily seeds sprout best in warm temperatures. Keep the soil between 65°F and 75°F. Too cold or hot can stop growth. Place the seed tray where it gets indirect sunlight. Bright light helps seeds grow but avoid harsh, direct sun. A warm, bright spot boosts germination speed.
Watering Practices
Keep soil moist but not soaked. Water gently to avoid washing seeds away. Use a spray bottle or small watering can. Water once the top soil feels dry. Overwatering can cause seeds to rot. Proper watering helps seeds absorb moisture without drowning.
Maintaining Humidity
Seeds need high humidity to stay moist and soft. Cover the seed tray with clear plastic wrap or a dome. This traps moisture and keeps the air around seeds wet. Remove the cover daily for fresh air to stop mold growth. High humidity encourages seeds to swell and break open.
Monitoring Germination Progress
Monitoring the germination progress of daylily seeds is important for a successful start. It helps you know when seeds sprout and how healthy they are. Watching closely allows quick action if problems appear. This section guides you through the key steps to track germination well.
Expected Germination Timeline
Daylily seeds usually start to sprout in 7 to 14 days. Some may take longer, up to 21 days. Keep the soil moist and warm during this time. Avoid disturbing the seeds while waiting. Patience is key, as germination times can vary.
Identifying Healthy Seedlings
Healthy seedlings show bright green leaves and firm stems. They grow steadily and look strong. Avoid seedlings that are yellow, wilted, or very thin. These signs show weak or unhealthy growth. Remove unhealthy seedlings to save space and nutrients.
Troubleshooting Common Issues
Slow germination often means soil is too cold or dry. Too much water can cause seeds to rot. Mold on soil surface signals excess moisture. Thin or weak seedlings may lack light. Adjust watering, temperature, and light to fix these issues quickly.
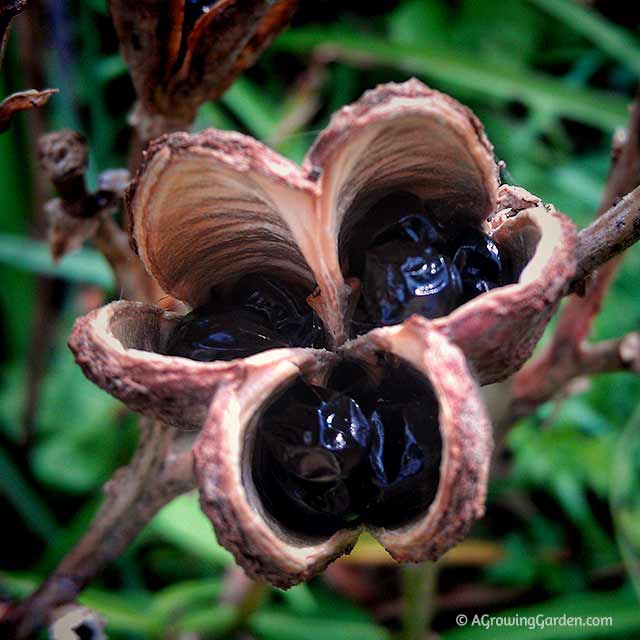
Credit: agrowinggarden.com
Transplanting Seedlings
Transplanting daylily seedlings is a crucial step in growing healthy plants. This process moves young plants from small pots or trays into the garden or larger containers. Careful transplanting helps seedlings grow stronger and bloom beautifully. Follow these tips to ensure your daylilies thrive after transplanting.
Timing For Transplant
Transplant seedlings when they have at least two sets of true leaves. This usually takes four to six weeks after germination. Wait until the weather is warm and frost-free. Early morning or late afternoon is best for transplanting to avoid heat stress. Avoid transplanting on very windy days.
Preparing The Garden Bed
Choose a spot with full sun or partial shade. Daylilies prefer well-drained soil rich in organic matter. Loosen the soil to a depth of 12 inches. Mix compost or aged manure into the soil. Remove weeds and debris to give seedlings space to grow. Create small holes or mounds spaced 12 to 18 inches apart for planting.
Acclimating Young Plants
Harden off seedlings before planting outdoors. Place them outside for a few hours each day, increasing time over a week. Protect seedlings from strong sun, wind, and cold during this phase. This helps plants adjust to outdoor conditions without shock. Transplant seedlings gently, keeping roots moist during the move.
Care For Vibrant Blooms
Daylilies are easy to grow and bring bright color to your garden. Caring for them properly helps produce vibrant blooms year after year. Good care includes feeding, protecting from pests, and encouraging flowers. These steps keep your daylilies healthy and full of life.
Fertilizing Tips
Use a balanced fertilizer to feed daylilies in early spring. Choose one with equal parts nitrogen, phosphorus, and potassium. Apply fertilizer once a month during the growing season. Avoid overfeeding, which can cause too much leaf growth and fewer flowers. Water plants well after fertilizing to help nutrients soak in.
Pest And Disease Management
Watch for common pests like aphids and spider mites. Remove them by spraying plants with water or using insecticidal soap. Check leaves often for signs of disease, such as spots or mold. Remove affected leaves quickly to stop spread. Keep the garden clean by clearing dead leaves and debris.
Encouraging Flowering
Deadhead spent blooms to encourage new flowers. Trim the stalks back after blooming stops. Give plants enough sunlight—daylilies love full sun for at least six hours. Avoid too much shade, which reduces flower production. Regular watering during dry spells also helps keep buds healthy.
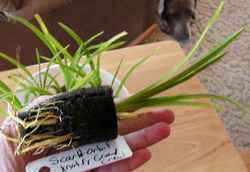
Credit: www.midaylilysociety.com
Frequently Asked Questions
How Long Does It Take To Germinate Daylily Seeds?
Daylily seeds typically take 2 to 4 weeks to germinate. Proper temperature and moisture speed up the process. Keep the soil consistently moist and warm for best results.
What Is The Best Soil For Daylily Seed Germination?
Well-draining, fertile soil with organic matter works best. A mix of potting soil and compost provides nutrients and drainage. Avoid heavy clay soils that retain too much water.
Should I Soak Daylily Seeds Before Planting?
Yes, soaking seeds for 12 to 24 hours softens the seed coat. This helps speed up germination by allowing water to penetrate easily. Use lukewarm water for soaking.
How Much Light Do Daylily Seeds Need To Germinate?
Daylily seeds germinate best in indirect sunlight or partial shade. Avoid direct harsh sunlight that can dry out seeds. Maintain moderate light to keep soil moist and warm.
Conclusion
Germinating daylily seeds takes patience and care. Keep the soil moist and warm for best results. Watch for sprouts in a few weeks. Transplant seedlings gently once they grow strong. Enjoy seeing your daylilies bloom after careful nurturing. Growing plants from seeds brings joy and pride.
Start small and learn as you go. Your garden will thank you with beautiful flowers soon.