To transplant Bermuda grass, prepare the new area, dig up the existing grass with a shovel, and replant the sod in the desired location. Bermuda grass transplantation involves creating a hospitable environment for the roots to establish themselves and ensuring proper watering and maintenance.
Bermuda grass is a warm-season grass commonly used for lawns due to its durability and ability to withstand heat and drought. By transplanting, you can extend its growth to a new area or rejuvenate an existing lawn. Following the correct procedure for transplanting Bermuda grass ensures successful establishment and a lush, green lawn.
Let’s delve into the process of transplanting Bermuda grass and explore the necessary steps for optimal results.

Understanding The Optimal Season For Transplanting
Transplanting Bermuda grass requires an understanding of the optimal season to ensure success. Several factors play a role in determining the ideal time for transplantation. The weather conditions have a significant impact on the grass’s ability to adapt and establish itself in the new location.
It is crucial to consider factors such as temperature, rainfall, and humidity when deciding on the transplanting season. Extreme temperatures or harsh weather conditions can stress the grass and hinder its growth. Additionally, the availability of sunlight and the soil’s moisture level should be taken into account.
Choosing the right season will provide the grass with the best chance of survival and successful establishment in its new environment. By considering these factors, you can ensure a successful transplanting process for Bermuda grass.
Assessing The Readiness Of Bermuda Grass For Transplantation
Bermuda grass transplantation success hinges on accurately assessing its readiness. The following signs determine if it’s fitting for transplanting. First, observe the grass’s growth stage. Look for well-established root systems and healthy rhizomes. Next, check for a deep green color, indicating optimal photosynthesis.
Also, inspect the grass for dense coverage, indicating maturity. Additionally, consider the time of year, as transplanting during the growing season offers higher chances of success. Furthermore, assess the grass’s length, aiming for a height between 1. 5 to 2 inches.
Lastly, check for minimal weed presence, ensuring a healthy, weed-free transplant. By meticulously evaluating these signs, you can determine the readiness of the Bermuda grass for transplantation, securing a successful outcome.
How to Transplant Bermuda Grass: Step by Step Guide
Clearing The Transplanting Area
To prepare the area for transplanting Bermuda grass, it is crucial to remove any existing vegetation or debris. This can be achieved by using proper tools and techniques for effective clearing. By clearing the designated area before transplanting, you create a clean slate for the Bermuda grass to thrive.
This step is essential to ensure that the grass can establish its roots properly and receive adequate nutrients. Clearing the area thoroughly can also help prevent any competition from weeds or other unwanted plants. Using the appropriate tools and techniques will help you efficiently remove any obstacles that may hinder the growth of the Bermuda grass.
So, take the time to clear the transplanting area diligently before proceeding with the transplantation process.
Leveling The Ground
Leveling the ground is a crucial step for successful Bermuda grass transplantation. A level surface ensures uniform water distribution, preventing pooling and drainage issues. To achieve proper leveling, follow these step-by-step instructions. Begin by removing any obstacles such as rocks or debris from the area.
Next, use a rake or shovel to loosen the soil, breaking up clumps and smoothing out any bumps. Compact the soil lightly to create a solid foundation. Use a long straightedge or a board to check for uneven areas and adjust accordingly.
Finally, water the area thoroughly to settle the soil and repeat the leveling process if needed. By carefully following these guidelines, you can create an optimal surface for transplanting Bermuda grass, ensuring its successful growth and establishment.
Soil Preparation
Soil preparation is a vital step for transplanting Bermuda grass successfully. Understanding the soil requirements for Bermuda grass is essential for optimal growth. The first step is to assess the soil’s drainage capabilities and make sure it is well-drained. Next, remove any weeds or debris from the area to create a clean space.
It’s important to test the soil pH level and adjust it accordingly to match Bermuda grass’s preference. Additionally, incorporating organic matter like compost or manure can improve soil fertility and provide necessary nutrients. Tilling the soil to a depth of 6-8 inches helps loosen compacted soil and improves air circulation.
Finally, ensure the soil is moist but not overly wet before transplanting Bermuda grass plugs. Taking these essential steps will prepare the soil for successful Bermuda grass transplantation.
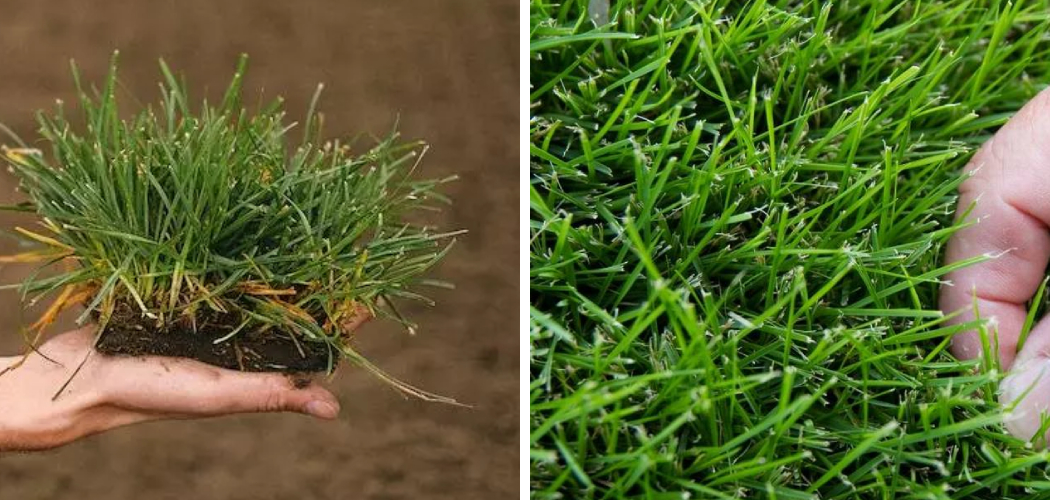
Lifting And Separating The Grass
Transplanting Bermuda grass requires gentle techniques to lift and separate the grass without causing root damage.
Transporting Bermuda Grass To The New Location
Transporting Bermuda Grass to the new location involves following best practices to ensure viability. Strategies to protect the grass from drying out during transit are crucial. Proper handling and care are essential. A key tip is to water the lawn deeply before digging it up.
This helps retain moisture in the root system. It’s important to excavate the Bermuda grass carefully, ensuring the entire root ball is intact. Using a sharp shovel or spade, cut a wide and neat perimeter around the grass. Lift the grass gently, taking care not to damage the roots.
Place the grass in a sturdy container or wrap it loosely in burlap to preserve moisture. During transportation, avoid exposing the grass to prolonged sunlight or wind. Once at the new location, promptly plant the Bermuda grass, ensuring the root system makes good contact with the soil.
Following these guidelines will help guarantee a successful transplant of Bermuda grass.
Planting Bermuda Grass In The New Location
Planting Bermuda grass in a new location requires proper spacing and installation guidelines. After transplanting, it is crucial to care for the grass immediately. One guideline is to ensure you accurately space the transplanted Bermuda grass to promote healthy growth.
Another guideline is to install the grass at the right depth, making sure the roots are in contact with the soil. Adequate watering is essential during the first few weeks to help the grass establish roots. It is important to avoid overwatering, as it can lead to shallow root growth.
Regular mowing is necessary to maintain the desired height, but be careful not to remove more than one-third of the grass blade at each mowing. Fertilizing the grass with a balanced nitrogen-based fertilizer can encourage healthy growth. By following these guidelines, you can successfully transplant Bermuda grass and ensure its long-term health.
Watering Schedule For Newly Transplanted Grass
Establishing an appropriate watering routine for newly transplanted Bermuda grass is crucial for promoting healthy growth. The key is to strike a balance between overwatering and underwatering. While it may seem tempting to water frequently, it’s important to avoid excess moisture which can lead to root rot.
On the other hand, inadequate watering can cause the grass to wither and die. To avoid these extremes, follow these tips. Firstly, water the transplanted grass thoroughly immediately after planting to ensure deep root penetration. Next, monitor the moisture level regularly and water as needed, keeping in mind that Bermuda grass prefers to dry out slightly before the next watering.
Additionally, consider factors such as temperature and rainfall when determining the watering frequency. Remember that consistency is crucial, so establish a schedule and stick to it. By following these guidelines, you can ensure the successful transplantation and healthy growth of your Bermuda grass.
Mowing And Fertilizing Transplanted Bermuda Grass
Mowing and fertilizing transplanted Bermuda grass requires careful attention. After transplantation, wait until the grass has established before mowing. This usually takes about two to three weeks. When mowing, maintain a height of 1 to 1. 5 inches for optimal growth.
Avoid cutting the grass too short, as it can stress the plants. For fertilization, it is best to wait four to six weeks after transplantation. Apply a balanced fertilizer with equal amounts of nitrogen, phosphorus, and potassium. Follow the manufacturer’s instructions for application rates and frequency.
Avoid over-fertilizing, as this can result in excessive top growth and weak root development. By adhering to these recommended mowing heights and fertilization techniques, you can ensure the successful establishment of transplanted Bermuda grass.
Dealing With Potential Challenges And Issues
When transplanting Bermuda grass, it’s important to be aware of potential challenges that may arise. One common problem is dealing with pests, diseases, and weeds. These can wreak havoc on your newly transplanted grass and hinder its growth. To tackle pests, it’s advisable to regularly inspect your lawn for signs of infestation and take appropriate action.
In the case of diseases, proper irrigation, and maintenance practices such as regular mowing can help prevent their occurrence. Weeds, on the other hand, can be controlled by implementing a pre- and post-emergent herbicide program. It’s crucial to follow the instructions on the herbicide label to avoid damaging the Bermuda grass.
By taking these effective solutions into consideration, you can ensure a successful transplantation process for your Bermuda grass.
Frequently Asked Questions For How To Transplant Bermuda Grass
Can Bermuda Be Transplanted?
Yes, Bermuda can be transplanted without difficulty, allowing it to grow in a new location.
How Do You Transplant Bermuda Runners?
To transplant Bermuda runners, follow these steps: 1. Prepare the new location by removing weeds and loosening the soil. 2. Dig holes, spacing them about 12 inches apart. 3. Gently lift the Bermuda runners from the original location, being careful not to damage the roots.
4. Place the runners in the holes and cover with soil, ensuring that the roots are well-covered. 5. Water the transplanted runners thoroughly to help them establish in their new location.
Can You Transplant Grass From One Part Of The Yard To Another?
Yes, you can transplant grass from one part of your yard to another.
How Do You Prepare Ground For Bermuda Grass?
To prepare the ground for Bermuda grass, follow these steps: 1. Clear the area of any existing vegetation or debris. 2. Loosen the topsoil with a rake or tiller to improve drainage and root penetration. 3. Test the soil pH and adjust it to the recommended range for Bermuda grass.
4. Apply a layer of organic matter, such as compost, to enrich the soil and promote healthy growth. Remember to water the area thoroughly before planting Bermuda grass seeds or laying sod for optimal results.
Conclusion
With these simple steps, you can successfully transplant Bermuda grass and enjoy a beautiful, lush lawn. Keep in mind the proper timing, ensuring the grass is in its active growth phase and the weather conditions are favorable. Prepare the new planting area thoroughly, removing any rocks, weeds, or debris that may inhibit growth.
Take care not to damage the grass roots during the transplantation process, being gentle and precise with your digging. Once transplanted, provide the newly transplanted grass with proper care, including regular watering and fertilization. Remember, patience is key as the grass adapts to its new environment and establishes strong roots.
By following these guidelines, you’ll be able to successfully transplant Bermuda grass and create a vibrant, healthy lawn that adds beauty to your outdoor space.