To remove the lid from a Roundup sprayer, twist it counterclockwise until it comes off. If you’re looking to remove the lid from your Roundup sprayer, you can follow a simple process.
Just twist the lid counterclockwise until it loosens and comes off. This will allow you to access and refill the sprayer with your desired liquid. Removing the lid is an essential step in maintaining and using your Roundup sprayer effectively.
By understanding how to remove the lid properly, you can ensure a smooth and hassle-free experience when using your sprayer for weed control or other applications. We will guide you through the process of removing the lid from your Roundup sprayer, making it easier for you to handle and operate.
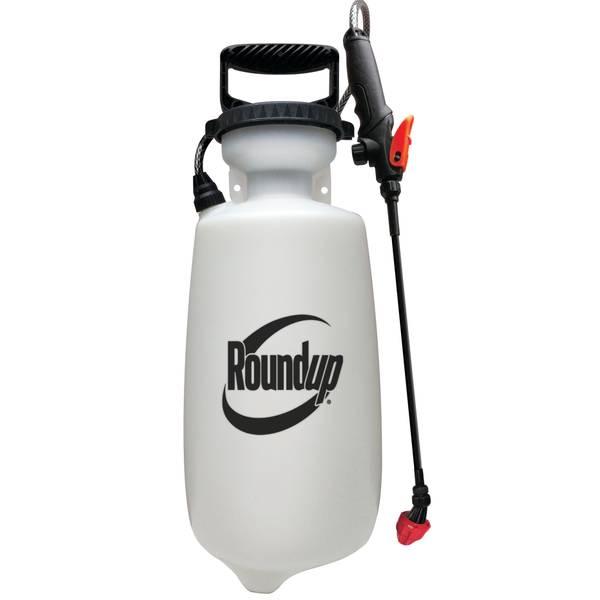
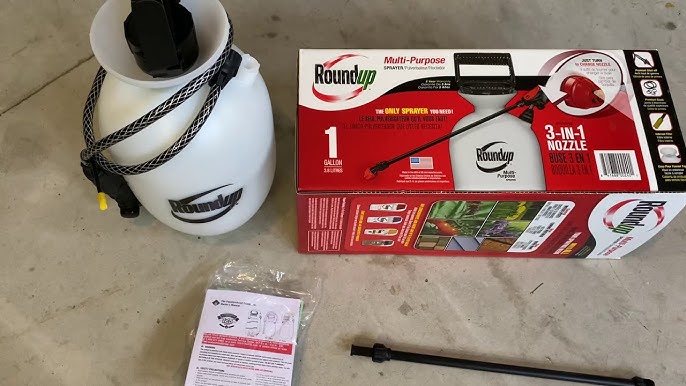
Credit: www.farmandfleet.com
Preparation For Lid Removal
Before you can start using your Roundup Sprayer to tackle those pesky weeds in your garden, it’s important to know how to properly remove the lid. This preparation for lid removal is crucial to ensure a smooth and hassle-free gardening experience. In this guide, we will walk you through the steps to gather the necessary tools and take the necessary safety precautions before removing the lid of your Roundup Sprayer.
Gathering The Necessary Tools:
Before you begin removing the lid from your Roundup Sprayer, it’s essential to have the right tools at hand. Here is a list of items you’ll need:
| Tools | Description |
| Flathead screwdriver | A flathead screwdriver will help you pry open the lid easily. |
| Protective gloves | Wearing protective gloves is important to shield your hands from any potentially harmful chemicals. |
| Clean cloth or towel | Having a clean cloth or towel nearby will come in handy to wipe away any excess liquid or dirt. |
Ensuring Safety Precautions:
Prior to removing the lid from your Roundup Sprayer, it’s crucial to take certain safety precautions. These precautions will help protect both you and your surroundings from any potential hazards. Here are the steps to ensure safety:
- Choose a well-ventilated area: It’s important to work in a well-ventilated area to prevent the accumulation of fumes.
- Wear protective clothing: Put on long sleeves, long pants, closed-toe shoes, and safety goggles to protect your skin and eyes from any accidental exposure to the chemical.
- Read and follow the manufacturer’s instructions: Familiarize yourself with the Roundup Sprayer’s user manual and follow the recommended guidelines for lid removal.
- Ensure the sprayer is depressurized: Before attempting to remove the lid, make sure the sprayer is depressurized to avoid any sudden releases of pressure.
By following these simple steps, you’ll be well-prepared to remove the lid from your Roundup Sprayer safely and efficiently. Now that you have gathered the necessary tools and taken the proper safety precautions, it’s time to move on to the next steps in our lid removal guide.
Understanding The Lid Assembly
When it comes to using a Roundup sprayer, one of the most important aspects is being able to remove the lid assembly. Whether you need to clean the sprayer, refill it with solution, or replace a damaged part, understanding the lid assembly is essential. In this section, we will discuss the different parts of the lid assembly, their functions, and how to identify them.
Identifying Different Parts Of The Lid Assembly
The lid assembly of a Roundup sprayer consists of several key components. By being able to identify these parts, you will have a better understanding of how they work together and how to remove them when needed. The main parts of the lid assembly include:
| Part | Description |
|---|---|
| Lid | The top cover that protects the inner components of the sprayer. |
| Pressure Relief Valve | A safety feature that releases excess pressure from the sprayer. |
| Pump Handle | The handle used to pressurize the sprayer. |
| Pressure Gauge | A gauge that indicates the pressure level inside the sprayer. |
| Strainer Basket | A mesh basket that filters out debris from the solution. |
| Nozzle | The final point of discharge for the spray solution. |
Understanding Their Functions
Each part of the lid assembly serves a specific function in the overall operation of the Roundup sprayer. Here’s a breakdown of their functions:
- The lid provides a protective covering for the inner components, ensuring they are shielded from external elements and potential damage.
- The pressure relief valve is a safety feature that prevents the sprayer from becoming over-pressurized. It releases excess pressure to maintain safe operating conditions.
- The pump handle is used to build pressure inside the sprayer. By pumping the handle, you create pressure that is necessary to propel the solution out through the nozzle.
- The pressure gauge indicates the pressure level inside the sprayer. It allows you to monitor and adjust the pressure to achieve optimal spray coverage.
- The strainer basket acts as a filter, removing any debris or particles from the solution before it reaches the nozzle. This helps prevent clogging and ensures a consistent spray pattern.
- The nozzle is the final point of discharge for the spray solution. It determines the spray pattern and plays a crucial role in achieving effective and precise application.
By understanding the functions of each part, you can troubleshoot any issues that may arise during the removal or assembly process. This knowledge will also help you maintain and operate your Roundup sprayer more effectively.
How to Remove Lid from Roundup Sprayer: Step by Step Guide
Removing the lid from your Roundup sprayer is a simple and essential step to ensure proper maintenance and cleaning. By following this step-by-step process, you can effortlessly remove the lid and access the reservoir for refilling or cleaning.
1. Removing The Spray Wand
The first step in the lid removal process is to detach the spray wand from the sprayer. To do this, carefully twist counterclockwise to loosen the wand from the nozzle. Once the wand is loose, set it aside in a safe place.
2. Releasing Pressure From The Sprayer
Before attempting to remove the lid, it is crucial to release any built-up pressure inside the sprayer to avoid any potential accidents. Start by locating the pressure-release valve on the sprayer. Turn the valve counterclockwise to release the pressure. Ensure that you do this in an area away from your face and others.
3. Detaching The Pump Handle
Once the pressure is released, you can proceed to detach the pump handle from the sprayer. Grip the handle firmly and twist it counterclockwise to loosen it from the lid. Set the pump handle aside.
4. Opening The Lid
Now that the spray wand, pressure, and pump handle are detached, you are ready to open the lid. Locate the tabs or clips on the sides of the lid that secure it in place. Press the tabs or release the clips to unlock the lid.
Once the lid is unlocked, you can lift it gently, ensuring not to spill any contents inside. If the lid feels stuck, you can use a flathead screwdriver to pry it open gently.
With the lid removed, you have access to the reservoir for refilling, cleaning, or performing any necessary maintenance on your Roundup sprayer.
To ensure the durability and longevity of your sprayer, it is essential to properly remove the lid following this step-by-step process. By taking the time to perform this task correctly, you can continue to use your sprayer effectively for all your gardening and spraying needs.
Troubleshooting Common Issues
Having trouble removing the lid from your Roundup sprayer? Follow these simple steps to troubleshoot the common issues and safely remove the lid without any hassle.
Dealing With Stuck Or Stubborn Lids
Removing the lid from your Roundup sprayer can sometimes be a frustrating task, especially if it seems to be stuck or stubborn. But don’t worry, we’ve got you covered with a few troubleshooting tips to help you overcome this common issue.
If you find yourself struggling to remove the lid, here are a few simple steps you can follow:
- Make sure the sprayer is completely depressurized before attempting to remove the lid. This is important for your safety and to prevent any accidents.
- Try twisting the lid counterclockwise while applying gentle pressure. Sometimes, lids can get a little bit jammed due to prolonged use or exposure to harsh weather conditions.
- If the lid still won’t budge, try tapping it gently with a rubber mallet or using a pair of pliers with a rubber grip for better leverage. Be careful not to apply excessive force, as this could damage the lid or the sprayer itself.
- If none of the above methods work, try using a lubricant like WD-40 to loosen the lid. Apply the lubricant directly to the stuck areas and let it sit for a few minutes before attempting to twist the lid again.
By following these steps, you should be able to successfully remove the lid from your Roundup sprayer, even if it’s stuck or stubborn. However, if you’re still having trouble, it might be a sign of a more serious issue, and it’s recommended to contact the manufacturer or a professional for further assistance.
Overcoming Lid Sealing Problems
Another common issue that users may encounter with Roundup sprayers is problems with lid sealing. A proper lid seal is essential for the sprayer to function effectively and prevent leaks. If you’re experiencing lid sealing problems, here are a few steps you can take to resolve them:
- Check the condition of the rubber gasket or O-ring located inside the lid. Over time, these components can deteriorate, become damaged, or lose their elasticity, resulting in poor sealing. If you notice any signs of wear or damage, it’s important to replace the gasket or O-ring.
- Ensure that the lid is properly aligned and securely tightened. Sometimes, a loose or misaligned lid can affect the sealing performance. Double-check that the lid is aligned with the sprayer body and tighten it until you feel resistance.
- If the lid seal is still not sufficient, you can try using a food-grade silicone grease or lubricant to enhance the sealing capability. Apply a small amount of the lubricant to the rubber gasket or O-ring before reassembling the lid.
Following these steps should help you overcome lid sealing problems and ensure a tight and effective seal for your Roundup sprayer. Remember to regularly inspect and maintain the lid and its components to prevent any future issues.
Maintenance Tips For Lid Assembly
The lid assembly of your Roundup sprayer is a critical component that helps ensure proper functioning and effective herbicide application. To keep your sprayer working optimally, it’s crucial to regularly maintain and care for the lid assembly. In this section, we will explore three important maintenance tips for the lid assembly: cleaning the lid and its components, lubricating moving parts, and ensuring proper storage.
Cleaning The Lid And Its Components
Cleaning the lid and its components is essential to remove any debris or residue that may hinder the sprayer’s performance. Follow these steps to effectively clean the lid:
- Before starting the cleaning process, ensure that the sprayer is completely empty and free from any chemical content.
- Remove the lid from the sprayer by gently twisting it counterclockwise.
- Separate the different parts of the lid, including the gasket, filters, and valves.
- Thoroughly rinse each part with clean water to remove any dirt or herbicide residue.
- For stubborn residue, you can use a mild detergent or cleaning solution. Remember to rinse off any cleaning agents completely.
- Inspect each part for any signs of damage or wear. Replace any worn-out components to ensure proper functioning.
- Allow all the parts to dry completely before reassembling the lid.
Lubricating Moving Parts
Lubricating the moving parts of the lid assembly helps reduce friction, ensures smooth operation, and prolongs the lifespan of your sprayer. Follow these steps to lubricate the lid assembly:
- Ensure that the lid and its components are clean and dry before proceeding with lubrication.
- Apply a small amount of silicone-based lubricant or spray onto the moving parts such as the valve stems and gasket.
- Gently distribute the lubricant using your fingers or a clean cloth, ensuring that all moving parts are adequately lubricated.
- Wipe off any excess lubricant to prevent accumulation of dirt or debris.
Ensuring Proper Storage
Proper storage of your sprayer and its lid assembly is crucial for maintaining its performance and longevity. Follow these guidelines for proper storage:
- After each use, clean the lid and all components as mentioned earlier to remove any herbicide or dirt residue.
- Inspect the lid and its components for any signs of damage, such as cracks or leaks, which may compromise its functionality.
- Store the lid assembly in a cool and dry place, away from direct sunlight or extreme temperatures.
- Avoid storing the lid under heavy objects or placing it in a position where it may get damaged.
- Consider using a dedicated storage container or bag to keep the lid and its components organized and protected.
- Regularly check the condition of the lid assembly during storage and address any issues promptly.
Frequently Asked Questions For How To Remove Lid From Roundup Sprayer
How Do You Refill A Roundup Spray Bottle?
To refill a Roundup spray bottle, unscrew the top and pour the desired amount of Roundup concentrate into the bottle. Then, fill the rest of the bottle with water, making sure to leave enough space for shaking. Screw the top back on securely, and your Roundup spray bottle is ready for use.
How Do I Remove The Lid From A Roundup Sprayer?
To remove the lid from a Roundup sprayer, start by turning the sprayer off and relieving any pressure in the tank. Then, twist the lid counterclockwise to unlock it from the tank. Lift the lid carefully, making sure not to spill any contents.
What Should I Do If I Can’t Remove The Lid From My Roundup Sprayer?
If you’re having trouble removing the lid from your Roundup sprayer, try applying some lubricant to the lid and letting it sit for a few minutes. This can help loosen any stuck parts. If that doesn’t work, consider using a strap wrench or pliers to provide extra grip and leverage when turning the lid.
Are There Any Safety Precautions To Follow When Removing The Lid From A Roundup Sprayer?
Yes, there are safety precautions you should follow when removing the lid from a Roundup sprayer. Always wear protective gloves and eyewear to avoid contact with any chemicals. Make sure the sprayer is turned off and depressurized before attempting to remove the lid.
This will minimize the risk of accidents or spills.
Conclusion
Removing the lid from a Roundup sprayer is a simple task with the right approach. By following the step-by-step instructions in this blog post, you can easily remove the lid and ensure proper maintenance and cleaning of your sprayer. Remember to be cautious and take necessary precautions to avoid any accidents or damage.
By incorporating these tips, you can confidently and efficiently remove the lid from your Roundup sprayer, ensuring its longevity and performance.