To add a sprinkler head to an existing line, first locate the main water supply. Then, connect a t-shaped fitting to the line and attach the sprinkler head to the open end of the t-fitting.
When it comes to watering your lawn or garden efficiently, adding a sprinkler head to an existing line can be a great solution. By doing so, you can effectively distribute water in specific areas without the need for manual watering.
To accomplish this, it is important to first locate the main water supply. From there, you can connect a t-shaped fitting to the existing line, creating a secondary outlet. Finally, attach the sprinkler head to the open end of the t-fitting, providing a targeted water source. With these simple steps, you can easily expand your irrigation system and ensure a well-watered and healthy outdoor space.

Tools Required For Adding A Sprinkler Head To An Existing Line
Adding a sprinkler head to an existing line requires a few essential tools. Firstly, you’ll need a shovel to dig a hole for the new sprinkler head. Next, a pipe cutter will help you cut the existing line to create an opening for the new head.
A teflon tape or pipe thread sealant will ensure a secure connection when attaching the new head. To connect the new head, you’ll need pvc primer and cement for gluing the pieces together. Additionally, a pressure gauge will help you assess the water pressure in the line.
Finally, a screwdriver or wrench is necessary for tightening the fittings. By having these tools on hand, you’ll be prepared for the process of adding a sprinkler head to an existing line.
Step-By-Step Guide: Adding A Sprinkler Head To An Existing Line
Adding a sprinkler head to an existing line requires a step-by-step approach. Firstly, check the layout of the existing system to understand its setup. Next, identify the appropriate location for the new sprinkler head, considering the coverage and water flow.
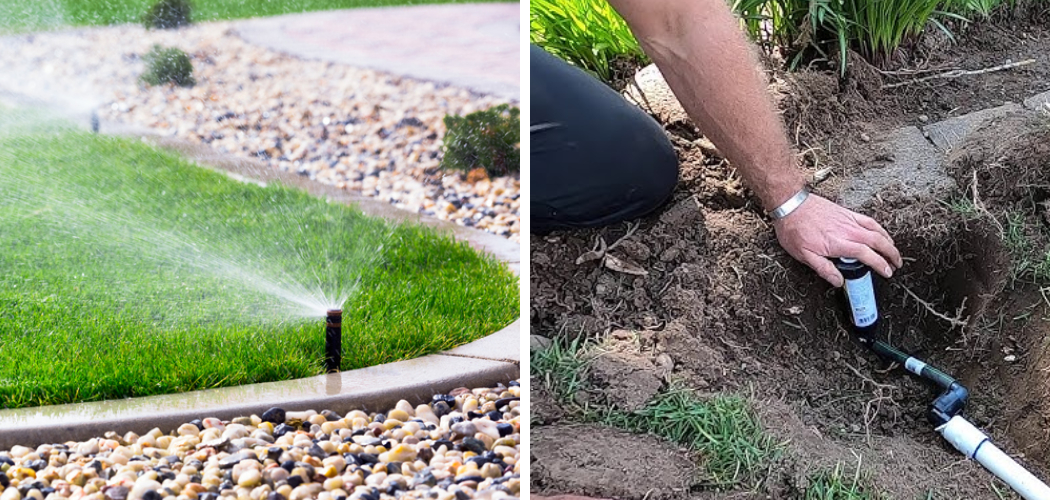
Once that’s done, gather the necessary materials like the new sprinkler head, fittings, and tools. Before starting the installation, it’s crucial to shut off the water supply to avoid any accidents. Then, dig a hole at the chosen location to accommodate the new sprinkler head.
Connect the new sprinkler head to the existing line using the appropriate fittings, ensuring a secure and leak-free connection. Finally, test the new sprinkler head to ensure it’s functioning properly. Following these steps will help you add a sprinkler head seamlessly to your existing line.
Successful Installation
When adding a sprinkler head to an existing line, there are several tips for a successful installation. First, ensure proper alignment of the sprinkler head to ensure efficient watering. Next, use teflon tape to create a secure connection between the sprinkler head and the line.
It is crucial to check for leaks by turning on the water and making necessary adjustments to prevent water wastage. Lastly, set the correct water pressure for optimal performance. By following these guidelines, you can add a sprinkler head to an existing line with ease and ensure a well-functioning irrigation system.
Common Issues And Troubleshooting
Adding a sprinkler head to an existing line can sometimes come with its own set of challenges. One common issue that may arise is problems with water flow or pressure. It’s important to ensure that the water is flowing at the optimal rate and with adequate pressure to provide proper irrigation.
Additionally, leaks or improper connections can also cause issues, leading to wasted water and inefficient sprinkler performance. Checking for any leaks and fixing them promptly will help maintain the integrity of the system. Another problem that may be encountered is obstructions in the line, such as debris or dirt.
These obstructions can restrict the water flow and affect the sprinkler head’s performance. Regular maintenance and cleaning of the line can prevent this problem. By addressing these common issues and troubleshooting accordingly, you can ensure that your sprinkler system operates smoothly and effectively.
Frequently Asked Questions Of How To Add A Sprinkler Head To An Existing Line
Can You Add Sprinkler Heads To Existing Sprinkler System?
Yes, it is possible to add sprinkler heads to an existing sprinkler system. Adding new sprinkler heads can help improve coverage and ensure that all areas of your lawn or garden are adequately watered. To begin, locate the main pipe of your existing system and determine where you would like to install the new sprinkler heads.
Next, dig a hole in the desired location and connect a new section of pipe to the main line. Attach the new sprinkler head to the end of the new pipe section using the appropriate connectors. Once connected, bury the pipe and make sure it is secure.
Adjust the sprinkler head to the desired spray pattern. It is also important to make sure that your existing system has enough water pressure to support the additional heads. If needed, consult a professional to ensure proper installation and functionality.
How Do You Attach A Sprinkler Head To Pvc Pipe?
To attach a sprinkler head to pvc pipe, follow these simple steps: 1. First, turn off the main water supply to the sprinkler system. 2. Measure the desired height for the sprinkler head and mark the pvc pipe accordingly. 3. Use a pvc cutter to cut the pipe at the marked spot.
4. Take the threaded end of the sprinkler head and apply teflon tape around it to create a tight seal. 5. Insert the threaded end into a pvc coupling or adapter that matches the size of the cut pipe. 6.
Use pvc primer and cement to secure the coupling or adapter to the pipe. 7. Allow the cement to dry completely as per the manufacturer’s instructions. 8. Finally, tightly screw the sprinkler head onto the threaded end of the coupling or adapter.
9. Turn the main water supply back on to check for any leaks. Remember to follow proper safety guidelines and local codes when working with pvc and water systems.
How Many Pop Up Sprinklers Can I Put On One Line?
You can put multiple pop-up sprinklers on one line, but the exact number depends on various factors. These factors include the water pressure and flow rate of your irrigation system, as well as the type and spacing of the sprinkler heads.
It is important to ensure that each sprinkler receives enough water to efficiently irrigate the designated area. Overloading a single line with too many sprinklers can lead to inadequate water distribution and poor performance. Consult the manufacturer’s guidelines or seek advice from a professional to determine the appropriate number of sprinklers for your specific circumstances.
How Do You Hook Up A Sprinkler System To The Main Water Line?
To hook up a sprinkler system to the main water line, follow these steps: 1. Locate the main water supply: find the main water shut-off valve, usually near the water meter or where the water line enters your property. 2. Choose an irrigation system: select the type of sprinkler system that suits your needs, such as a drip or in-ground system.
3. Design the system layout: plan the placement of sprinkler heads, valves, and pipes based on your landscape’s requirements. 4. Install the backflow preventer: connect the backflow preventer to the main water line to protect your water supply from contamination.
5. Lay out the pipes: lay down the pipes following your planned layout, connecting them to the backflow preventer and sprinkler heads. 6. Connect the system to the main water line: attach a valve manifold to the main water line and connect the pipes from the sprinkler system to it.
7. Test and adjust: turn on the main water supply and check for any leaks or malfunctions. Adjust the sprinkler heads to ensure proper coverage. 8. Maintain and monitor: regularly inspect and maintain the system to keep it working efficiently, ensuring your landscape stays well-watered.
Conclusion
Adding a sprinkler head to an existing line can be a simple way to expand the irrigation coverage in your yard. By following the steps outlined in this blog post, you can ensure that the new sprinkler head is properly installed and connected to the existing line.
Start by locating the appropriate spot for the new sprinkler head and digging a hole according to the manufacturer’s specifications. Then, connect the new sprinkler head to the existing line using the appropriate fittings and tools. Once the connection is secure, cover the hole with soil and test the new sprinkler head to ensure it is working properly.
Remember to adjust the water flow and direction of the sprinkler head as needed to properly water your landscape. With these easy steps, you can enjoy a lush and well-maintained yard all year round.