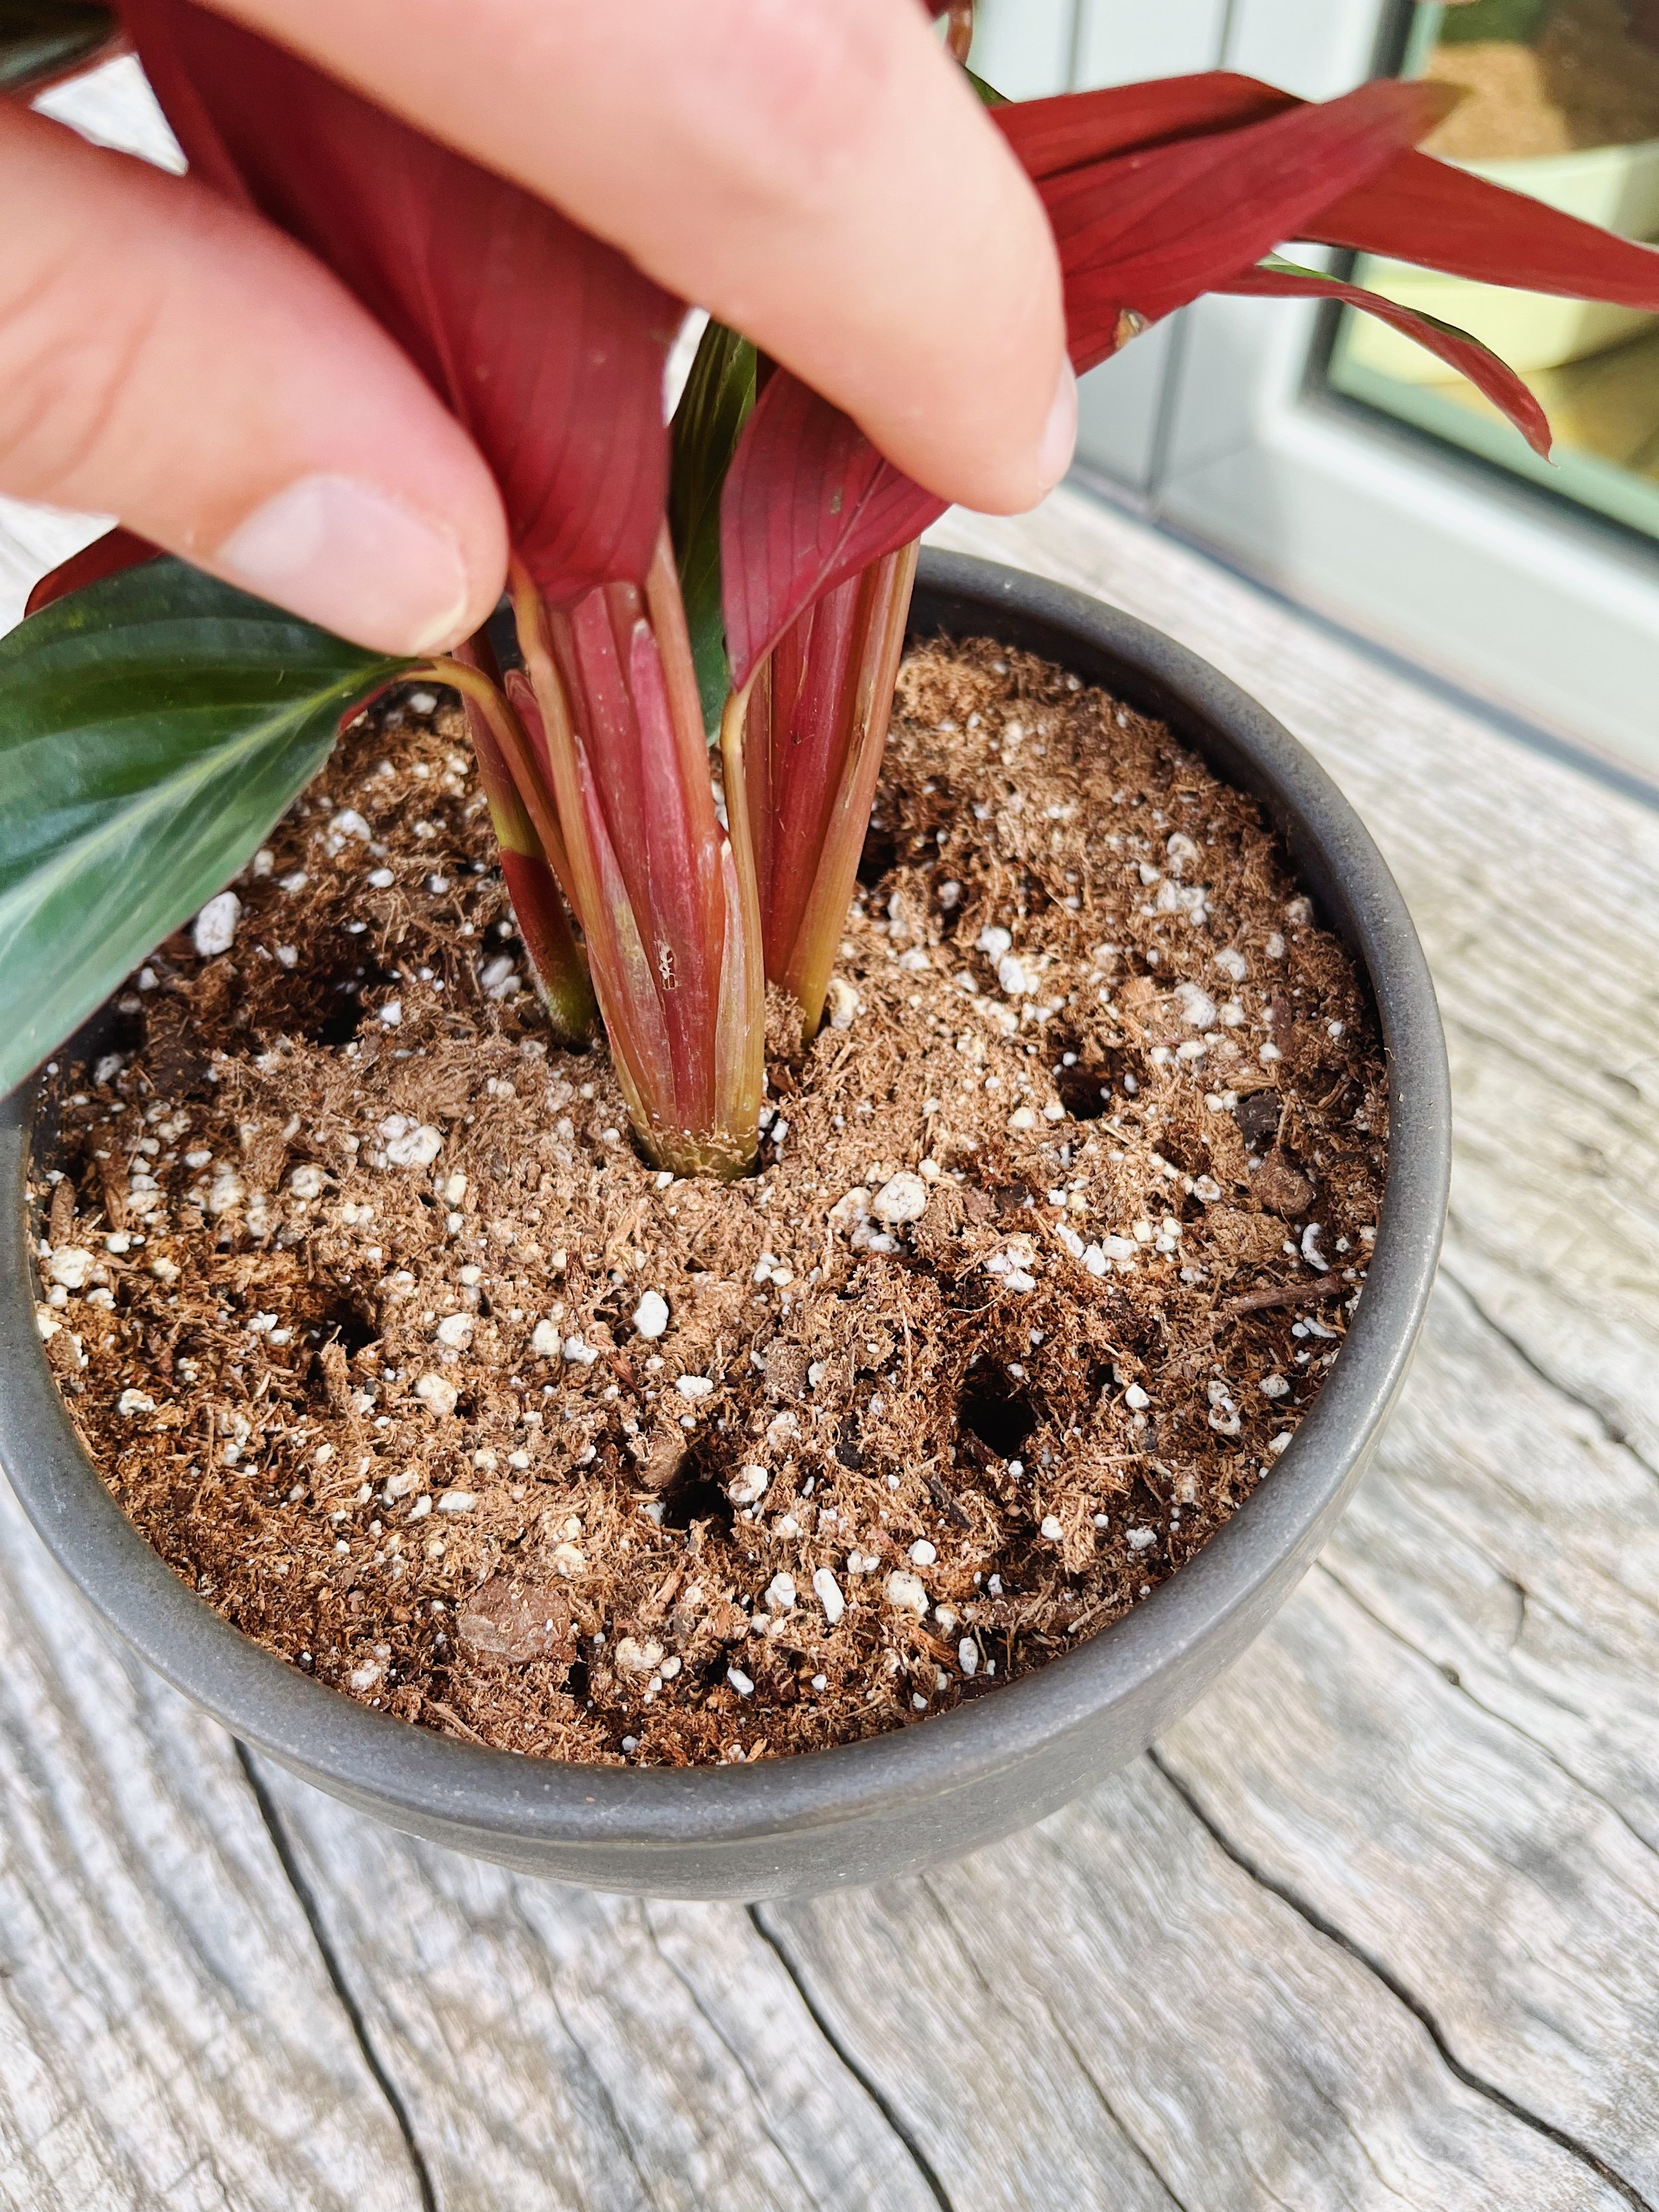
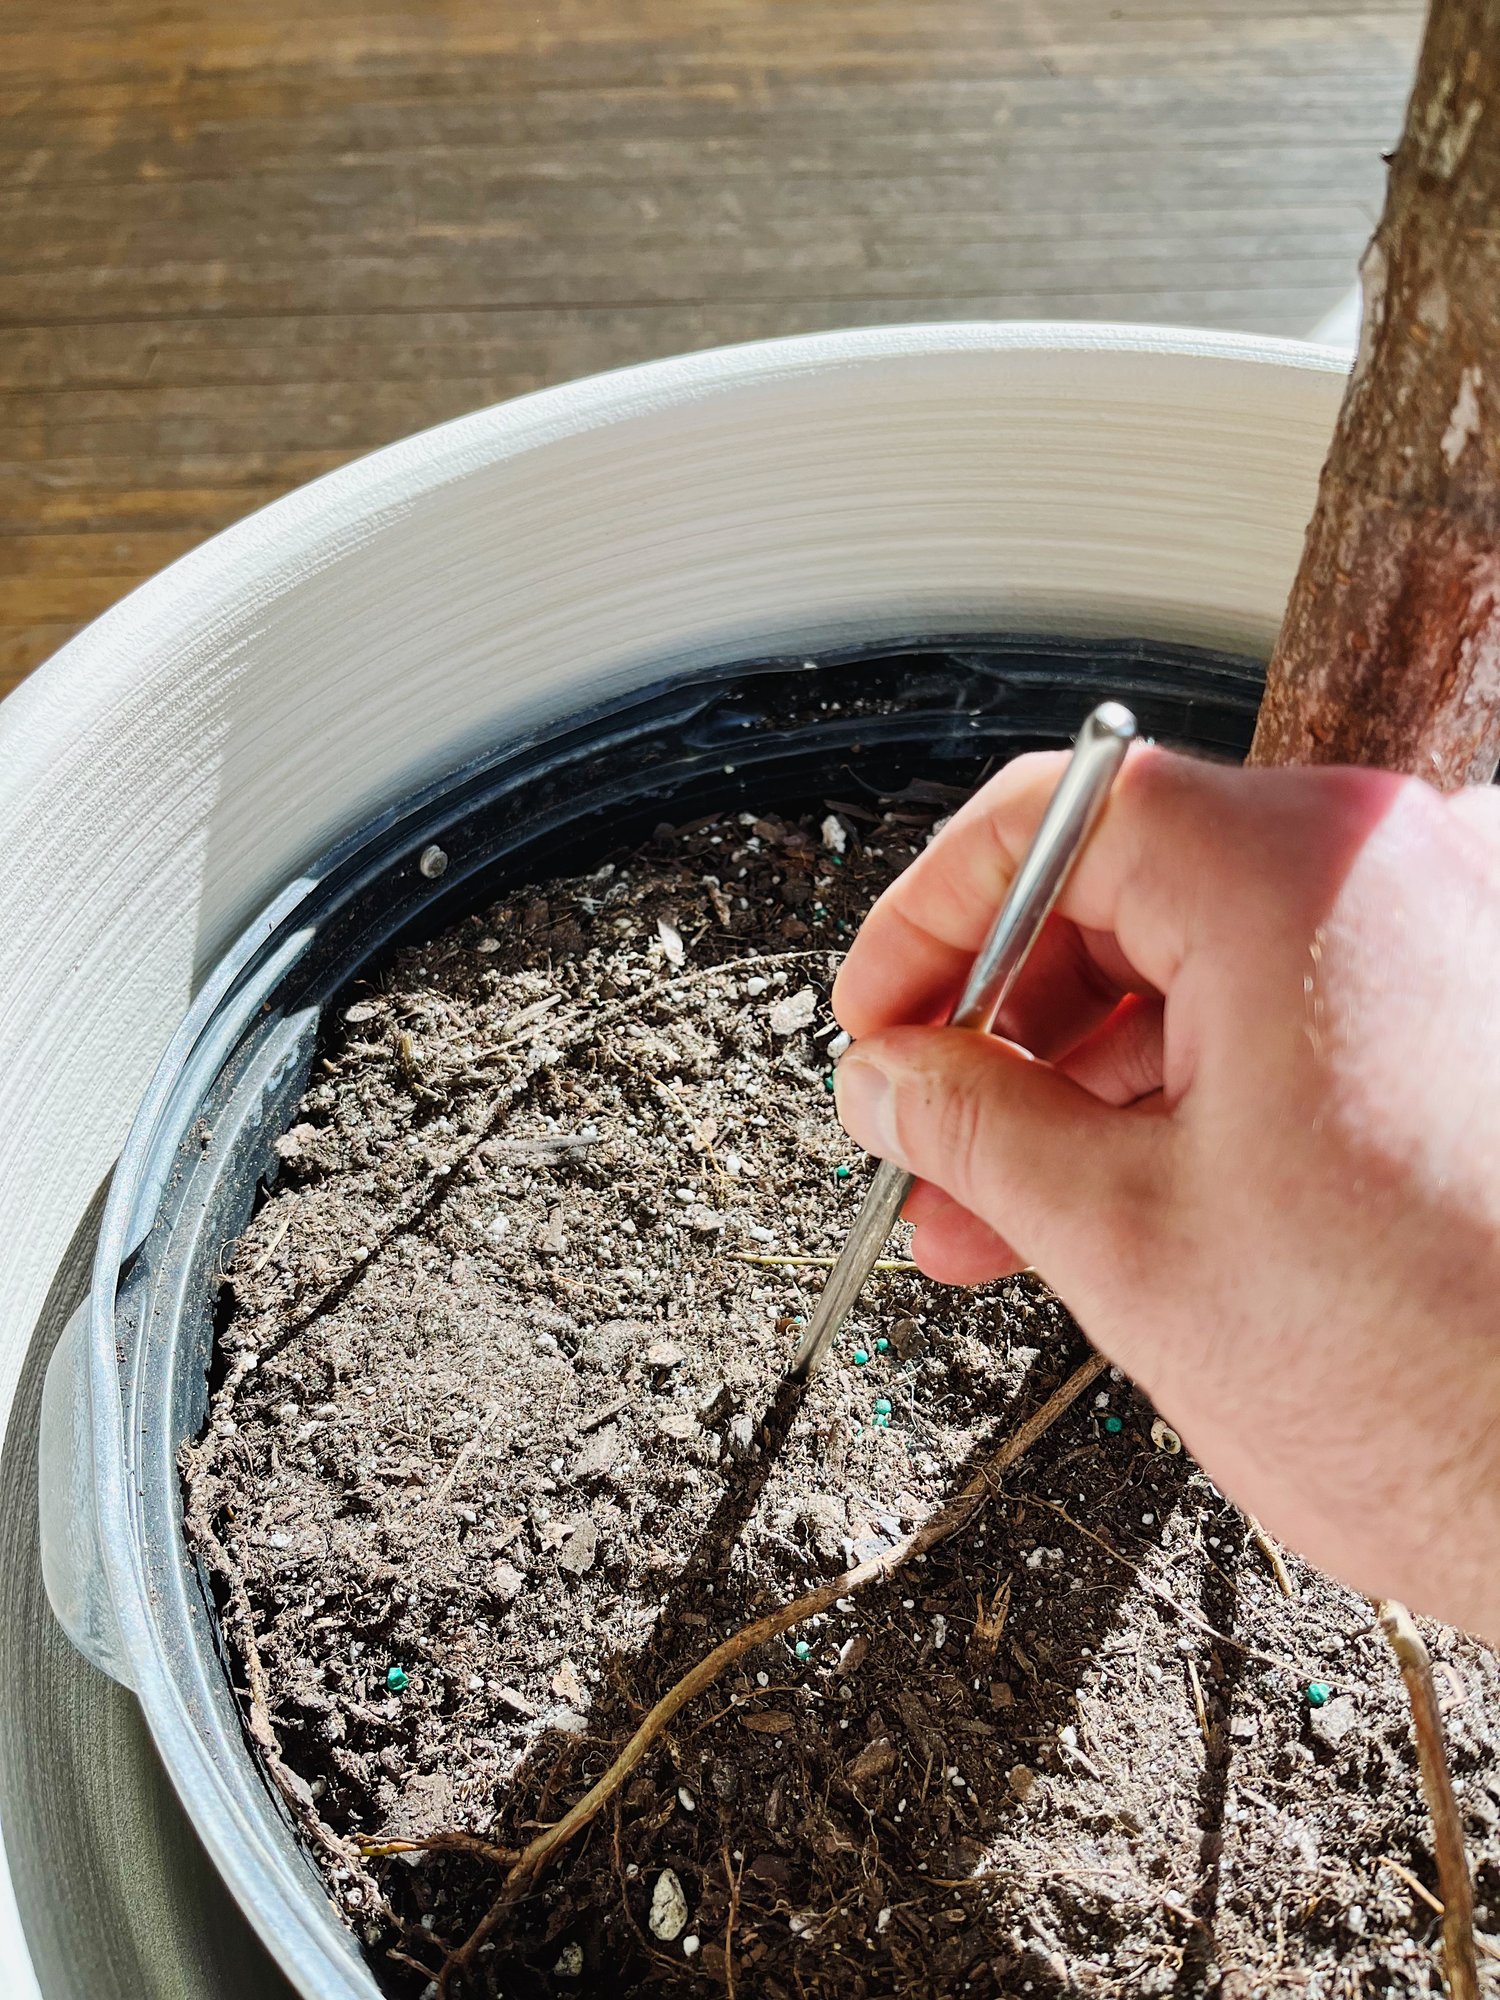
To aerate soil in pots, use a garden fork or aerating tool to create small holes in the soil. This allows air, water, and nutrients to penetrate more effectively.
Aerating soil in pots is essential for healthy plant growth. Over time, soil can compact, reducing its ability to retain moisture and nutrients. Aeration improves drainage and promotes root development. This process also helps prevent the buildup of harmful bacteria and fungi.
Regularly aerating your potted plants can enhance their overall health and vigor. Simple tools like a garden fork or specialized aerators make this task easy. For optimal results, aerate during the growing season when plants are most active. By ensuring proper aeration, you can create a thriving environment for your plants to flourish.

Credit: m.youtube.com
How to Aerate Soil in Pots : Step by Step Guide
The Importance Of Aerating Soil In Pots
Aerating soil in pots is crucial for healthy plants. It allows air, water, and nutrients to reach the roots. This process helps prevent compaction. Compacted soil limits root growth and can lead to poor plant health.
Benefits of aerating include improved drainage and stronger root systems. Healthy roots absorb water and nutrients more effectively. Plants will grow faster and produce more flowers or fruits.
Signs your potting soil needs aeration include:
- Soil feels hard and compacted.
- Water pools on the surface.
- Plants show slow growth.
- Yellowing leaves may appear.
Tools And Materials Needed For Soil Aeration
To aerate soil in pots, use specific tools. Common tools include:
- Garden Fork: Helps break up compacted soil.
- Aeration Tool: Designed for creating holes in the soil.
- Screwdriver: Can work in smaller pots for aeration.
- Drill with a Bit: Efficient for larger pots.
Selecting the right material is essential for plant health. Organic materials like:
- Compost: Adds nutrients and improves drainage.
- Perlite: Increases soil aeration and reduces compaction.
- Sand: Improves drainage in heavy soils.
Choose materials based on your plants’ needs. Each type supports growth differently.
Preparation Steps Before Aerating
Water your plants a day before aerating. This helps to soften the soil. Soft soil is easier to aerate.
Check for any surface debris. Remove leaves, twigs, or other unwanted items. Clear surfaces ensure better aeration.
Use a small rake or your hands for this task. Make sure the surface is clean and smooth.
Preparing the pot properly makes aerating much easier. Healthy soil leads to healthier plants.
Manual Aeration Techniques
Manual aeration helps plants breathe better. Use a fork or stick to create holes. Insert the tool into the soil and twist gently. This allows air and water to reach roots.
Specialized aeration tools can make the job easier. Aerators have sharp spikes that penetrate the soil. They create evenly spaced holes. Choose a tool that fits your pot size.
Remember to aerate regularly. This promotes healthy growth and strong roots. Healthy plants thrive with good soil aeration.
Incorporating Aerating Materials
To aerate soil effectively, use perlite and vermiculite. These materials improve drainage and air circulation. Perlite is a lightweight volcanic glass. It helps keep soil loose and prevents compaction. Vermiculite absorbs moisture and nutrients, enhancing soil health.
Organic matter options can also boost aeration. Compost is a great choice. It adds nutrients and improves soil structure. Peat moss retains moisture and creates air pockets in the soil. Coconut coir is another good option. It promotes drainage while keeping soil moist.
| Material | Benefits |
|---|---|
| Perlite | Improves drainage, prevents compaction |
| Vermiculite | Enhances moisture retention, nutrient absorption |
| Compost | Adds nutrients, improves soil structure |
| Peat Moss | Retains moisture, creates air pockets |
| Coconut Coir | Promotes drainage, keeps soil moist |

Credit: stumpplants.com
Aftercare Following Aeration
After aerating, water the soil thoroughly. This helps restore moisture quickly. Wait a few days before watering again. Check the soil moisture level first.
Monitor soil compaction regularly. Look for signs like poor drainage or hard surfaces. Use a moisture meter to check the level. If the soil feels compacted, aerate again.
Keep an eye on your plants. Healthy growth shows that the aeration worked. Adjust watering habits based on the soil’s needs.
Common Mistakes To Avoid
Over-aerating the soil can damage plant roots. It removes too much soil, leaving them exposed. This can lead to stress and even death of the plants. Always check the soil before aerating.
Regular aeration is important. Neglecting this task can cause soil to become compacted. Compacted soil limits air and water flow. This can result in poor plant growth. Aim to aerate at least once a month.
Use proper tools for aeration. A soil auger or fork works well. Make sure to create small holes, about 2-4 inches apart. This method helps maintain a healthy balance for your plants.

Credit: stumpplants.com
Advanced Techniques And Tips
Layering in pots helps with drainage and airflow. Start with a layer of small stones at the bottom. This allows excess water to escape. Next, add a layer of activated charcoal. It keeps the soil fresh and prevents bad smells.
On top of that, use high-quality potting mix. This mix should have good organic material. It helps retain moisture while allowing air circulation. Remember, use a mix with perlite or vermiculite for better aeration.
Seasonal changes can affect aeration needs. Spring is a great time to aerate pots. Soil often compacts during winter. During summer, check for dry spots. Add water to keep soil moist but not soggy.
In fall, prepare pots for winter. Remove dead plants and refresh the soil. This keeps the pots healthy for the next growing season.
Frequently Asked Questions
How Often Should I Aerate Potted Soil?
You should aerate potted soil every 6 to 12 months. This helps maintain healthy root systems and improves drainage. Regular aeration allows nutrients and water to penetrate more effectively. Adjust the frequency based on plant growth and pot size. Always monitor your plants for signs of stress.
What Tools Are Best For Soil Aeration?
Use a soil aerator, fork, or chopstick for effective aeration. A soil aerator is designed specifically for this task. A garden fork can also work by creating holes in the soil. For small pots, a chopstick is a handy tool.
Choose the right tool based on your pot size.
Can I Aerate Soil Without Tools?
Yes, you can aerate soil without tools. Simply use your fingers to gently poke the soil. This method is effective for small pots and delicate plants. Ensure you don’t disturb the roots too much. Aerating without tools is quick and can be done regularly.
Why Is Aeration Important For Potted Plants?
Aeration is crucial for potted plants to ensure proper drainage. It helps prevent soil compaction, allowing air and nutrients to reach roots. Healthy roots lead to stronger plants and better growth. Regular aeration reduces the risk of root rot and promotes overall plant health.
Conclusion
Aerating soil in pots is essential for healthy plant growth. It improves drainage and allows roots to breathe. Regular aeration helps prevent compaction and encourages nutrient absorption. By following the methods outlined, you can ensure your potted plants thrive. Happy gardening, and enjoy the benefits of well-aerated soil!

