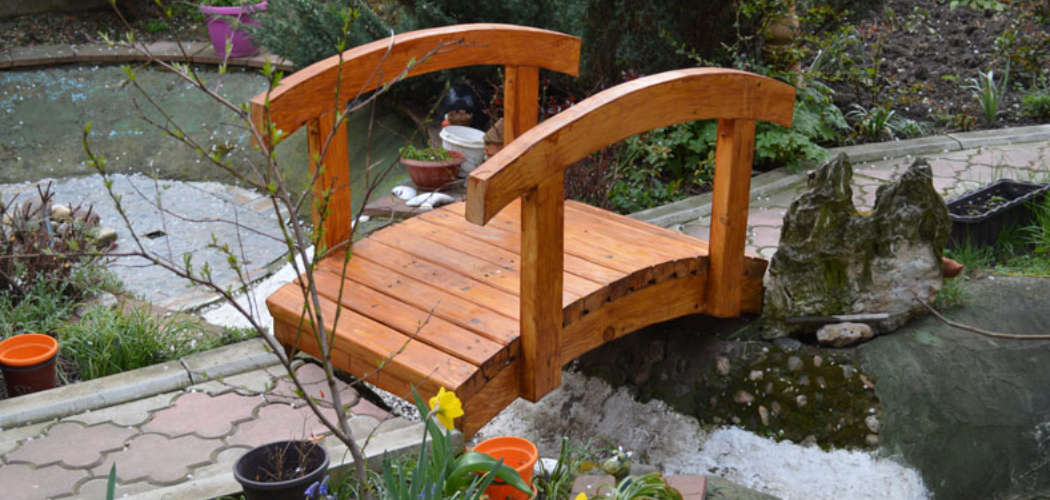
To build a garden bridge, follow these steps: plan the design, gather materials, construct the foundation, build the bridge, and add finishing touches. A garden bridge can be a beautiful addition to your landscape, providing a charming pathway over a small pond.
Whether you have a large or small garden, building a bridge can add character and create a focal point in your outdoor space. By following the right steps and using the proper materials, you can build a garden bridge that enhances the beauty of your garden and provides a functional and aesthetically pleasing feature for years to come.
So, let’s dive in and learn how to build a garden bridge.

Materials Needed For Building A Garden Bridge
To build a garden bridge, you will need various materials. Wood is essential for the bridge’s framework and decking. Screws and nails are necessary for fastening the wooden pieces together securely. Brackets provide additional support for the structure. Concrete is required for creating strong and stable foundations.
Waterproof sealant helps protect the wood from moisture and prolongs its lifespan. Sandpaper ensures a smooth finish, while paint or stain adds a decorative touch. By having these materials ready, you can begin constructing a beautiful garden bridge to enhance your outdoor space.
So gather everything you need and get started on this exciting diy project!
Step-By-Step Guide To Building A Garden Bridge
Building a garden bridge requires careful planning and designing. First, choose the perfect location for your bridge. Gather all the necessary tools and materials to begin the construction process. Preparing the site is crucial to ensure a solid foundation for your bridge.
With proper planning and attention to detail, you can create a beautiful garden bridge that adds charm and functionality to your outdoor space. Remember to consider the aesthetics and functionality of the bridge when designing. By following these steps, you can successfully build a garden bridge that enhances the overall beauty of your garden.
So, let’s get started on your garden bridge project and bring a touch of elegance to your outdoor sanctuary.
Building The Foundation
Building a garden bridge starts with digging foundation holes to anchor the structure securely. The holes should be deep enough for stability. After digging, pour concrete footings to provide a solid base. This ensures the bridge can withstand various weather conditions and heavy loads.
Next, install support beams to connect the foundation holes. These beams will bear the weight and give the bridge its shape. Carefully secure them in place, ensuring they are level and properly aligned. Building a garden bridge requires precision and attention to detail, but the end result will be a beautiful addition to your outdoor space.
Constructing The Bridge Deck
Constructing the bridge deck involves cutting the bridge boards and assembling the deck structure. The first step is to cut the bridge boards to the desired size. Next, assemble the deck structure using the prepared materials. Finally, fasten the cut boards to the deck structure securely.
It is important to ensure that the boards are aligned properly and tightly fastened to create a sturdy deck. Pay close attention to detail during this process to achieve a high-quality garden bridge. By following these steps, you can successfully build a garden bridge with a solid and durable deck.
With careful construction, your garden bridge will be a beautiful addition to your outdoor space.
Adding Railings And Side Supports
To add decorative railings, choose a design that complements your garden bridge’s style. Measure and cut the railings to fit the length of the bridge. Position them securely, ensuring they are level and parallel to the bridge’s edges. Install the railings using screws or brackets, securing them firmly in place.
To attach side supports, measure and cut wooden beams according to the bridge’s dimensions. Position the supports perpendicular to the railings, secure them with screws or nails. Side supports will provide stability and reinforce the bridge structure for added safety.
Make sure they are evenly spaced and aligned with the railings. Test the bridge for stability, making any necessary adjustments before enjoying your newly completed garden bridge.
Finishing Touches
Sanding and smoothing the wood surface is an essential step in building a garden bridge. It ensures a clean and even finish. Applying sealant is crucial to protect the bridge from weather damage and prolong its lifespan. This creates a barrier against moisture and prevents rot.
Painting or staining the bridge adds a touch of aesthetic appeal, enhancing its overall look. Choose a color or stain that complements your garden’s theme and style. The right finishing touches can make the bridge a focal point in your outdoor space.
Remember to follow the manufacturer’s instructions for each step to achieve the best results. Build a garden bridge that not only functions as a pathway but also enhances the beauty of your garden.
Tips For Maintaining A Garden Bridge
Tips for maintaining a garden bridge include regular cleaning and inspection, as well as making repairs and reinforcement as needed. Applying fresh sealant or paint periodically is also important. By keeping the bridge clean and regularly inspecting it for any damage, you can ensure its longevity and prevent any further issues.

If you notice any wear and tear or structural problems, make the necessary repairs and reinforce weak areas to avoid any accidents or collapse. Additionally, applying a fresh coat of sealant or paint will help protect the bridge from weathering and extend its lifespan.
Remember to follow these maintenance tips to keep your garden bridge in excellent condition for years to come.
Frequently Asked Questions For How To Build A Garden Bridge
How Do I Build A Garden Bridge?
To build a garden bridge, start by choosing the right location in your garden. Measure the area and gather the necessary materials like wood, concrete, and nails. Next, create a sturdy foundation using concrete footings. Construct the bridge’s frame and attach the posts and rails.
Finally, add the decking and decorative elements to complete your garden bridge.
What Materials Do I Need To Build A Garden Bridge?
To build a garden bridge, you’ll need materials like pressure-treated lumber for the frame, cedar or redwood for the decking, concrete for footings, nails or screws for assembly, and waterproof sealant to protect the wood. Additionally, you may want to include decorative elements such as railings, arches, or lighting to enhance the beauty of your garden bridge.
Can I Build A Garden Bridge Without Professional Help?
Yes, building a garden bridge is a manageable diy project that you can complete without professional help. However, it’s essential to have basic woodworking skills and access to the necessary tools. Planning, measuring accurately, and following step-by-step instructions or tutorials will ensure successful construction.
Don’t hesitate to ask for help or advice from knowledgeable friends or resources if needed.
Conclusion
Finally, with just a little bit of time and dedication, you can create a stunning garden bridge that will not only enhance the visual appeal of your outdoor space but also provide a functional and practical feature. By following these step-by-step instructions, you can confidently build a garden bridge that will withstand the test of time.
Remember to carefully plan your design, choose the right materials, and take accurate measurements to ensure a successful project. Whether you prefer a simple and rustic wooden bridge or a more ornate and decorative style, building your own garden bridge can be a rewarding experience.
So grab your tools, roll up your sleeves, and get ready to transform your garden into a picturesque oasis with a beautiful, handcrafted bridge.