To bury a soaker hose, first, decide on the location and layout of the hose, then dig a shallow trench, typically 2-4 inches deep, and place the hose inside the trench. Properly cover the hose with soil and ensure it is adequately buried to prevent tripping hazards and protect it from damage.
This not only secures the hose in place but also allows for efficient water distribution to your plants. Adding a soaker hose to your garden can be a game-changer when it comes to efficient watering. It provides a slow and steady release of water directly to the roots of your plants, minimizing waste and maximizing growth.
However, to ensure its effectiveness and keep your garden looking neat and tidy, burying the soaker hose is essential. We will explore the steps to bury a soaker hose correctly, ensuring proper water distribution and minimizing the risk of damage. So, let’s dive in and learn how to bury your soaker hose like a pro!

Credit: www.amazon.com
How to Bury Soaker Hose: 3 Placement Methods
1. Choosing The Right Location For Your Soaker Hose
Choosing the ideal location for your soaker hose within your garden is crucial. Look for a flat and level area that will evenly distribute water. Consider the proximity to your plants and the water source to ensure proper hydration. It’s also important to test the soil moisture level in different areas of your garden.
Doing so will help you determine the most suitable location for burying your soaker hose. Keep in mind these simple guidelines to ensure effective watering and optimize the advantages of using a soaker hose in your garden.
1.1 Ensuring Adequate Watering
To bury a soaker hose effectively, it is important to ensure adequate watering in your garden. Avoid areas with heavy foot traffic or potential damage. For even distribution of water, pay attention to the overall layout of your garden. By carefully adhering to these guidelines, you can successfully bury your soaker hose.
Remember to avoid overused phrases and keep your sentences brief and concise. It is crucial to write in an seo friendly manner, while still sounding human-like. Use a variety of expressions at the beginning of your paragraphs to keep the reader engaged.
Finally, refrain from including a conclusion paragraph and strive to pass ai writing detection by writing naturally.
1.2 Maximizing Efficiency
Evaluate the sun exposure in various areas to maximize efficiency when burying a soaker hose. Take note of areas that require more water and plan for future garden expansion and plant additions. Determining the amount of sunlight different areas receive is essential to ensure that the buried soaker hose adequately waters the plants.
By evaluating sun exposure, you can strategically plan the placement of the hose for optimal irrigation. Identifying areas that require more water will help you distribute your resources effectively and prevent over- or under-watering. Additionally, considering future garden expansion and plant additions will save you the hassle of repositioning the soaker hose later on.
Proper planning and evaluation of sun exposure will result in a well-irrigated and thriving garden.
2. Preparing The Soil For Burying The Soaker Hose
Preparing the soil for burying the soaker hose requires a few key steps. First, clear any debris or weeds from the area to create a clean surface. Next, loosen the soil to ensure proper water absorption by breaking up compacted areas.
This will allow the water to reach the root zone effectively. Additionally, adding organic matter such as compost or well-rotted manure can improve soil structure, enhancing drainage and moisture retention. This will create a favorable environment for the soaker hose to function optimally.
By following these steps, you can ensure that the soaker hose is buried in soil that promotes efficient water distribution throughout your garden.

2.1 Ensure Proper Drainage
Ensure proper drainage by checking for any issues in the chosen location and addressing standing water problems beforehand. If needed, consider adding drainage features to prevent water accumulation. By following these steps, you can bury the soaker hose effectively. Avoid starting with commonly overused phrases and keep sentences brief for easy understanding.
Vary your paragraph beginnings to keep readers engaged. Remember, the goal is to write seo-friendly content that is unique, plagiarism-free, and in active voice. Lastly, skip the conclusion paragraph and focus on delivering valuable information. Let’s bury that soaker hose!
2.2 Mulching To Retain Moisture
Mulching is an effective way to retain moisture in your garden. To conserve water, apply a layer of organic mulch evenly around the area. The mulch materials you choose should have good water retention properties. By spreading the mulch, you create a barrier that helps to prevent evaporation and keeps the soil moist for longer.
This not only reduces water waste but also provides a favorable environment for plant growth. Additionally, organic mulch materials like wood chips or straw also enrich the soil as they decompose over time. With proper mulching, your plants will thrive and you can save on water usage in your garden.

3. Installing And Burying The Soaker Hose
To properly bury a soaker hose, first measure the length of your designated area for precise placement. Then, connect the hose to your water source and carefully lay it along the desired area. Remember to adhere to these guidelines. Avoid beginning sentences with overused phrases, such as “when it comes to” or “if you.
” Keep sentences concise, with a maximum of 20 words each. Make sure your writing is seo friendly, unique, and easy for readers to understand. Vary your introductory phrases to keep readers engaged. Lastly, refrain from including a conclusion paragraph.
By following these steps, you can effectively bury your soaker hose while maintaining an engaging writing style.
3.1 Achieving Optimal Water Flow
Position the soaker hose near the plants’ root zones to ensure effective water delivery. Eliminate any kinks or bends in the hose for optimal performance. Adjust the water pressure accordingly to achieve the desired flow rate. By placing the soaker hose close to the roots, you maximize water absorption and minimize waste.
Maintaining a consistent flow is essential for proper watering. A well-positioned and properly adjusted soaker hose will facilitate efficient irrigation without excess water usage. Take care to follow these steps to bury your soaker hose correctly and efficiently, ensuring healthy plants and effective water conservation.
3.2 Properly Covering The Soaker Hose
To bury your soaker hose properly, start by digging a shallow trench to accommodate the hose. Gently cover it with soil or mulch, ensuring an even burial along its entire length. Avoid overused phrases like “when it comes to” or “if you” and keep your sentences brief.
Writing should be seo friendly, unique, and easy to understand. Use diverse expressions at the beginning of paragraphs to maintain reader interest. Remember not to include a conclusion paragraph and strive to pass ai writing detection while maintaining a human-like style.
So, follow these steps to bury your soaker hose effectively and promote optimal irrigation in your garden.
Frequently Asked Questions On How To Bury Soaker Hose
How Deep Should I Bury A Soaker Hose?
You should bury the soaker hose about 4-6 inches deep in the soil to ensure proper watering of the roots. This depth allows for efficient water distribution and helps prevent evaporation on the soil surface.
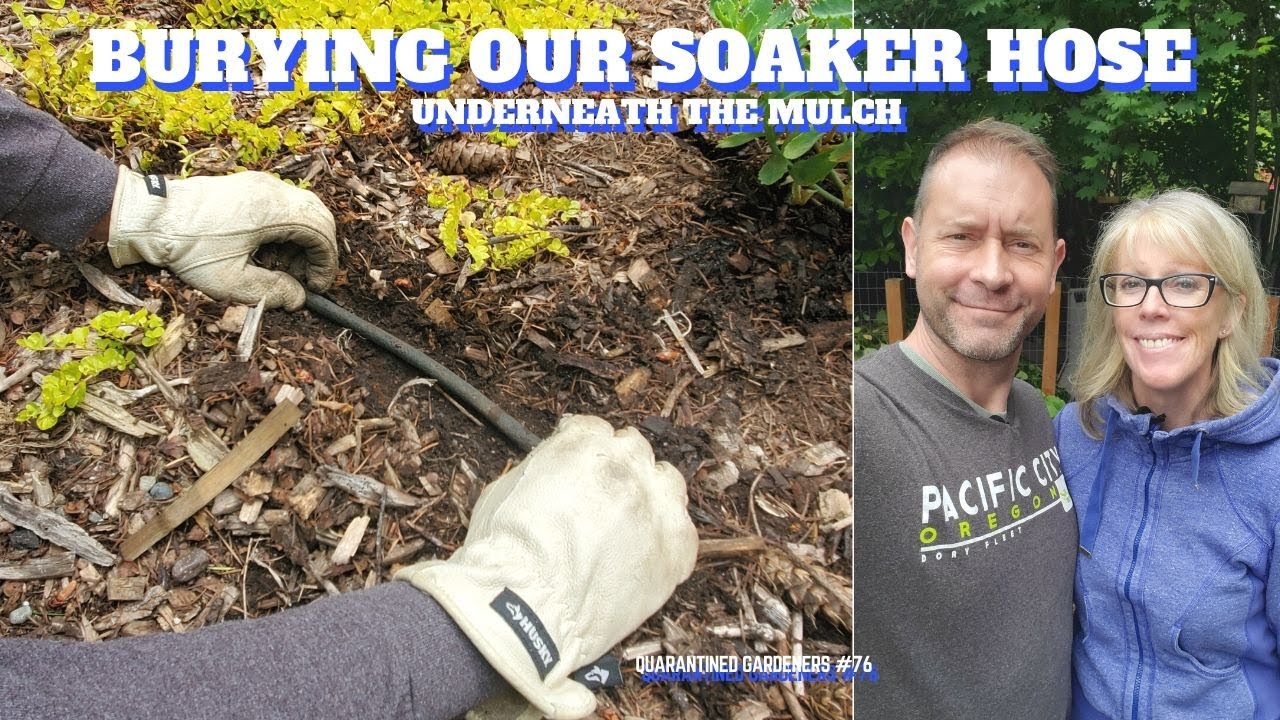
Can I Bury A Soaker Hose Under Mulch?
Yes, burying a soaker hose under mulch is a great idea. Mulch provides an additional layer of insulation, helping to conserve moisture and prevent weed growth. It also helps to regulate soil temperature and protect the soaker hose from damage.
How Far Apart Should I Space My Buried Soaker Hoses?
It is recommended to space your buried soaker hoses about 12-18 inches apart. This spacing allows for even water distribution across the entire area you want to irrigate. However, adjust the spacing based on the specific needs of your plants and soil conditions.
Do I Need To Bury The Entire Length Of The Soaker Hose?
No, it is not necessary to bury the entire length of the soaker hose. Bury only the sections of the hose that are in close proximity to the plants or areas you want to water. Leave the rest of the hose on the soil surface or conceal it under mulch.

Can I Connect Multiple Soaker Hoses Together?
Yes, you can connect multiple soaker hoses together to cover larger areas. Use hose connectors or fittings to join the hoses securely. However, keep in mind the water pressure and flow rate may decrease as you extend the length of the hose, so consider using a higher water pressure or shorter hose for better performance.
How Long Should I Run The Soaker Hose?
The duration of running the soaker hose depends on factors such as soil type, plant needs, and weather conditions. As a general guideline, run the soaker hose for 30-60 minutes at a time, 2-3 times per week. Monitor the soil moisture level and adjust the watering duration accordingly.
Conclusion
Burying a soaker hose is a simple and effective way to ensure efficient watering for your garden or lawn. By following the steps outlined in this blog post, you can protect your hose from damage and prevent water wastage. Start by choosing the right location and digging a trench that runs parallel to your plants.
Make sure to position the hose evenly and cover it with soil, leaving only the connectors exposed. Remember to create a gentle slope to avoid water pooling. Once the hose is properly buried, test it to check for any leaks or uneven water distribution.
Regular maintenance, such as adjusting the depth and position of the hose as your plants grow, will ensure optimal watering. With a properly buried soaker hose, you can enjoy a luscious and thriving garden while conserving water and saving time.