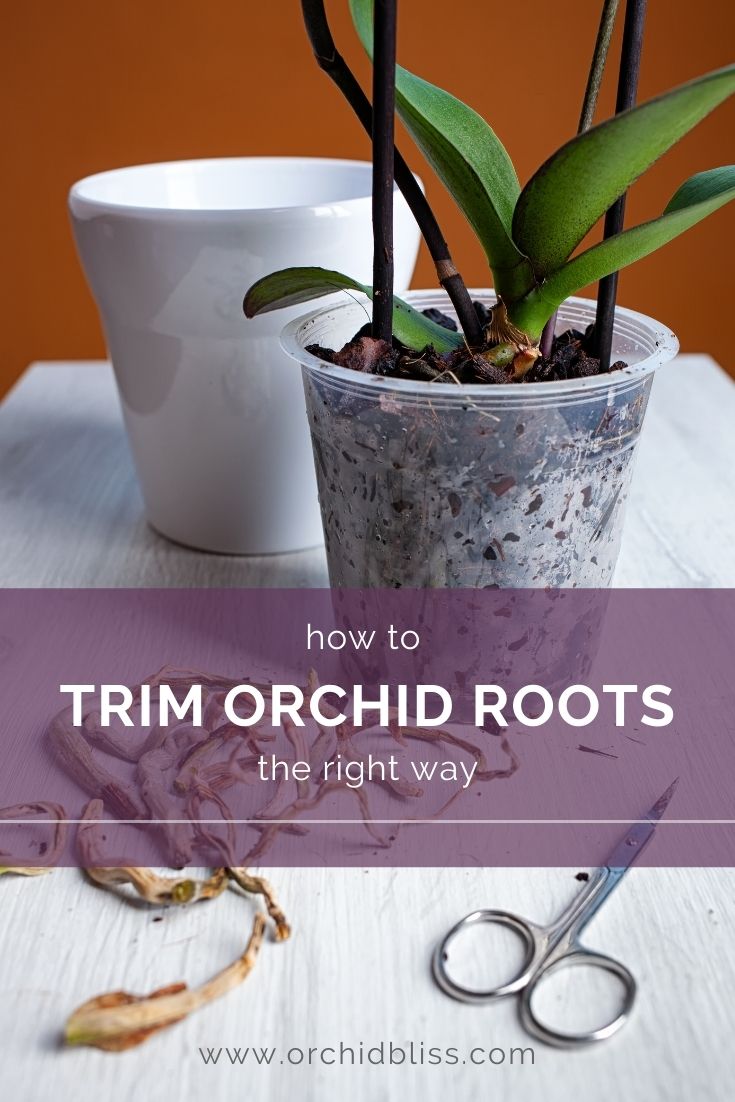
To clean orchid roots, gently remove them from the pot and rinse them under lukewarm water.

Credit: orchidanu.com
Why Clean Orchid Roots Regularly
Orchid roots play a crucial role in the overall health and growth of the plant. Regularly cleaning these roots is essential to maintain their optimal condition and ensure the well-being of your orchid.
Clean roots are vital for proper nutrient absorption and water uptake by the orchid. When roots become clogged with dust, dirt, or debris, they can’t perform these functions efficiently, disrupting the plant’s growth and leading to various issues like root rot or nutrient deficiencies.
By cleaning orchid roots, you remove any accumulation of dirt, dust, or old potting mix, providing the roots with better access to air and water. This promotes healthier root growth and helps the plant absorb nutrients more effectively.
| Promotes growth | Cleaning orchid roots stimulates new root growth, leading to healthier plants and better blooms. |
| Prevents diseases | Regular cleaning helps reduce the chances of fungal or bacterial infections that can affect orchid roots. |
| Improves nutrient absorption | Clearing away debris allows orchid roots to absorb nutrients effectively, ensuring proper plant development. |
| Enhances air circulation | Clean roots promote better air circulation, preventing suffocation and root rot caused by excessive moisture. |
Signs That Indicate The Need To Clean Orchid Roots
Signs that indicate the need to clean orchid roots include yellowing or brown roots, root rot or decay, and soil or debris buildup. When orchid roots start turning yellow or brown, it can be a sign of root issues and may require cleaning. Root rot or decay often occurs when the roots are sitting in water for too long, causing them to become mushy and black. This can be detrimental to the overall health of the plant and should be addressed promptly. Soil or debris buildup around the roots can hinder proper air circulation and also lead to root problems. Regularly cleaning the roots can help to prevent these issues and ensure the orchid’s longevity.
Supplies Needed For Cleaning Orchid Roots
- Garden shears
- Pruning snips
- Sterilized scissors
- Soft brush
- Sterilized tweezers
- Distilled or rainwater
- Orchid potting mix
Cleaning orchid roots requires a few essential supplies for the task. You will need garden shears and pruning snips to cut away any dead or rotting roots. Make sure to use sterilized scissors to prevent the spread of diseases or infections. A soft brush can be used to gently remove dirt and debris from the roots. Additionally, sterilized tweezers are useful for carefully removing any unwanted materials or adjustment of roots.
Using distilled or rainwater is important, as tap water may contain chemicals that can harm orchid roots. Finally, it’s recommended to have orchid potting mix on hand to repot the orchid after cleaning the roots. By having these supplies ready, you can effectively clean and maintain the health of your orchid roots.
How to Clean Orchid Roots: Step by Step Guide
Step 1: Preparing For Root Cleaning
When cleaning orchid roots, it is important to start by preparing for the task at hand. The first step is to gather the necessary supplies, which may include a pair of sharp scissors or garden shears, a clean brush or toothbrush, orchid potting mix, clean pots or containers, and distilled or filtered water. Having all of these items ready will streamline the cleaning process and ensure that you have everything you need on hand.
Once you have your supplies ready, it is important to create a clean and organized workspace. Clear away any clutter and ensure that you have enough space to work comfortably. Keeping your workspace clean will help prevent the spread of any potential pests or diseases and will also make it easier to see what you are doing. Additionally, make sure you have proper lighting and ventilation in your workspace to help you see the orchid roots clearly and provide fresh air during the cleaning process.
Step 2: Removing The Orchid From Its Pot
Gently hold the orchid by the base of its stem. Tap or slide the pot to loosen the roots. Carefully lift the orchid out without causing damage.
Step 3: Inspecting The Roots
In Step 3 of cleaning orchid roots, it is important to carefully inspect the roots for any signs of damage or decay. Look closely for dead or mushy roots that need to be removed. These can hinder the overall health of the plant and should be trimmed away using sterilized tools. On the other hand, note any healthy roots that are white or green, as these indicate a good condition. Healthy roots play a crucial role in the growth and development of orchids, absorbing nutrients and providing stability. By keeping a close eye on the roots and removing any unhealthy ones, you help ensure that your orchid maintains its vitality.
Step 4: Trimming Dead Or Decayed Roots
|
When trimming dead or decayed roots of your orchid, it is important to have sterilized shears or pruning snips. Using these tools, you can cut away the dead or rotten roots carefully. |
|
Make clean cuts just above the damaged area, ensuring you avoid cutting healthy roots. By doing this, you allow the orchid to focus its energy on the healthy roots and promote better growth. |
Step 5: Brushing Away Soil And Debris
Gently brush the remaining soil off the roots, taking care not to damage or break any healthy roots. Use a soft brush to remove stubborn dirt or debris that may cling to the roots. Holding the orchid over a sink or a tray, lightly brush the roots with gentle strokes, allowing the loose soil to fall off. Be cautious not to apply too much pressure or force, as this can harm the delicate root system.
Brushing away the soil and debris is an essential step in cleaning orchid roots, as it allows for better inspection of the roots and helps to identify any potential issues. Additionally, removing the excess soil promotes good airflow and enables the roots to uptake nutrients more efficiently.
Step 6: Rinsing And Soaking The Roots
Cleaning orchid roots is an essential step in maintaining the health and vitality of your orchid plant. Once you have carefully removed the orchid from its pot and gently separated the roots, it is time to move on to step 6: rinsing and soaking the roots.
Place the orchid roots under running water to thoroughly rinse away any debris or old potting mix. Using distilled or rainwater is recommended to avoid mineral buildup that can be harmful to orchids. The gentle flow of water helps to clean the roots without causing any damage.
After rinsing the roots, it is important to allow them to soak for a few minutes in a clean container. This helps to hydrate and refresh the roots, giving them a chance to absorb moisture and nutrients. You can use the same distilled or rainwater for soaking, ensuring that your orchid gets the best care possible.
Step 7: Drying And Potting The Orchid
In Step 7 of cleaning orchid roots, it is important to properly dry and repot the orchid to promote its overall health and growth. After rinsing the roots to remove any remaining debris or old potting mix, gently shake off any excess water. It is crucial to handle the orchid roots delicately to avoid causing damage.
Allow the roots to air dry naturally for a few hours before repotting. This ensures that any remaining moisture evaporates and reduces the risk of root rot. During this time, it is recommended to place the orchid in a well-ventilated area with indirect light.
Once the roots are completely dry, it is time to repot the orchid. Choose a clean container that is slightly larger than the one it was previously in. Fill it with fresh orchid potting mix, specially designed for orchid growth. Carefully place the plant in the new container, spreading the roots out evenly.
Remember to avoid overcrowding and ensure that the roots have enough space to grow. Gently press the potting mix around the roots, securing the plant in its new home. With proper care and maintenance, your orchid will thrive in its refreshed environment.
Step 8: Caring For Newly Cleaned Orchid Roots
After cleaning your orchid roots, it’s important to provide them with the appropriate light, temperature, and humidity conditions to promote healthy growth. Orchids thrive in bright, indirect light, so place them near a window with filtered sunlight. Avoid exposing them to direct sunlight as it can cause leaf burns.
Temperature is another crucial factor to consider. Most orchids prefer temperatures between 60°F and 80°F during the day and slightly cooler temperatures at night. However, specific orchid varieties may have different temperature requirements, so research your orchid’s specific needs.
Humidity is essential for orchids as they originate from tropical regions. Aim for a humidity level of around 50-70%. You can increase humidity by using a humidifier or placing the orchid on a tray filled with water and pebbles.
To prevent overwatering or underwatering, closely monitor the watering routine. Orchids usually require watering once a week, but this can vary depending on factors such as potting medium, humidity levels, and temperature.
Maintaining a regular fertilization and orchid care routine is equally important. Use a balanced orchid fertilizer according to the instructions provided, usually every 2-4 weeks during the growing season. Lastly, keep an eye out for any signs of pests or diseases, as early detection is key to effective treatment.
Final Thoughts On Cleaning Orchid Roots
A regular cleaning routine for orchid roots is crucial in ensuring their overall health and vitality. By gently and patiently cleaning the roots, you can remove dirt, debris, and potential pests that may hinder their growth.
Start by inspecting the roots and identifying any dead or damaged parts, indicated by their withered appearance or soft texture. Use a pair of sterilized scissors or pruners to carefully trim away these damaged portions, ensuring a clean cut.
Next, rinse the roots under lukewarm water to remove any loose debris or dirt. Be cautious not to use hot or cold water, as extreme temperatures can shock the roots.
If you encounter stubborn debris, you can gently brush the roots using a soft-bristled toothbrush. Avoid using excessive force, as this can harm the delicate root system.
Once cleaned, allow the roots to air dry for a few minutes before placing the orchid back into its pot with fresh orchid potting mix. This process can be repeated every few months or when necessary to maintain the health and vigor of your orchids.
Regularly cleaning orchid roots allows for better nutrient absorption, resulting in healthier and more vibrant plants. By following these simple steps, you can ensure that your orchids thrive and bloom beautifully.
| Benefits of Regular Root Cleaning | Tips for Gentle and Patient Cleaning |
|---|---|
| Enhanced nutrient absorption | Inspect roots for damage before cleaning |
| Removal of dirt, debris, and potential pests | Rinse with lukewarm water |
| Promotion of healthier root growth | Use a soft-bristled toothbrush for stubborn debris |
| Prevention of root rot | Allow roots to air dry before repotting |
Frequently Asked Questions On How To Clean Orchid Roots
Should You Clean Orchid Roots?
Cleaning orchid roots is not necessary unless they are rotting or damaged. Healthy roots should be left undisturbed to maintain the plant’s stability and ability to absorb nutrients and water.
Is It Safe To Spray Orchid Roots With Hydrogen Peroxide?
Spraying orchid roots with hydrogen peroxide is safe and beneficial. It helps prevent infections and promotes healthy root growth. However, it’s important to use a dilute solution (1-2%) and be cautious not to overdo it, as excessive use may damage the delicate roots.
Should Orchid Roots Be Soaked In Water?
No, orchid roots should not be soaked in water. Overwatering can lead to root rot and other diseases. Instead, allow the roots to dry out between watering to prevent waterlogged conditions.
What Do You Soak Orchid Roots In Before Repotting?
Soak orchid roots in water or a diluted orchid fertilizer solution for about 15-30 minutes before repotting. This helps hydrate the roots and stimulate new growth.
Conclusion
To sum up, understanding how to clean orchid roots is crucial for maintaining a healthy and thriving plant. Through gentle yet thorough cleaning techniques, orchid owners can prevent the accumulation of debris and promote proper absorption of nutrients. Remember to be cautious and avoid overwatering or damaging the delicate roots.
With regular care, your orchid will continue to flourish and impress with its vibrant blooms. Happy gardening!