
To clean a snowblower carburetor, disconnect the fuel line and carefully remove the carburetor. Next, disassemble the carburetor, clean all components with carburetor cleaner, and use compressed air to remove any residue.
Finally, reassemble the carburetor and reconnect the fuel line. A snowblower carburetor can accumulate dirt, debris, and old fuel over time, causing it to clog or malfunction. Regular cleaning of the carburetor is crucial for optimal performance. By following a few simple steps, you can easily clean the carburetor and ensure your snowblower runs smoothly during the winter months.
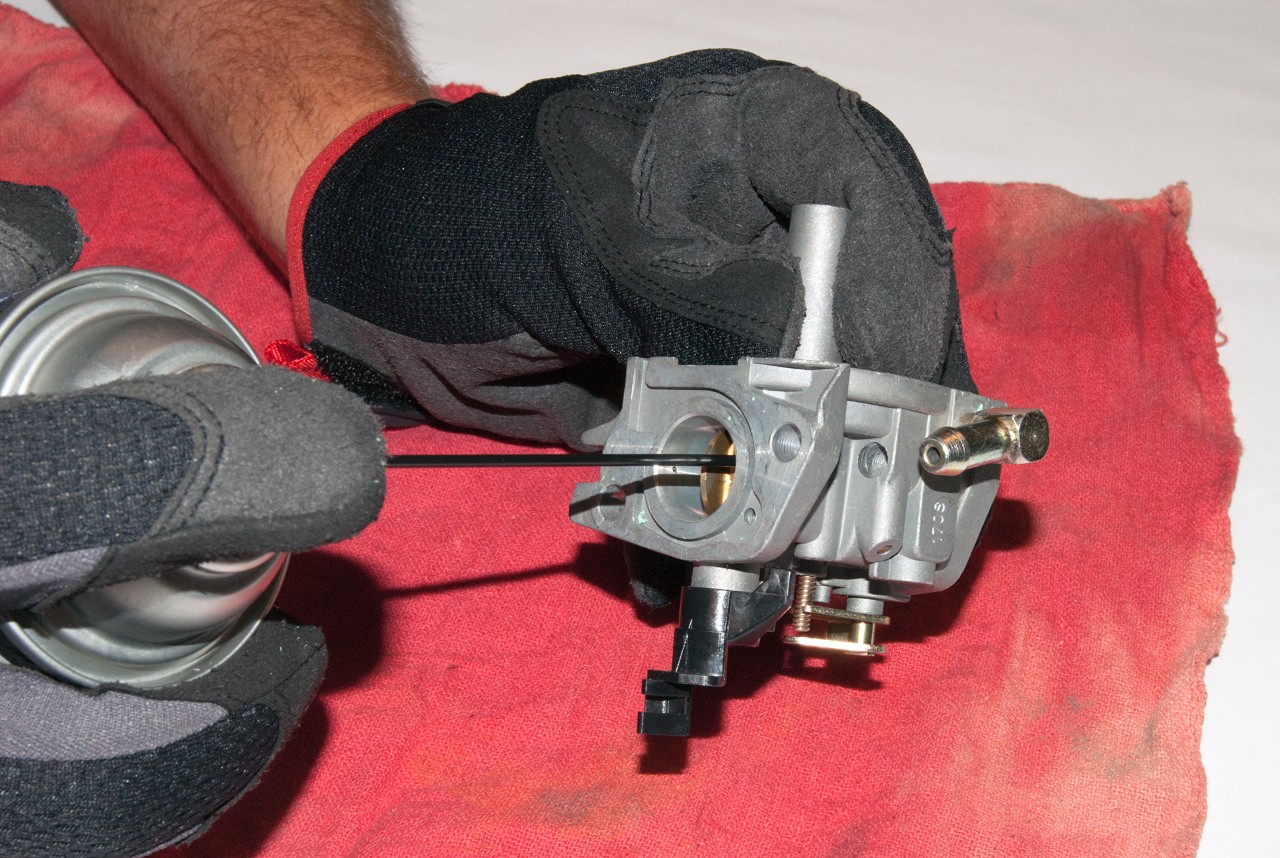
Credit: www.searspartsdirect.com
This guide will provide you with step-by-step instructions on how to effectively clean a snowblower carburetor, helping you maintain the longevity and efficiency of your equipment.
Understanding The Importance Of Cleaning Snowblower Carburetor
Significance Of Regular Carburetor Cleaning
Regular cleaning of the snowblower carburetor is crucial for its optimal performance and longevity. The carburetor plays a vital role in the engine’s efficiency by providing the correct fuel-air mixture. Over time, dirt, debris, and stale fuel can accumulate in the carburetor, leading to clogs and blockages. By cleaning the carburetor regularly, you ensure that it remains free of any obstructions, allowing the engine to function smoothly.
Impact On Snowblower Performance
A clean carburetor directly impacts the performance of your snowblower. When the carburetor is clogged or dirty, it hampers the engine’s ability to start and run efficiently. This can result in decreased power output, misfiring, and even engine stalling. Regular cleaning not only improves the snowblower’s performance but also enhances its overall reliability.
Gathering The Required Tools And Materials For Cleaning
To clean a snowblower carburetor, gathering the necessary tools and materials is crucial. This includes a wrench, screwdriver, carburetor cleaner, compressed air, gloves, and safety glasses. Prepare these items beforehand for a smooth and successful cleaning process.
Necessary Tools For The Job
Gathering the required tools and materials for cleaning your snowblower carburetor is the first step towards successfully maintaining and optimizing its performance. By having the right tools and materials on hand, you can ensure a smooth and efficient cleaning process. Here are the necessary tools you’ll need:
- Screwdriver set: A set of screwdrivers with various sizes and types will come in handy for removing screws and other fasteners on the carburetor.
- Carburetor cleaner: A quality carburetor cleaner specifically designed for small engines like snowblowers is essential for removing dirt, debris, and varnish buildup.
- Cleaning brushes: Different types of brushes, such as a small wire brush and a soft-bristle brush, will help you scrub away stubborn residue without damaging delicate parts of the carburetor.
- Compressed air: An air compressor or a can of compressed air will be useful for blowing away loose debris and dirt from hard-to-reach areas.
- Shop towels or rags: Absorbent towels or rags are necessary for wiping away dirt, grease, and excess cleaning fluid during the cleaning process.
Recommended Cleaning Agents And Lubricants
When it comes to cleaning your snowblower carburetor, it’s crucial to use the right cleaning agents and lubricants to ensure proper maintenance and long-lasting performance. Here are some recommended cleaning agents and lubricants:
- Denatured alcohol: This solvent is effective in removing grease, varnish, and other deposits from the carburetor without leaving any residue behind.
- Carburetor cleaner spray: A specifically formulated carburetor cleaner spray will help dissolve and flush out stubborn dirt and debris from hard-to-reach areas.
- Silicone lubricant: To ensure smooth operation, a light application of silicone lubricant on moving parts such as throttle linkages and choke mechanisms is recommended. Avoid using heavy greases that may attract dirt and debris.
How to Clean Snowblower Carburetor : Step by Step Guide
Step 1: Preparing The Snowblower For Maintenance
Before diving into the process of cleaning your snowblower carburetor, it is crucial to take some safety precautions. By following these steps, you can ensure a safe and hassle-free maintenance session.
Safety Precautions Before Starting Cleaning Process
When it comes to working with machinery, safety should always be a top priority. Before you begin cleaning the snowblower carburetor, make sure to keep the following safety precautions in mind:
- Disconnect the spark plug wire: Before starting any maintenance work, disconnecting the spark plug wire is essential to prevent accidental engine starts.
- Allow the engine to cool down: Give your snowblower sufficient time to cool down before beginning the cleaning process. Hot components can cause burns.
- Wear protective gear: Protect yourself by wearing safety goggles, gloves, and closed-toe shoes. This will shield you from any potential debris or accidents during the cleaning process.
- Work in a well-ventilated area: Cleaning the carburetor often involves using cleaning agents that emit fumes. Ensure that you work in a well-ventilated area to avoid inhaling harmful chemicals.
- Read the user manual: Familiarize yourself with the manufacturer’s instructions and guidelines provided in the user manual. Every snowblower model may have unique features and requirements, so it is important to understand them thoroughly.
By following these safety precautions, you can create a safe environment for yourself and ensure a successful snowblower carburetor cleaning session.
Properly Shutting Off The Snowblower
Before you begin cleaning the carburetor, it is crucial to properly shut off the snowblower. This step guarantees that the machine is not accidentally started during the maintenance process. Follow these steps to ensure a secure shutdown:
- Turn off the engine: Shift the snowblower’s throttle into the “Stop” position to switch off the engine. Allow the machine to come to a complete stop before proceeding.
- Detangle any clogs: Before shutting down the snowblower, make sure to remove any snow or debris from the chute, auger, and other components. This will prevent any blockages during the next usage.
- Engage the safety system: Engage the machine’s safety system by releasing the control levers, ensuring that the snowblower is in a safe and locked position.
- Disconnect the spark plug wire: To prevent accidental starts, disconnect the spark plug wire from the spark plug itself. This step adds an extra layer of safety to the shutdown process.
Following these steps will ensure that your snowblower is properly shut off, minimizing the risk of any accidents or unwanted engine starts while you undertake the carburetor cleaning.
Step 2: Removing The Carburetor
Once you have located and accessed the carburetor, the next step in cleaning your snowblower’s carburetor is to remove it. This step requires some careful handling and precise actions to ensure the carburetor is safely taken out of the snowblower.
Locating And Accessing The Carburetor
Before you can remove the carburetor, you need to locate it and access it properly. Every snowblower model is slightly different, so the exact location of the carburetor may vary. However, most carburetors can be found near the engine or on top of it.
To locate the carburetor, you can refer to your snowblower’s user manual. It typically contains a diagram or detailed instructions on where the carburetor is positioned. If you don’t have the manual or are unable to locate it, you can also search online for the specific model’s carburetor location.
Once you have located the carburetor, you need to access it. This may require removing certain parts or covers to expose the carburetor fully. Make sure to follow the correct steps and take necessary precautions to avoid damaging any other components of your snowblower.
Step-by-step Instructions For Removing The Carburetor
Now that you have located and accessed the carburetor, follow these step-by-step instructions to successfully remove it:
- Disconnect the spark plug: To ensure safety, always disconnect the spark plug wire before working on any engine-related parts. This will prevent accidental starting of the snowblower during the carburetor removal process.
- Remove the air filter: The air filter is usually connected to the carburetor and may need to be detached before removing the carburetor completely. Refer to your snowblower’s user manual or follow the manufacturer’s instructions to remove the air filter.
- Detach the fuel line: To remove the carburetor, you also need to disconnect the fuel line connected to it. Locate the fuel line and use pliers to carefully remove any clamps or fasteners holding it in place. Make sure to have a container ready to catch any fuel that may spill.
- Unscrew the carburetor: Once the spark plug is disconnected, the air filter is removed, and the fuel line is detached, you can proceed to unscrewing the carburetor. Use a wrench or screwdriver to loosen and remove the bolts or screws holding the carburetor in place.
- Remove the carburetor: With the screws or bolts detached, carefully lift the carburetor out of its position. Be gentle to avoid any damage to the carburetor or other surrounding components.
Remember to handle the carburetor with care and keep track of any small parts or gaskets that may come off during the removal process. These parts will need to be properly cleaned and reinstalled later. Now that the carburetor is removed, you can proceed to the next step of cleaning it thoroughly.
Step 3: Disassembling And Cleaning The Carburetor
To clean the carburetor of your snowblower, begin by carefully disassembling it. Pay close attention to the components and clean them thoroughly to ensure optimal performance.
Removing The Carburetor Parts
Once you have located the carburetor on your snowblower, follow these steps to remove the necessary parts:
- Start by carefully disconnecting the fuel line from the carburetor. This can be done by removing the clamp or screw that holds it in place.
- Next, unscrew the bolts or screws that secure the carburetor to the engine. These are usually located on the side or underside of the carburetor.
- Gently lift the carburetor away from the engine, making sure to keep track of any small parts or gaskets that may come loose during the process.
- Place the carburetor on a clean and well-lit work surface, ready for the cleaning process.
Methods And Techniques For Cleaning Each Part
Now that you have successfully removed the carburetor from your snowblower, it’s time to clean each part individually. Follow these methods and techniques to ensure a thorough cleaning:
1. Cleaning the carburetor body
The carburetor body is the main housing of the carburetor and is where the fuel and air mixture is regulated. To clean it:
- Use a carburetor cleaner spray to remove any dirt or debris that has accumulated on the outside of the carburetor body. Be sure to spray in all the crevices and hard-to-reach areas.
- Inspect the carburetor body for any clogs or obstructions. Use a thin wire or small brush to carefully clean out any dirt or buildup that may be blocking the fuel passages.
- Once you have cleaned the outside and inside of the carburetor body, wipe it dry with a clean cloth or towel.
— In order to thoroughly clean the body of your carburetor, it is important to remove any remaining fuel or debris that may be obstructing the fuel passages. This will prevent any potential problems when reassembling the carburetor. —
2. Cleaning the carburetor float and needle
The float and needle are key components of the carburetor that regulate the flow of fuel. To clean them:
- Inspect the float and needle for any signs of damage or wear. If they appear to be in good condition, proceed with the cleaning process.
- Remove the float and needle from the carburetor body by unscrewing or detaching them according to the manufacturer’s instructions.
- Use a carburetor cleaner spray or a small brush to clean any dirt or buildup on the float and needle. Pay attention to the needle’s tip, as this is where fuel flows through.
- After cleaning, thoroughly dry the float and needle before reattaching them to the carburetor body.
— Taking the time to clean the float and needle will ensure that fuel flows smoothly through the carburetor, promoting optimal performance. —
3. Cleaning the carburetor jets
The carburetor jets are responsible for delivering fuel to the engine. Cleaning them is crucial to maintain proper fuel flow. Follow these steps:
- Identify the jets in your carburetor. They are small, screw-like components typically located inside the carburetor body.
- Use a small screwdriver to carefully remove the jets from the carburetor body.
- Soak the jets in a carburetor cleaner solution for at least 15 minutes to break down any deposits or blockages.
- After soaking, use a small brush or compressed air to clean any remaining debris from the jets.
- Thoroughly dry the jets before reinstalling them into the carburetor body.
— Cleaning the carburetor jets will ensure that fuel is delivered in the proper amount and mixture, improving the overall performance of your snowblower. —
Step 4: Inspecting And Replacing Worn-out Parts
Inspecting and replacing worn-out parts is an essential step in cleaning the snowblower carburetor. Ensure smooth operation by carefully examining and replacing any components that show signs of wear or damage.
Identifying Worn-out Or Damaged Components
Before proceeding with replacing any parts in your snowblower carburetor, it is crucial to identify the worn-out or damaged components. By thoroughly inspecting the carburetor, you can pinpoint the exact parts that need replacement and avoid unnecessary expenses. Here are key components to check for wear and tear:
- Gaskets: Examine the gaskets for cracks, wear, or signs of leaking fuel. Damaged gaskets can cause fuel to leak, leading to poor engine performance.
- Float: Inspect the float for any signs of damage or deformity. A damaged float can affect the fuel flow to the carburetor, causing the engine to run rough or stall.
- Needle and Seat: Check the needle and seat for wear or corrosion. A worn-out needle and seat can lead to fuel leakage or improper fuel flow, resulting in engine problems.
- Jets: Thoroughly clean and inspect the jets for any clogs or deposits. Clogged jets can restrict fuel flow, affecting the overall performance of the snowblower.
- Deteriorated O-rings: Carefully check the O-rings for deterioration or damage. Worn out O-rings can cause air or fuel leaks, impacting the carburetor’s functionality.
- Bowl and Bowl Gasket: Remove the bowl and inspect it for any cracks or damage. Also, check the bowl gasket for wear or deterioration, as it ensures a proper seal between the bowl and carburetor body.
Steps For Replacing Faulty Parts
Once you have identified the worn-out or damaged parts, you can proceed with replacing them. Follow these steps to ensure a smooth replacement process:
- Obtain the replacement parts: Before starting the replacement, make sure you have all the necessary replacement parts on hand. This will save you time and prevent delays during the repair process.
- Remove the old parts: Carefully remove the worn-out or damaged components from the carburetor. Pay attention to any clips, screws, or retaining springs that may be holding the parts in place. Take note of the exact position and orientation of each part for easy reassembly.
- Install the new parts: Replace the old parts with the new ones, ensuring a proper fit. Apply a small amount of lubricant or gasket sealer, if required, to ensure a tight seal and prevent leaks.
- Reassemble the carburetor: Once all the new parts are in place, carefully reassemble the carburetor in the reverse order of disassembly. Ensure that you properly reattach any clips, screws, or retaining springs.
- Test the carburetor: After reassembling, test the carburetor by starting the snowblower. Check for any abnormal noises, fuel leaks, or rough engine operation. If everything runs smoothly, you have successfully replaced the faulty parts in your snowblower carburetor.
Step 5: Reassembling And Reinstalling The Carburetor
Now that you have thoroughly cleaned the snowblower carburetor, it’s time to move on to the reassembling and reinstalling process. This step is crucial in ensuring that your carburetor functions properly when it is put back into the snowblower. Follow these instructions carefully to properly assemble and install the cleaned carburetor.
Properly Assembling The Cleaned Carburetor
Assembling the carburetor correctly is essential to its functionality. With clean and organized parts at hand, begin by following these steps:
- Carefully examine the carburetor components and make sure everything is clean and undamaged.
- Start by reinstalling the float and the needle valve onto the carburetor body. Ensure that the float pivots smoothly and that the needle valve is correctly positioned.
- Next, attach the throttle plate and lever assemblies, making sure they are aligned and functional.
- Secure the main jet back into place, being cautious not to overtighten.
- Double-check the gaskets and replace them if necessary, ensuring a proper seal.
Take your time during this process and refer to the snowblower’s manual if needed. It’s important to correctly assemble the carburetor to avoid any issues with the snowblower’s functioning.
Reinstalling The Carburetor Onto The Snowblower
Now that the carburetor is properly assembled, it’s time to reinstall it onto the snowblower. Follow these steps to ensure a successful installation:
- Line up the carburetor mounting flange with the gasket on the snowblower’s intake manifold.
- Carefully slide the carburetor into position, making sure it sits securely.
- Reattach the mounting bolts and tighten them evenly to ensure a proper seal.
- Connect the fuel line and any other hoses or cables that were detached during the removal process.
- Double-check all connections and make sure everything is securely fastened.
At this point, you have successfully reassembled and reinstalled the cleaned carburetor onto your snowblower. Make sure you have followed all the steps correctly to avoid any issues with its performance. With the carburetor properly in place, you can now proceed to start your snowblower and conquer those snow-covered driveways and sidewalks with ease!
Testing And Fine-tuning The Snowblower After Cleaning
Once you have successfully cleaned the carburetor of your snowblower, it is important to perform some tests and fine-tuning to ensure that it runs smoothly and efficiently. This final step is crucial to optimize the performance of your snowblower and make sure it is ready to take on the next snowfall. In this section, we will discuss two key steps in the process: starting the snowblower for a test run and adjusting the carburetor for optimal performance.
Starting The Snowblower For A Test Run
Before you begin testing and fine-tuning the carburetor, it is vital to start the snowblower for a test run. This will allow you to assess its overall functionality and ensure that it is in proper working condition. Follow these steps to start your snowblower:
- Ensure that there is enough fuel in the tank.
- Set the throttle lever to the appropriate position for starting.
- Prime the engine by pressing the primer bulb a few times.
- Move the choke lever to the “Choke” position.
- Position yourself behind the snowblower, firmly grip the starter handle, and give it a quick pull to start the engine.
- If the engine starts smoothly, let it run for a few minutes to ensure that it reaches its normal operating temperature.
Adjusting The Carburetor For Optimal Performance
Once you have started the snowblower and let it run for a few minutes, it is time to fine-tune the carburetor for optimal performance. The carburetor controls the fuel-to-air mixture and plays a crucial role in the efficiency of your snowblower. Follow these steps to adjust the carburetor:
- Locate the adjustment screws on the carburetor. These are usually labeled as “Low Speed,” “High Speed,” or “Idle.”
- Begin by adjusting the low-speed screw. Turn it clockwise until it stops, and then turn it counterclockwise 1.5 turns as a starting point.
- Next, adjust the high-speed screw. Turn it clockwise until it stops, and then turn it counterclockwise 1.5 turns as a starting point.
- Start the snowblower again and let it run for a few minutes.
- Observe the engine’s performance and listen for any irregularities.
- If the engine is running too rich (producing black smoke) or too lean (sputtering or stalling), make additional adjustments to the screws in small increments until the engine runs smoothly.
It is important to note that carburetor adjustments may vary depending on the make and model of your snowblower. Consult the manufacturer’s manual for specific instructions or seek assistance from a professional if you are unsure.
By following these steps to test and fine-tune your snowblower after cleaning the carburetor, you can ensure optimal performance and reliable operation when you need it most. Remember to perform regular maintenance and cleaning to keep your snowblower in top condition throughout the winter season.
Maintenance Tips To Keep Your Carburetor Clean For Longer
Proper maintenance of your snowblower carburetor is essential to ensure its smooth functioning and avoid any performance issues. Cleaning and maintaining your carburetor regularly not only extends its lifespan but also helps optimize the performance of your snowblower. In this section, we will discuss some preventive measures you can take to avoid carburetor issues and a regular maintenance schedule to keep your carburetor clean for longer.
Preventive Measures To Avoid Carburetor Issues
By following these preventive measures, you can significantly reduce the chances of encountering carburetor issues:
- Use clean fuel: The fuel you use in your snowblower plays a vital role in maintaining the cleanliness of the carburetor. Always ensure you use clean and fresh fuel without any impurities or contaminants.
- Use a fuel stabilizer: Storing your snowblower for an extended period? Adding a fuel stabilizer to the fuel tank can help prevent the formation of varnish and gum deposits in the carburetor.
- Keep the air filter clean: A clogged air filter can affect the air-fuel mixture in the carburetor. Regularly clean or replace the air filter to ensure optimal performance.
- Store your snowblower properly: When not in use, store your snowblower in a clean and dry area to prevent dust and moisture from entering the carburetor.
- Inspect fuel lines and fittings: Regularly check for any leaks, cracks, or loose connections in the fuel lines and fittings. Addressing these issues promptly can prevent debris from entering the carburetor.
Regular Maintenance Schedule For Snowblower Carburetor
A consistent maintenance schedule will help keep your snowblower carburetor clean and enhance its longevity. Follow these steps for regular maintenance:
- Inspect the carburetor: Periodically inspect the carburetor for any visible signs of dirt, debris, or residue. If you notice any buildup, it’s time for a thorough cleaning.
- Clean the carburetor: Remove the carburetor from the snowblower and disassemble it according to the manufacturer’s instructions. Use a carburetor cleaner to remove any accumulated grime or deposits.
- Replace worn-out parts: While cleaning the carburetor, check for any worn-out or damaged parts. Replace them with new ones to ensure optimal performance.
- Reassemble and reinstall: After cleaning and replacing the necessary parts, reassemble the carburetor as per the manufacturer’s instructions and reinstall it into your snowblower.
- Test the carburetor: Once the carburetor is reinstalled, test your snowblower to ensure it’s functioning correctly. Check for any abnormal engine performance or fuel-related issues.
Following these preventive measures and regular maintenance schedule will keep your snowblower carburetor clean and in excellent condition, enabling you to tackle snow removal with ease.
Frequently Asked Questions For How To Clean Snowblower Carburetor
Can You Clean A Snowblower Carburetor Without Removing It?
Yes, you can clean a snowblower carburetor without removing it. Use a carburetor cleaner specifically made for small engines. Follow the instructions on the cleaner’s label. Remove the air filter and spray cleaner into the carburetor’s throat. Let it sit for a few minutes, then start the engine and let it run for a while.
Repeat if necessary.
How Do You Clean A Gummed Up Snowblower Carburetor?
To clean a gummed up snowblower carburetor, follow these steps: 1. Turn off the snowblower and disconnect the spark plug wire. 2. Remove the carburetor bowl and soak it in a carburetor cleaner solution. 3. Use a small brush or toothbrush to clean any clogs or debris from the carburetor jets and passages.
4. Reassemble the carburetor and reconnect the spark plug wire. 5. Test the snowblower to ensure it runs smoothly.
How Do You Clean Gunk Out Of A Carburetor?
To clean gunk out of a carburetor, follow these steps: 1. Turn off the engine and disconnect the fuel line. 2. Remove the carburetor and disassemble it. 3. Clean the carburetor parts with a carburetor cleaner. 4. Use a soft brush to scrub away any stubborn gunk.
5. Reassemble the carburetor and reconnect the fuel line.
What Can I Use To Clean A Gummed Up Carburetor?
To clean a gummed up carburetor, you can use a carburetor cleaner. It effectively removes deposits and varnish build-up, improving carburetor performance.
Conclusion
Maintaining a clean snowblower carburetor is crucial for optimal performance during the winter season. By regularly cleaning and maintaining this vital component, you can ensure that your snowblower operates efficiently and effectively. Remember to follow the step-by-step process outlined in this guide to keep your carburetor free from debris and functioning smoothly.
With a clean carburetor, you’ll be ready to tackle even the heaviest snowfall with ease. Happy snowblowing!