
Are you ready to grow your own celery from seed but don’t know where to start? Collecting celery seeds might seem tricky, but it’s easier than you think.
Imagine having a steady supply of fresh, homegrown celery right in your garden. By learning how to collect celery seeds properly, you take control of your garden’s future and save money on buying seeds every season. In this guide, you’ll discover simple steps that anyone can follow to gather healthy celery seeds.
Keep reading to unlock the secrets that will make your celery-growing experience rewarding and successful.
Choosing The Right Celery Variety
Choosing the right celery variety is key to collecting quality seeds. Different varieties grow in different climates and soils. Picking the right type helps plants thrive and produce more seeds. Understanding your local conditions guides the choice.
Celery comes in many types. Some have thick stalks, others thin and crunchy. Some varieties resist pests better. Others grow faster or taste sweeter. Knowing these traits helps find the best match for your garden.
Types Of Celery Varieties
Common celery types include Pascal, Golden, and Celeriac. Pascal celery has thick, crunchy stalks. Golden celery is sweeter and less bitter. Celeriac grows a large root instead of stalks. Each type offers different seed collection options.
Climate And Soil Considerations
Celery prefers cool, moist climates. Some varieties handle heat better than others. Soil should be rich and well-drained. Matching celery type to climate and soil improves growth. Healthy plants produce more and better seeds.
Seed Production Traits
Some celery varieties flower earlier. Early bloomers give seeds faster. Others produce more seeds per plant. Choosing high seed-yield types saves time and effort. Look for varieties known for strong seed production.
Credit: gardenerd.com
Timing The Seed Collection
Timing is key for collecting celery seeds successfully. Picking seeds too early or too late reduces their quality. Knowing the right moment helps save seeds that grow well next season.
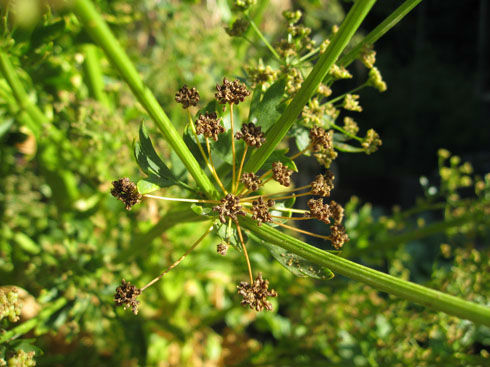
Celery plants produce seeds after flowering. The seeds mature on umbrella-like clusters called umbels. These clusters change color as seeds ripen. Watching these changes guides the best harvest time.
Watch For Flower Fading
Celery flowers bloom in white clusters. They fade and dry as seeds develop. Wait until most flowers turn brown and dry. This signals seeds are nearing maturity.
Look For Seed Color Change
Immature celery seeds are green and soft. Mature seeds turn beige or light brown. The color shift means seeds are ready for collection. Avoid harvesting if seeds remain green.
Check Seed Firmness
Gently squeeze seeds between fingers. Mature seeds feel hard and dry. Soft seeds need more time to ripen. Firmness is a reliable sign of seed readiness.
Harvest Before Seed Drop
Seeds fall quickly once fully dry. Harvest seeds before they drop. Cut whole seed heads carefully. Dry them in a paper bag indoors to collect fallen seeds.
Preparing Celery Plants For Seed Harvest
Preparing celery plants for seed harvest takes careful attention. Healthy plants produce better seeds. You must know when and how to prepare them for the best results.
Start by letting celery plants grow fully. Celery usually flowers in its second year. During this time, the plant focuses energy on seeds, not leaves.
Identifying The Right Time To Harvest Seeds
Watch the celery flowers closely. They change color as seeds mature. Seeds are ready when flower heads turn brown and dry. Check seeds often to avoid losing them to wind or rain.
Stopping Watering Before Harvest
Reduce watering a week before harvesting seeds. Less water helps seeds dry faster on the plant. It also prevents mold and rot from forming on seed heads.
Protecting Plants From Pests
Pests can damage seeds and lower quality. Use natural methods to keep bugs away. Check plants daily and remove any pests by hand. This keeps seeds safe until harvest time.
Supporting Flower Stalks
Celery flower stalks grow tall and may fall over. Use stakes or supports to keep them upright. This helps seeds mature fully and prevents loss from broken stems.

Credit: www.youtube.com
Harvesting Celery Seeds
Harvesting celery seeds is a rewarding step for gardeners who want to save seeds for the next season. The process starts with recognizing when the seeds are ready. Proper harvesting ensures healthy and viable seeds for planting.
Timing and technique play a big role in seed collection. Careful handling during cutting and drying protects seed quality. Following simple steps helps gather seeds easily.
Identifying Mature Seed Heads
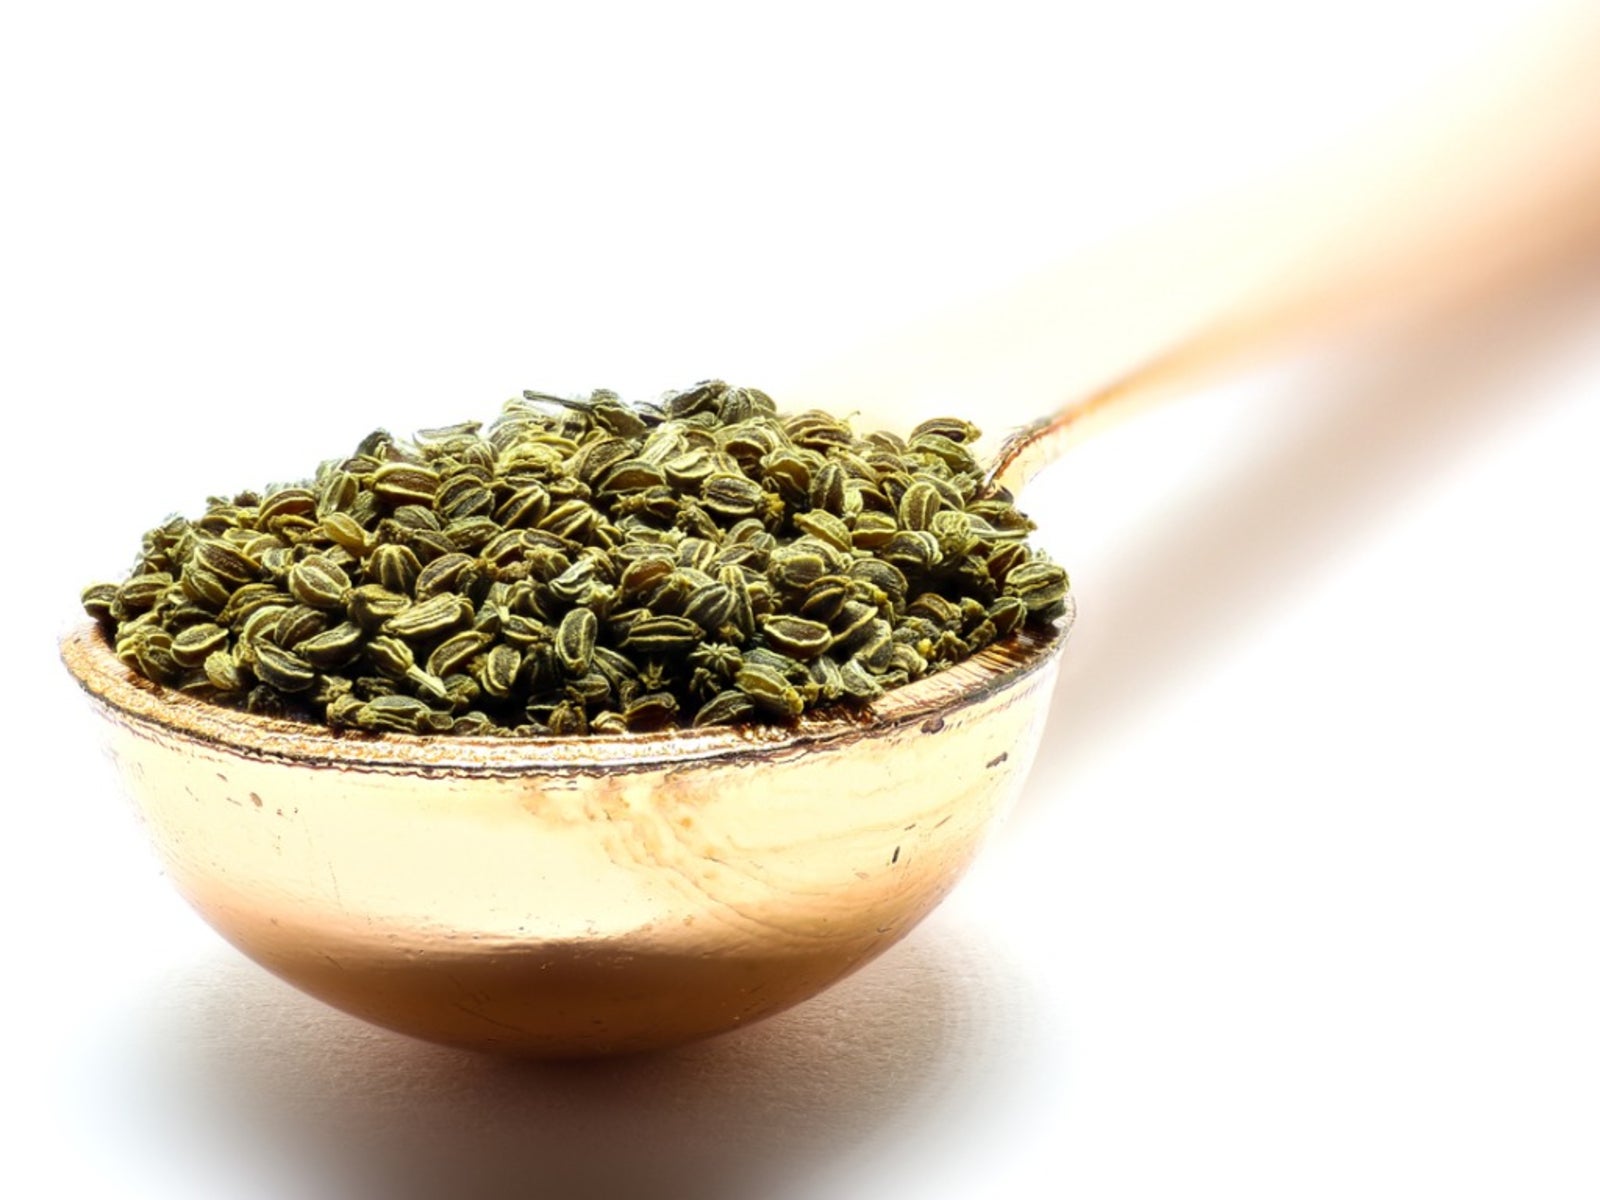
Celery seed heads change color as they mature. They turn from green to a light brown or tan shade. Seeds become hard and dry on the plant. Look for seed clusters that feel dry and firm.
Wait until most of the seeds show this color. Immature seeds may not grow well later. Check seed heads daily during late summer or early fall. Harvest when the majority are dry but before seeds fall off.
Cutting And Drying Techniques
Use sharp scissors or garden shears to cut seed heads. Cut the whole cluster at once. Handle gently to avoid shaking seeds loose. Place cut seed heads in a paper bag or basket.
Dry seeds in a warm, dry area with good air flow. Avoid direct sunlight to keep seeds from overheating. Spread seed heads out on newspaper or screen. Let them dry for about one to two weeks.
After drying, rub seed heads gently to release seeds. Remove any plant debris by winnowing or blowing lightly. Store seeds in a cool, dry place inside airtight containers.
Extracting And Cleaning Seeds
Extracting and cleaning celery seeds is an important step for successful planting. Clean seeds grow better and give healthy plants. The process removes unwanted parts and prepares seeds for storage or sowing.
Careful handling during extraction keeps seeds whole and ready to grow. After drying celery seed heads, start separating seeds from the plant. Then, clean the seeds by winnowing to remove light debris. These steps ensure pure, quality seeds.
Separating Seeds From Plant Material
First, gently crush the dried celery seed heads. Use your hands or a small tool to break them apart. This releases seeds from the stems and flower parts. Do this over a bowl or tray to catch all seeds. Remove large pieces of plant material by hand. Be gentle to avoid damaging seeds. This step helps gather most seeds quickly.
Winnowing And Removing Debris
Next, clean the seeds by winnowing to remove dust and chaff. Use a small fan or blow gently on the seeds. The wind carries away lighter debris, while seeds fall back. Repeat the process several times for best results. Another method is to sift seeds through a fine mesh. This catches larger pieces and leaves clean seeds. Clean seeds store longer and sprout better in soil.
Credit: www.gardeningknowhow.com
Storing Celery Seeds Properly
Storing celery seeds properly keeps them fresh and ready for planting. Poor storage can cause seeds to lose their ability to grow. Proper storage maintains seed quality and extends their life. Follow simple steps to protect your celery seeds.
Choosing The Right Containers
Select containers that keep seeds dry and safe. Glass jars with tight lids work best. Avoid plastic bags as they can trap moisture. Paper envelopes are okay for short-term storage. Label containers with the seed type and date.
Ideal Storage Conditions
Store celery seeds in a cool, dark place. Avoid heat and sunlight, which damage seeds quickly. A temperature between 32°F and 41°F (0°C to 5°C) is ideal. Keep seeds away from humidity to prevent mold. A sealed container inside the refrigerator can work well.
Tips For Successful Celery Seed Germination
Growing celery from seeds takes patience and care. Seeds need the right conditions to sprout well. This section shares simple tips for healthy celery seed germination. Follow these steps to see your seeds grow into strong seedlings.
Choose Fresh Seeds
Use seeds that are fresh and not too old. Old seeds may not sprout well. Check the seed packet for the best planting date.
Soak Seeds Before Planting
Soak celery seeds in warm water for 24 hours. This softens the seed coat. It helps seeds sprout faster and better.
Use Seed Starting Mix
Plant seeds in a light, well-draining seed starting mix. Avoid heavy soil that holds too much water. Good drainage prevents seed rot.
Keep Soil Moist
Water the soil gently to keep it moist but not wet. Dry soil stops seed growth. Too much water can cause seeds to rot.
Maintain Warm Temperature
Keep the seed tray at 70 to 75°F (21 to 24°C). Celery seeds need warmth to sprout. Use a heat mat if needed.
Provide Light After Sprouting
Once seeds sprout, give them plenty of light. A sunny window or grow light works well. Light helps seedlings grow strong and healthy.
Frequently Asked Questions
How Do I Know When Celery Seeds Are Ready To Harvest?
Celery seeds are ready to harvest when their flower heads turn brown and dry. This usually happens in late summer or early fall. The seeds will easily fall off when rubbed between your fingers. Harvest before rain to avoid seed rot and ensure good quality.
What Is The Best Method To Collect Celery Seeds?
To collect celery seeds, cut the dried flower heads and place them in a paper bag. Shake the bag to release seeds from the flower heads. Then, sift the seeds to remove debris. Store seeds in a cool, dry place for future planting.
Can Celery Seeds Be Harvested From Store-bought Celery?
No, store-bought celery usually does not produce viable seeds. It’s often harvested before flowering. For seed collection, grow celery plants in your garden and allow them to flower and mature fully. This ensures you get healthy, viable seeds for planting.
How Do I Store Celery Seeds After Harvesting?
Store celery seeds in an airtight container in a cool, dry, and dark place. Proper storage keeps seeds viable for up to 3 years. Avoid moisture and heat to prevent mold and loss of germination ability.
Conclusion
Collecting celery seeds is simple and rewarding. Wait until the seeds turn brown and dry on the plant. Gently shake or rub the seed heads to gather the seeds. Store them in a cool, dry place to keep them fresh.
Using your own seeds saves money and helps grow strong plants. Try it in your garden this season. Enjoy the process and the results. Easy steps lead to great success.