To collect iris seeds, wait for the seed capsules to ripen, cut the stalks, and collect the seeds. Here is a comprehensive guide on how to collect iris seeds.
Iris seeds can be collected once the seed capsules turn brown and start to open up. When the capsules are fully ripened, stalks should be cut and brought indoors to prevent any loss of seeds. The seeds can then be extracted from the capsules by carefully tearing them apart or gently squeezing them.
Once the seeds are collected, they can be stored in a cool and dry place before sowing or sharing with other iris enthusiasts. By following these steps, you can successfully collect iris seeds for future propagation.
Credit: www.cdn-iris.ca
Finding The Perfect Time For Seed Collection
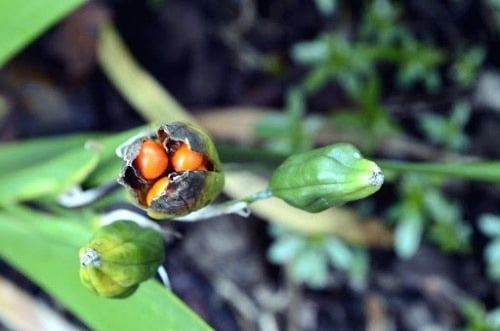
When it comes to finding the perfect time for seed collection, it is important to pay attention to visual cues and understand the length of time it takes for an iris seed pod to mature. Iris seeds are typically ready for collection when the pods have turned brown and the seeds inside are black. This visual cue indicates that the seeds have reached their full maturity and are ready to be harvested.
It is crucial to wait for the seed pods to mature completely before attempting to collect the seeds. If the pods are collected too early, the seeds may not be fully developed and will not germinate successfully. On the other hand, if the pods are left on the plant for too long, they may split open and the seeds may be lost.
In addition to visual cues, it is also important to consider the length of time it takes for an iris seed pod to mature. Depending on the iris variety and growing conditions, this can take anywhere from several weeks to a few months. It is recommended to regularly check the seed pods and observe any changes in color and texture to determine their readiness for seed collection.
How to Collect Iris Seeds: Step by Step Guide
Preparation For Seed Collection
Collecting iris seeds requires proper preparation to ensure success. Here is a step-by-step guide to help you get started:
| Step 1: | Gather the necessary tools and materials, including clean and sharp scissors, paper envelopes or bags, a marker, and a clean workspace. |
| Step 2: | Prioritize cleanliness throughout the process to prevent contamination and ensure seed viability. Clean and sterilize your tools and workspace before and after use. |
| Step 3: | Observe the iris plants and wait for the seed pods to turn brown and dry. This indicates that the seeds are mature and ready for collection. |
| Step 4: | Carefully cut the seed pods from the iris plant using the sharp scissors. Place the pods in the paper envelopes or bags, making sure to label them with the iris variety and the collection date. |
| Step 5: | Store the seed envelopes in a cool and dry place until you are ready to plant or share them with other gardening enthusiasts. |
By following these preparatory steps, you can enhance your chances of successfully collecting and preserving iris seeds for future use.
Harvesting Iris Seed Pods
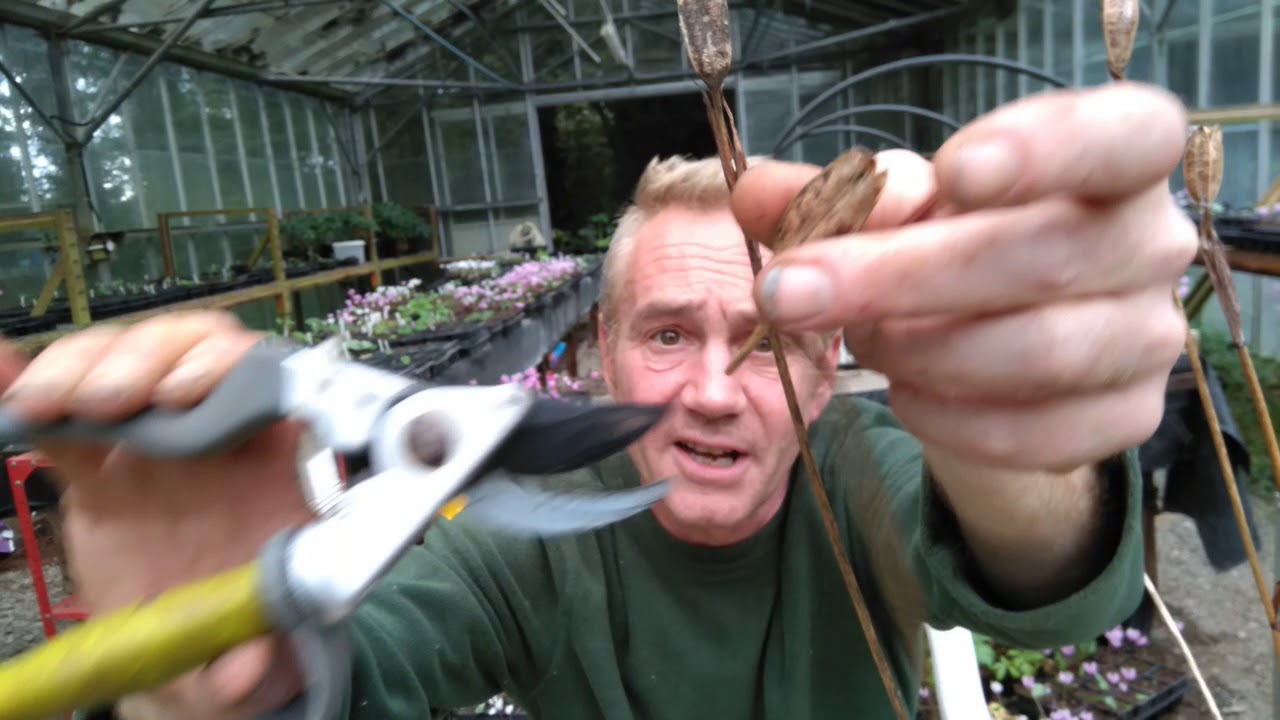
Harvesting iris seed pods requires a careful and gentle technique to prevent damage to the pods or seeds. To begin, wait for the iris seed pods to turn a dark brown or black color, indicating that they are mature and ready for collection. It is essential to approach the task with caution to avoid accidentally rupturing the pods, as this can cause the seeds to scatter and make collecting them difficult.
When removing the seed pods from the plant, use sharp, sterilized scissors to cut the stem just below the pods. It is crucial to be gentle and handle the pods with care, ensuring they remain intact. Once the pods have been cut, place them in a clean paper bag to allow for air circulation and prevent the growth of mold. Avoid using plastic bags, as they can trap moisture and result in the seeds rotting.
After harvesting, it is important to label the paper bag with the iris variety and date for future reference. Store the bag in a cool, dry place for a few weeks to allow the seeds to fully mature. Finally, break open the pods and collect the seeds for planting or storage in airtight containers.
Seed Extraction And Drying
Extracting iris seeds from the pods requires careful handling to ensure successful germination. One method involves waiting for the pods to dry on the plant, as they will eventually split open, revealing the embedded seeds. Gently collecting the seeds and removing any remaining pod fragments is crucial.
Another technique is to manually open the pods before they dry out. This can be done by using a pair of tweezers or your fingers to gently pry the pods open. Take care not to damage the seeds during this process.
Once the iris seeds have been extracted, proper drying is essential for long-term storage. Spread the seeds evenly on a paper towel or a dry, clean surface, allowing them to dry naturally. Avoid using heat or direct sunlight as they can potentially damage the seeds.
Benefits of various drying methods include minimizing the risk of mold or fungal growth and maintaining the integrity of the seeds. Drying them indoors in a cool, well-ventilated area is a popular choice. Alternatively, using a food dehydrator or a drying chamber with controlled temperature and humidity can expedite the drying process while ensuring optimal conditions.
Storing Iris Seeds For Longevity
When it comes to storing iris seeds, providing the right conditions is crucial for maintaining their viability. Optimal storage conditions include temperature and humidity levels that promote longevity.
| Conditions | Recommendations |
|---|---|
| Temperature | Keep the seeds in a cool and dry environment, ideally between 35°F and 50°F (2°C and 10°C). |
| Humidity | Aim for a low humidity level, around 30% to 40%, to prevent mold and moisture damage. |
Proper storage containers also play a role in maintaining seed viability. Use airtight plastic bags or glass jars with tight-fitting lids to protect the seeds from excess moisture and pests. Remember to label each container with the iris variety and the date of collection for easier organization.
By storing iris seeds under optimal conditions, you can ensure their longevity and increase the chances of successful germination in the future.
Planting Iris Seeds For Germination
Planting iris seeds is a great way to explore the fascinating world of iris cultivation. To ensure successful germination and healthy growth, it is important to create ideal conditions and follow proper techniques.
Firstly, choose a well-draining soil with a pH level between 6.0 and 7.0. Prepare the soil by removing any weeds or debris and loosening it to a depth of at least 6 inches.
Next, soak the iris seeds in water for 24 hours to help soften the tough seed coat. Then, plant the seeds about 1 inch deep in the soil, ensuring they are not overcrowded.
Provide consistent moisture to the planting area, but avoid overwatering as this can lead to rot. Mulching the soil can help retain moisture and protect the seeds.
After planting, place the pots or trays in a warm, sunny location or use a heating mat to maintain a temperature between 70-75 degrees Fahrenheit. This will promote germination.
Regularly monitor the soil moisture and provide light but not direct sunlight to avoid scorching the delicate young plants.
With patience and care, you can enjoy the rewarding experience of seeing your iris seeds germinate and grow into beautiful, vibrant flowers!
Troubleshooting Common Seed Collection Issues
Collecting iris seeds can sometimes present challenges, but with the right approach, you can overcome common issues. One common problem is identifying the right time to collect the seeds. To address this, observe the iris plants closely and look for signs of maturity, such as drying seed pods and browning stems. Another issue that may arise is knowing how to extract the seeds without causing damage. Gently twist or cut the seed pods and carefully remove the seeds.
In some cases, seeds may not germinate due to poor storage conditions. To overcome this, store the seeds in a cool and dry place to maintain their viability. Lastly, pests and diseases can also affect seed collection. Inspect the plants for any signs of infestation or infection and take appropriate measures to prevent further damage. By being mindful of these common challenges, you can ensure a successful iris seed collection process.
Frequently Asked Questions On How To Collect Iris Seeds
What Should I Do With Iris Seed Pods?
After iris flowers bloom, the seed pods develop. To deal with iris seed pods, wait until they dry out and turn brown. Remove the pods carefully and store the seeds in a cool, dry place. Plant the seeds in the fall or spring and wait for new iris plants to grow.
How Do You Save Iris Seeds?
To save iris seeds, wait until the seed capsules turn brown and start to crack open. Collect the seeds and store them in a dry paper envelope. Keep the envelope in a cool, dark place until spring. Plant the seeds in a well-draining soil mix and water regularly.
Should You Remove Seed Pods From Irises?
Removing seed pods from irises is not necessary. It won’t harm the plant if you leave them. However, removing them can redirect energy towards blooming. So, it’s up to you, but it’s not crucial for the plant’s health.
Do Iris Seeds Turn Into Bulbs?
No, iris seeds do not turn into bulbs. Iris plants grow from rhizomes, not seeds. Rhizomes are thick underground stems that produce new iris plants and flowers. Seeds are rarely found in iris flowers and are not the primary way iris plants reproduce.
Conclusion
To sum up, collecting iris seeds is a rewarding process that enables you to propagate these beautiful flowers in your garden. By carefully following the steps outlined in this blog post, you can confidently gather and store iris seeds for future growth.
Remember to choose mature pods, dry them thoroughly, and store them in a cool, dark place. Happy gardening!