Are you tired of seeing brown and withered leaves on your indoor or outdoor plants? Trimming away dead leaves not only improves the appearance of your plants but also promotes healthy growth.
Removing dead leaves from plants is essential to maintaining their health and appearance. Dead or dying leaves can drain energy from the plant, potentially hindering its growth and vitality. Properly trimming these leaves encourages new growth and reduces the risk of spreading pests or diseases. Whether caring for indoor houseplants or outdoor greenery, learning the correct technique for removing dead leaves can make a significant difference in keeping your plants thriving.

In this guide on how to cut dead leaves off plants, we’ll cover the necessary tools and techniques needed to safely and effectively remove dead leaves from your plants.
Why Is It Important to Remove Dead Leaves?
Before we delve into the steps of trimming dead leaves, let’s first understand why it’s vital to remove them in the first place.
- Aesthetics: Dead leaves can make your plants look unsightly and neglected. By trimming them away, you can improve the appearance of your plants and make them more visually appealing.
- Prevent Disease: Leaves that have died from diseases or pests can spread these issues to other parts of the plant or neighboring plants. Regularly removing dead leaves can help prevent the spread of diseases and keep your plants healthy.
- Promote Growth: Dead leaves take up valuable space on a plant that could be used for new growth. Removing them allows for healthier, more vigorous leaves to grow in their place.
- Stress Relief: Just like humans, plants can experience stress, too. Removing dead or dying leaves can help reduce the stress on a plant and promote overall health and vitality.
Once you understand the importance of removing dead leaves, let’s move on to the steps for cutting them off your plants.
What Will You Need?
To properly cut dead leaves off your plants, you’ll need a few essential tools:
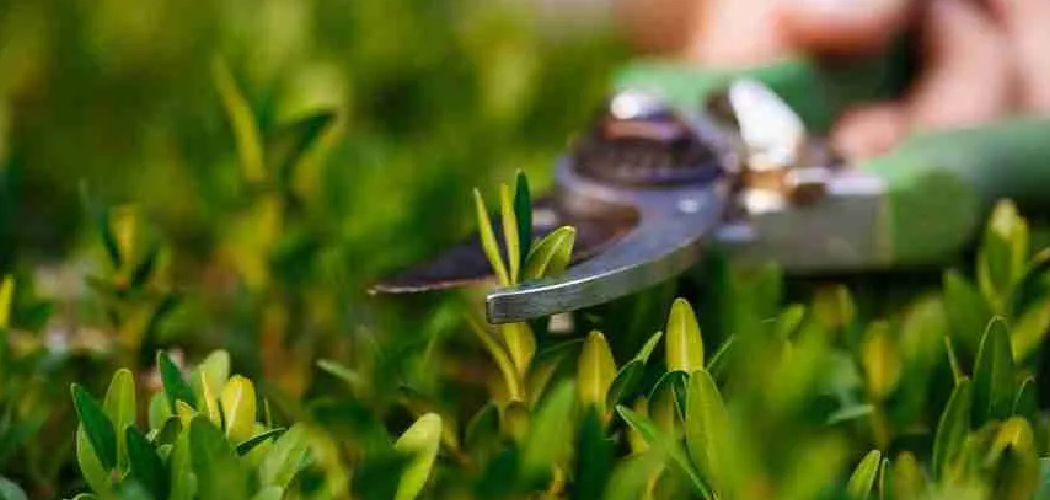
- Pruning Shears: These specialized scissors are designed to make clean cuts on plants without damaging them.
- Gloves: Wearing gloves while cutting dead leaves can help protect your hands from any sharp edges or thorns on the plant.
- Disinfectant Spray: It’s crucial to disinfect your pruning shears between uses to prevent spreading diseases or pests.
Once you have these tools, you’re ready to start trimming away those dead leaves.
08 Easy Steps on How to Cut Dead Leaves Off Plants
Step 1. Inspect Your Plant:
Begin by thoroughly examining your plant to identify which leaves are dead, dying, or damaged. Dead leaves usually appear brown, dry, and brittle, while dying leaves may look yellow, wilted, or discolored. Check the overall condition of the plant, including stems and branches, for any signs of pests, disease, or excessive damage.

Taking the time to inspect each part of the plant ensures you only remove the necessary leaves and avoid causing additional stress. This visual assessment will also help you determine if an underlying issue affecting your plant’s health needs to be addressed. Remember, proper inspection is the key to achieving optimal results during pruning.
Step 2. Gather Your Tools:
Before you start pruning, ensure the right tools are on hand. A pair of sanitized pruning shears or scissors is essential for clean cuts that minimize harm to the plant. Use gloves to protect your hands from thorns or irritating sap. Bring a small container or bag to collect the removed leaves for easy cleanup if necessary.
Ensuring your tools are clean and sharp makes the process more efficient and reduces the chances of introducing diseases to your plant. Proper preparation sets the stage for effective and safe pruning.
Step 3. Begin Pruning:
Start pruning by targeting dead, yellowing, or damaged leaves first. These leaves no longer contribute to the plant’s growth and can drain energy from healthier parts. Hold the leaf near its base and cut it cleanly with your pruning shears or scissors. Avoid yanking or tearing, as this can hurt your plant. Next, look for any overgrown or crowded areas and prune selectively to improve airflow and light penetration.
Be careful not to remove more than 20-30% of the plant in one session, as heavy pruning can shock the plant. Take your time and step back periodically to assess your progress, ensuring you’re shaping the plant effectively while maintaining its natural structure.
Step 4. Post-Pruning Care:
After completing your pruning session, provide your plant with extra care to help it recover. Water the plant if the soil feels dry, reducing stress and aiding in recovery. Check the plant for any residual debris, such as fallen leaves or cuttings, and clear them away to prevent pests or mold. If the plant requires fertilization, consider adding a diluted, balanced fertilizer after a few days to support new growth.

Finally, monitor the plant closely in the coming weeks, watching for any signs of stress or improvement. Adjust its light, water, or nutrient levels to ensure it thrives post-pruning.
Step 5. Regular Maintenance:
Establish a routine for regular maintenance to keep your plant healthy and thriving long-term. This includes periodic pruning to manage its growth, prevent overcrowding, and check for signs of pests, diseases, or nutrient deficiencies. Dust off the leaves occasionally to ensure better light absorption, and rotate the plant periodically so all sides receive equal sunlight. Regularly assess the plant’s soil and repot it as necessary when it outgrows its current container. With consistent care, your plant will continue to grow strong and vibrant.
Step 6. Observation and Patience:
Caring for plants requires observation and patience, as growth and recovery from interventions like pruning take time. Pay close attention to changes in the plant’s appearance, such as new leaves, improved color, or signs of stress. Documenting these observations can help identify patterns and adapt your care routine. Remember, plants thrive at their own pace, so be patient and provide consistent, nurturing care to support their long-term health and vitality.
Step 7. Seasonal Adjustments:
Plants often require different care routines depending on the season. During the growing season, typically spring and summer, ensure your plant receives ample water, nutrients, and sunlight to support its development.

Conversely, in autumn and winter, many plants enter a dormant phase and need less water and fertilizer. Adjust your care schedule accordingly and consider factors like indoor heating or reduced daylight, which can affect the plant’s well-being. Seasonal awareness ensures your plant thrives year-round.
Step 8. Repotting When Necessary:
Over time, plants may outgrow their current pots, leading to restricted root growth and reduced overall health. Signs that indicate it’s time to report include roots growing out of the drainage holes, soil drying out quicker than usual, or a noticeable decline in the plant’s growth. When repotting, choose a container slightly larger than the current one and fresh, well-draining soil suitable for your plant type. Gently remove the plant, loosen the roots, and place it in the new pot while filling it with soil. Proper repotting provides more space for the plant to grow and replenishes nutrients, promoting long-term vitality.
By following these steps, you can confidently and effectively prune your plants to keep them healthy and thriving.
5 Things You Should Avoid
- Using Dirty Tools: Always ensure your gardening tools, such as scissors or pruners, are clean and sterilized. Using dirty tools can spread diseases to your plants and harm their health.
- Cutting Too Close to the Stem: Avoid cutting dead leaves at the main stem. This can damage the plant’s structure and make it more vulnerable to pests and infections.
- Ignoring the Cause of Dead Leaves: Simply removing dead leaves without addressing the root cause, such as overwatering, lack of sunlight, or pest infestations, will not solve the problem and can lead to further plant decline.
- Cutting During the Wrong Time: Avoid pruning during the hottest parts of the day. It’s better to cut dead leaves in the early morning or late afternoon to minimize stress on the plant.
- Removing Too Many Leaves at Once: Be mindful not to over-prune your plant. Removing too many leaves in a single session can disrupt the plant’s ability to photosynthesize and recover properly.
By avoiding these common mistakes, you can ensure the health and vitality of your plants.

Conclusion
Cutting dead leaves off plants is an essential part of maintaining their health and appearance. By using clean tools, pruning carefully, and addressing the underlying causes of leaf damage, you can prevent further harm and promote new growth.
Always be mindful of timing and avoid over-pruning to give your plants the best chance to thrive. With proper care and attention, regular pruning can help your plants grow stronger and stay vibrant for years to come.
Hopefully, the article on how to cut dead leaves off plants in Markdown format has been helpful to you. Keep practicing and monitoring your plants for optimal results, and enjoy the satisfaction of seeing them thrive under your care. Happy pruning!