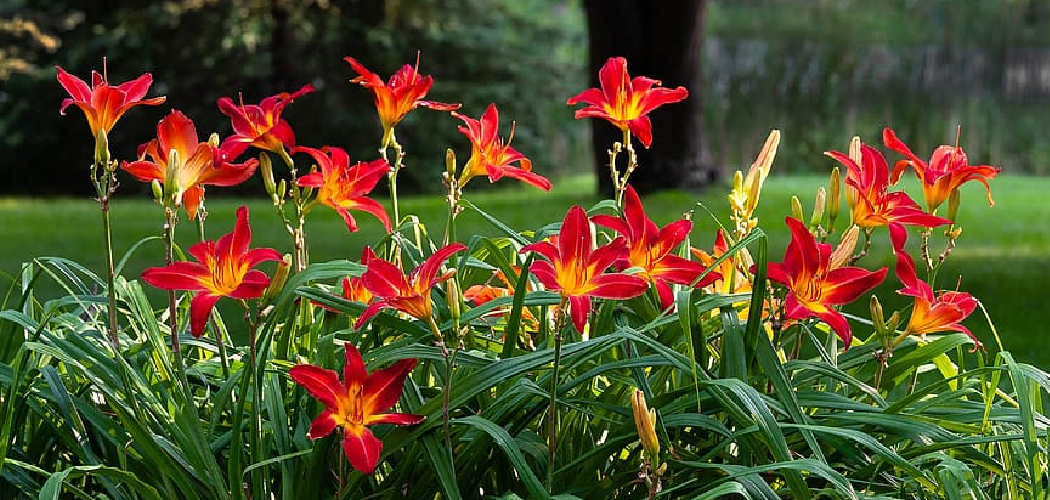
Daylilies are hardy, low-maintenance perennials that add vibrant color to gardens year after year. Over time, these plants can become overcrowded, leading to reduced blooming and overall health. Dividing daylilies not only revitalizes existing plants but also provides an opportunity to expand your garden or share with others.

This guide on how to divide daylily plants will walk you through the simple steps to successfully divide and replant your daylilies for optimal growth and beauty.
Best Time to Divide Daylilies
The best time to divide daylilies is during their dormant season, typically in early spring or late summer to early fall. Dividing in early spring allows the plants to establish themselves before their active growing season begins, while late summer to early fall gives them time to settle before winter.
Avoid dividing daylilies during the peak of summer heat, as the stress of high temperatures can hinder their recovery. Observing the plant’s growth patterns and weather conditions will help ensure a successful division process.
Signs That Daylilies Need Dividing
Over time, daylilies can become overcrowded, which can negatively impact their health and blooming potential. One of the most obvious signs that your daylilies may need dividing is a noticeable decrease in the number or size of blooms. When the clump becomes too dense, the plants compete for nutrients, water, and space, which can limit their ability to thrive. Another indicator is the formation of a hollow or dead center in the clump, where the middle appears sparse while growth continues primarily around the edges.
Additionally, if the plants seem to be outgrowing their space or their foliage appears stunted or yellowing despite adequate care, it may be time to divide them. Regularly observing your daylilies and addressing these signs will help maintain their vigor and ensure consistent, beautiful blooms.

Tools and Materials Needed
To successfully divide and transplant your daylilies, it’s important to have the right tools and materials on hand. Here’s what you’ll need:
Garden Spade or Shovel:
This will be used to dig up the daylilies from the ground. Choose a sturdy spade or shovel with a sharp blade for easier digging.
Garden Fork:
A garden fork can also be used to gently loosen and lift the plants from the soil without causing damage to their roots.
Pruning Shears:
These will come in handy for cutting away any dead, damaged, or diseased foliage before dividing the plants.
Garden Hose:
Watering your daylilies before and after transplanting will help reduce stress on the plants and promote healthy root growth.
Potting Mix:
When replanting your divided daylilies, it’s important to use a well-draining potting mix that is specifically formulated for container gardening. This will provide the necessary nutrients and support for your plants to thrive. You can also add some organic compost to the mix to further enrich it.
Fertilizing:
Daylilies are not heavy feeders, but they will benefit from a light application of balanced fertilizer in the spring and early summer. Be sure to follow the recommended dosage on the packaging, as over-fertilization can cause damage to your plants.
12 Step-by-Step Guidelines on How to Divide Daylily Plants
Step 1: Choose the Right Time
The best time to divide daylily plants is in early spring or late summer, when the weather is mild and the plants are not actively blooming.
These periods allow the daylilies to recover and establish themselves before facing extreme temperatures. Avoid dividing them during peak blooming seasons, as this can stress the plants and hinder their growth.
Step 2: Prepare the Soil
Before dividing and replanting your daylilies, it’s essential to ensure the soil is in the best condition to support healthy growth. Start by loosening the soil in the designated planting area to improve drainage and aeration. Mix in organic matter such as compost or well-rotted manure to enrich the soil with nutrients.
Test the soil’s pH level and adjust it if necessary to ensure it remains slightly acidic to neutral, within the optimal range of 6.0 to 7.0. Properly prepared soil will create a strong foundation for your divided daylily plants to thrive.
Step 3: Water Your Plants
After planting your divided daylilies, it’s essential to water them thoroughly to help establish strong roots. Ensure the soil is evenly moist but not waterlogged, as excessive water can lead to root rot.
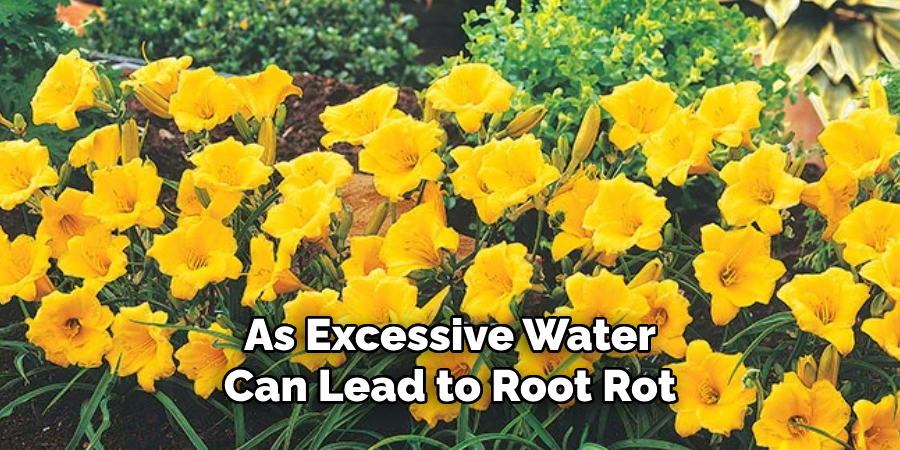
During the first few weeks, keep the soil consistently damp to support the plants’ adjustment to their new environment. Once the daylilies are established, regular watering can be done as needed, typically about 1 inch of water per week, depending on weather conditions. Proper hydration is key to healthy growth and vibrant blooms.
Step 4: Dig Up the Clump
When it’s time to divide or transplant daylilies, the first step is digging up the clump. Use a spade or garden fork to work around the base of the plant, loosening the soil to avoid damaging the roots.
Carefully lift the entire clump from the ground, ensuring as much of the root system as possible is preserved. Removing the clump will allow you to assess its size and condition, ensuring it’s ready for division or relocation to a new spot in your garden.
Step 5: Separate the Clumps
Once the clump has been lifted, gently shake off any excess soil to clearly see the root system. Use your hands or a clean, sharp garden knife to separate the clump into smaller sections, ensuring each section has healthy roots and at least two to three fans of foliage. Take care to handle the roots delicately to prevent unnecessary damage.
If any roots appear dead or diseased, trim them away before replanting. This separation process not only promotes healthier growth but also allows you to expand your daylily collection throughout your garden.
Step 6: Trim the Leaves and Roots
Once the clumps have been divided, use clean, sharp garden shears to trim the leaves back to a height of about 6-8 inches. This reduces water loss and stress on the plant while it re-establishes itself. Additionally, inspect the roots and trim any excessively long or damaged sections to encourage the growth of new, healthy roots.
Be sure to use sterilized tools to prevent the spread of diseases. Proper trimming prepares your daylilies for successful replanting, encouraging vigorous growth in the seasons to come.
Step 7: Replant
Choose a sunny location with well-drained soil for replanting your daylilies. Dig a hole wide and deep enough to accommodate the trimmed roots, ensuring the crown of the plant sits about an inch below the soil surface. Carefully place the daylily in the hole, spreading the roots evenly, and backfill with soil, patting it gently to remove air pockets.
Water the newly planted daylily thoroughly to help the soil settle around the roots. Adding a layer of mulch around the base will help retain moisture and regulate soil temperature, giving your daylilies the best start in their new spot.
Step 8: Water Again
After a few days, check the soil around the newly planted daylily to ensure it hasn’t dried out. If the soil feels dry to the touch, water the plant deeply to provide consistent moisture, as this helps establish strong roots.
Avoid overwatering, as excessively wet conditions can lead to root rot. Regularly monitoring the soil and adjusting your watering schedule as needed will keep your daylilies healthy and thriving.
Step 9: Mulch
Applying a layer of mulch around your newly planted daylilies can help retain soil moisture, regulate temperature, and minimize weed growth.
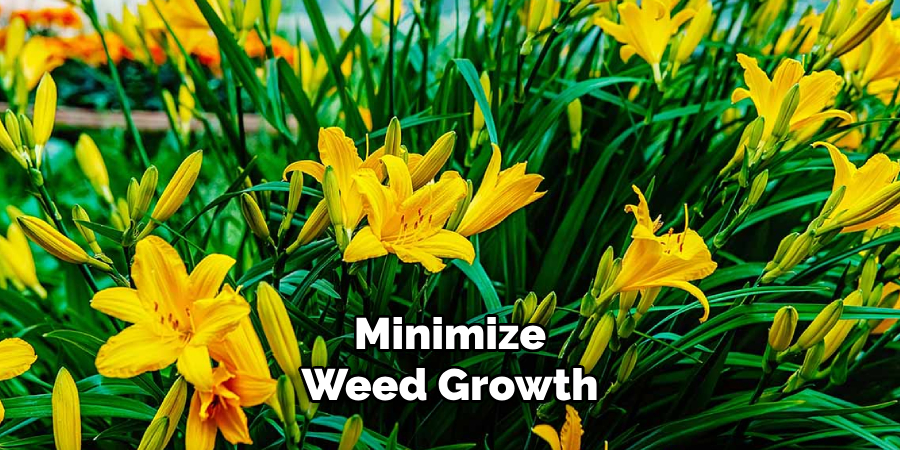
Use organic mulch, such as shredded bark, straw, or compost, and spread it evenly around the base of the plant, leaving a small gap around the crown to prevent rot. A layer of 2-3 inches is usually sufficient to provide these benefits while keeping your garden neat and tidy.
Step 10: Monitor and Maintain
Once your daylilies are planted and mulched, regular monitoring and maintenance are essential to ensure their long-term health. Inspect the plants frequently for signs of pests, diseases, or nutrient deficiencies.
Remove any yellowing or dead foliage to promote healthy growth and prevent the spread of potential issues. Fertilize lightly during the growing season if needed, and adjust watering based on weather conditions. By staying attentive and proactive, you can enjoy vibrant, blooming daylilies in your garden for years to come.
Step 11: Share with Others
As your hostas continue to grow and thrive, consider sharing extra divisions with friends, family, or neighbors. This not only helps spread the beauty of these plants but also prevents overcrowding in your own garden.
You can also join a local gardening group or online community to connect with other hosta enthusiasts and exchange tips and plants.
Step 12: Enjoy the Rewards
Watching your hostas grow, bloom, and thrive in your garden is a rewarding experience. These low-maintenance plants provide beauty year after year, making them a valuable addition to any landscape. Take the time to sit back and enjoy the results of your hard work, whether it’s admiring their unique foliage or taking in the sweet fragrance of their flowers.
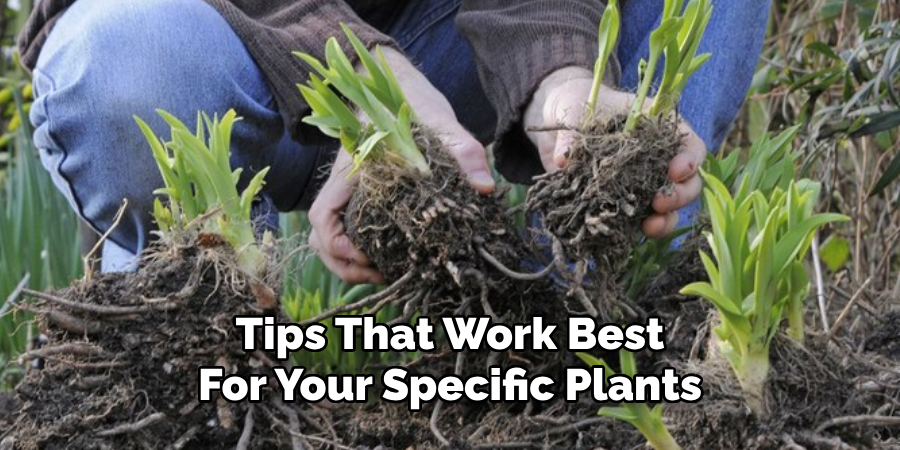
Following these steps on how to divide daylily plants will not only help you create a healthier and more beautiful garden, but it can also be a fun and fulfilling activity. As you continue to care for your hostas, you may even discover new techniques or tips that work best for your specific plants.
Conclusion
In conclusion, gardening is a rewarding practice that combines creativity, patience, and care. By learning and applying techniques such as dividing daylilies and properly tending to hostas, you can cultivate a thriving, vibrant garden that brings joy and beauty to your outdoor space.
Remember, each plant has its own needs and characteristics, so take the time to observe and understand them. The effort you put in will not only enhance your garden’s health and aesthetics but also provide a peaceful and fulfilling connection with nature. Thanks for reading this article on how to divide daylily plants.