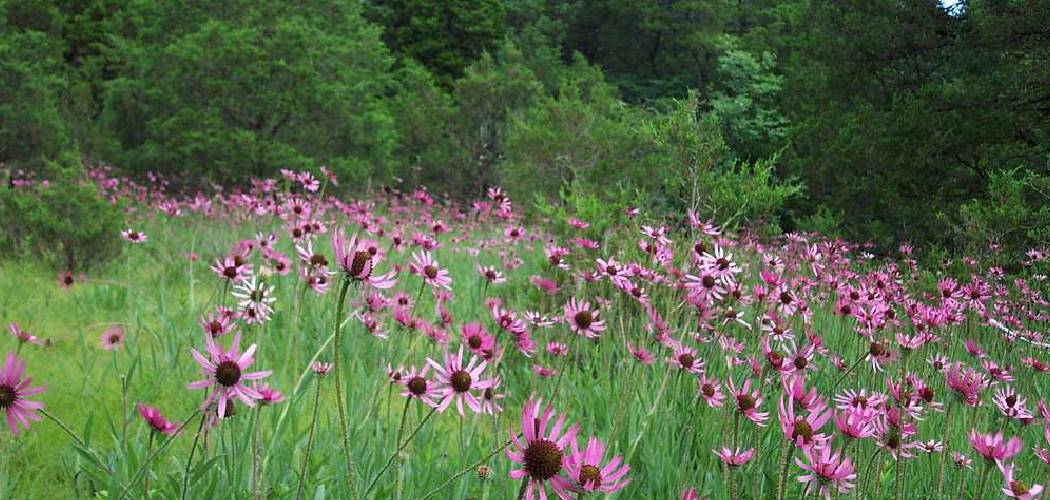
Are you tired of your Dianthus plants becoming overcrowded and tangled? Or do you simply want to propagate your favorite varieties to share with friends and family?
How to divide dianthus plants is a simple and effective way to rejuvenate older plants, encourage healthy growth, and propagate new ones for your garden. This process not only helps to maintain the plant’s vitality but also ensures that it continues to produce vibrant blooms year after year. By carefully separating the root clumps and replanting them, you can expand your dianthus collection or share them with fellow gardeners.

Whether you’re an experienced gardener or a beginner, dividing dianthus plants is a rewarding task that promotes a thriving and colorful garden. Let’s take a closer look at the steps involved in dividing dianthus plants.
What Are the Benefits of Dividing Dianthus Plants?
Dividing dianthus plants has several benefits that can improve the overall health and beauty of your garden. These include:
- Encourages New Growth: As dianthus plants grow, their root systems become crowded, which can inhibit new growth. By dividing them, you are giving each plant more space to establish its roots and grow.
- Increases Flower Production: When dianthus plants have limited space for their roots to spread out, they may produce fewer flowers. Dividing them allows for better nutrient absorption and ultimately leads to more blooms.
- Prevents Overcrowding: Without division, dianthus plants will continue to grow and take up more space in the garden. This can result in overcrowding, which can lead to competition for resources and stunted growth.
- Maintains Plant Health: Over time, dianthus plants may develop diseases or pests that can spread throughout the entire plant if left unattended. By dividing them, you are removing any diseased or damaged parts and promoting overall plant health.
- Increases Longevity: Dianthus plants that have been growing in the same spot for many years may become weaker and produce fewer flowers. Dividing them every few years helps rejuvenate the plant and extend its lifespan.
What Will You Need?
To successfully divide your dianthus plants, you will need a few basic gardening tools:
- Sharp Garden Shears or a Knife: These will be used to cut through the plant’s roots.
- Shovel or Garden Fork: You will need these to dig up the plant from the ground.
- Watering Can or Hose: After dividing and replanting, it is important to water the newly transplanted dianthus thoroughly.
- Pruning Scissors: If your dianthus has long stems, you may want to trim them down before dividing to make handling easier.
10 Easy Steps on How to Divide Dianthus Plants
Step 1. Choose the Right Time:
The best time to divide dianthus plants is during early spring or early fall when the weather is cooler and the plant is not actively blooming. This ensures minimal stress on the plant and allows it to focus on establishing new roots after division. Aim for a day when the soil is moist but not overly saturated, as this will make the process easier and more effective.

Step 2. Water the Plant:
Before dividing your dianthus plants, thoroughly water them a day or two before the process. This helps to loosen the soil around the roots and ensures that the plants are hydrated, reducing the risk of transplant shock. Moist soil is easier to work with when digging, and hydrated plants are better prepared to handle the disturbance caused by division. Be sure to avoid overwatering, as overly soggy soil can make the roots more prone to damage and may create a muddy mess during the process.
Step 3. Dig Around the Plant:
Begin by using a spade or garden fork to carefully dig around the plant, starting a few inches away from the base to avoid damaging the roots. Work your way around the entire plant, loosening the soil as you go. Aim to create a wide enough perimeter to ensure you can remove the root ball intact. Take care to dig deep enough to reach the bottom of the root system, as cutting through roots too close to the base can harm the plant. Once the soil is sufficiently loosened, gently lift the plant out of the ground. For larger, more established plants, you may need assistance or additional tools to successfully remove them.
Step 4. Lift the Plant:
Slowly and carefully lift the plant from the ground, ensuring that the root ball remains intact. Hold the base of the plant firmly but gently while supporting the soil and roots as much as possible. For smaller plants, this can typically be done by hand, but larger plants may require the use of a spade, trowel, or even a root ball tarp to provide extra support. Avoid shaking off too much soil from the root system, as the remaining soil can help the plant transition to its new location more easily. Place the plant in a shaded area or directly into its new planting hole to prevent the roots from drying out.

Step 5. Shake Off Excess Soil:
Gently shake the plant to remove any loose soil clinging to the roots, being careful not to damage the root system. This step helps in identifying and trimming any dead or damaged roots before replanting. If needed, lightly rinse the roots with water to ensure only healthy roots remain exposed. Properly prepared roots will encourage stronger growth once the plant is moved to its new location.
Step 6. Examine the Roots:
Carefully inspect the root system for any signs of rot, disease, or damage. Healthy roots are usually firm and white or light tan, while unhealthy roots may appear mushy, dark, or have an unpleasant odor. Trim away any problematic roots using sterilized scissors or pruning shears to prevent the spread of disease. Pay special attention to entangled or circling roots, as these can hinder proper growth. Gently separate or loosen them to encourage a healthier spread of roots in the new soil.
Step 7. Cut or Pull Apart the Clumps:
Carefully examine the root ball and identify natural divisions or sections where the plant can be separated without causing significant damage. Using your hands or a clean, sharp knife, gently pull apart or cut through the clumps, ensuring that each section has a healthy amount of roots attached. Be cautious to preserve the integrity of the roots and avoid tearing or breaking them unnecessarily.

Step 8. Prepare the New Planting Holes:
Select appropriate spots in your garden or pots for the new plant sections. Ensure the locations have suitable light, soil type, and drainage for the plant species. Dig holes that are slightly larger than the root ball of each division to allow the roots to spread out comfortably. If necessary, amend the soil with compost or other organic materials to improve fertility and texture. Make sure the planting holes are evenly spaced to provide adequate room for growth and airflow between the plants.
Step 9. Plant the Divisions:
Gently place each plant division into its prepared hole, ensuring that the top of the root ball is level with the surrounding soil surface. Fill the hole with soil, pressing it down lightly to remove any air pockets and secure the plant in place. Water the newly planted divisions thoroughly to help settle the soil and hydrate the roots. Add a layer of mulch around the base of the plants to retain moisture, regulate soil temperature, and suppress weeds. Be sure to care for the divisions with proper watering and monitoring, allowing them time to establish in their new environment.
Step 10. Water Thoroughly:
Proper watering is essential to ensure the success of your newly planted divisions. After planting, generously water the area to deeply saturate the soil and promote root-to-soil contact. This initial watering helps to eliminate air pockets and provides the moisture necessary for the plants to begin establishing their roots. Be careful not to overwater, as this can cause waterlogging and stress the plants. Moving forward, monitor the soil moisture regularly and provide water as needed, especially during dry or hot conditions. Consistent watering will help the divisions thrive in their new environment.
By following these steps, you can successfully divide and propagate your dianthus plants, ensuring healthy and vibrant growth in your garden!

5 Things You Should Avoid
- Dividing at the Wrong Time of Year
Avoid dividing dianthus plants during extreme weather conditions, such as the peak of summer or the middle of winter. The best time to divide is during early spring or early fall when the plants are less stressed and can recover more easily.
- Overlooking Diseased or Weak Plants
Do not attempt to divide plants that are showing signs of disease, pests, or general weakness. Dividing unhealthy plants can spread the problem to the new divisions and compromise the overall health of your garden.
- Using Dull or Dirty Tools
Never use tools that are dull or unclean to divide your dianthus plants. Unsterilized tools can introduce pathogens, while dull tools can damage roots and stems, leading to poor recovery and growth.
- Dividing Too Small
Avoid creating overly small divisions, as these may lack enough roots and stored energy to establish themselves after transplanting. Make sure each division has a healthy portion of roots and foliage to sustain growth.
- Neglecting Aftercare
Once divided, do not neglect the necessary aftercare. Failing to water appropriately, apply mulch, or monitor the new divisions can lead to stress or failure to thrive. Proper care ensures the success of your efforts in propagating healthy plants.
Conclusion
How to divide dianthus plants is a straightforward process that, when done correctly, can rejuvenate your garden and encourage healthy growth.
By choosing the right time, preparing the plants properly, and following effective division techniques, you can ensure the new divisions thrive. Remember to avoid common mistakes such as overwatering, poor preparation, or neglecting aftercare.
With patience and attention to detail, dividing dianthus can be a rewarding experience that contributes to a vibrant and flourishing garden.