To drill holes in a ceramic pot, use a diamond-tipped drill bit. Ensure you apply gentle pressure and keep the surface wet to avoid cracking.
Ceramic pots are popular choices for gardening and home decor. They enhance aesthetics but often lack drainage holes, which can lead to overwatering. Drilling holes allows excess water to escape, promoting healthier plants. The process may seem daunting, but with the right tools and techniques, it becomes manageable.
You’ll need safety goggles, a drill, and a diamond-tipped bit for best results. Taking precautions, such as keeping the pot wet while drilling, helps prevent damage. This guide will walk you through the steps to effectively drill holes in your ceramic pots, ensuring your plants thrive.
Credit: www.youtube.com
How to Drill Holes in a Ceramic Pot : Step by Step Guide
Safety First: Preparing To Drill Ceramic
Safety is very important when drilling ceramic pots. Start by wearing safety goggles to protect your eyes. Dust masks are also necessary to avoid inhaling any dust. Ear protection may be needed if using loud tools.
Choose a clean, flat surface for your workspace. Make sure it is well-lit to see clearly. Use a workbench or a sturdy table for stability. Keep all your tools organized and within reach. Avoid clutter to reduce the risk of accidents.
Selecting The Perfect Drill Bit
Choosing the right drill bit is essential for drilling ceramic pots. Ceramic drill bits are designed specifically for this task. They have a sharp tip and a special coating that prevents chipping.
For softer ceramics, use a diamond-tipped drill bit. This type is great for smooth finishes and precise holes. For harder materials, a carbide-tipped bit works best. It can handle tougher surfaces without breaking.
| Type of Ceramic | Recommended Drill Bit |
|---|---|
| Softer Ceramics | Diamond-tipped Drill Bit |
| Harder Ceramics | Carbide-tipped Drill Bit |
Marking Your Ceramic Pot
Start by choosing where to place the holes in your ceramic pot. Think about where water might collect. Select spots that help with drainage. This step is very important for plant health.
Use a pencil or marker to make your marks. Keep the markings small and clear. This will ensure you drill in the right spots. Make sure the marks are visible even after handling the pot.
Double-check your measurements before drilling. Accurate placement helps avoid mistakes. Take your time with this step for the best results.
Credit: www.reddit.com
Setting Up For Drilling
Before starting, secure the pot to avoid movement. Use a clamp or a non-slip mat. Place the pot on a stable surface. This setup prevents accidents while drilling.
Pre-drilling preparations are crucial. Choose the right drill bit for ceramic. A diamond-tipped bit works best. Mark the spot where you want to drill. Use a marker or pencil to make a visible mark.
Keep water nearby while drilling. This helps to cool the bit and reduce dust. Start drilling at a low speed. Gradually increase speed as you penetrate the ceramic.
The Drilling Process: Step By Step
Begin by choosing a ceramic pot that you want to drill. Use a marker to mark the spot where you want to create the hole. Make sure the spot is appropriate for your project.
Secure the pot on a stable surface. Use a clamp if needed to hold it steady. This helps prevent any movement while drilling.
Start with a low-speed drill setting. Apply gentle pressure as you begin. Too much force can crack the pot.
As you drill, maintain a steady speed. Keep the drill bit perpendicular to the surface. This ensures a clean and accurate hole.
Take breaks to avoid overheating the bit. Check your progress regularly. This way, you can adjust as needed.
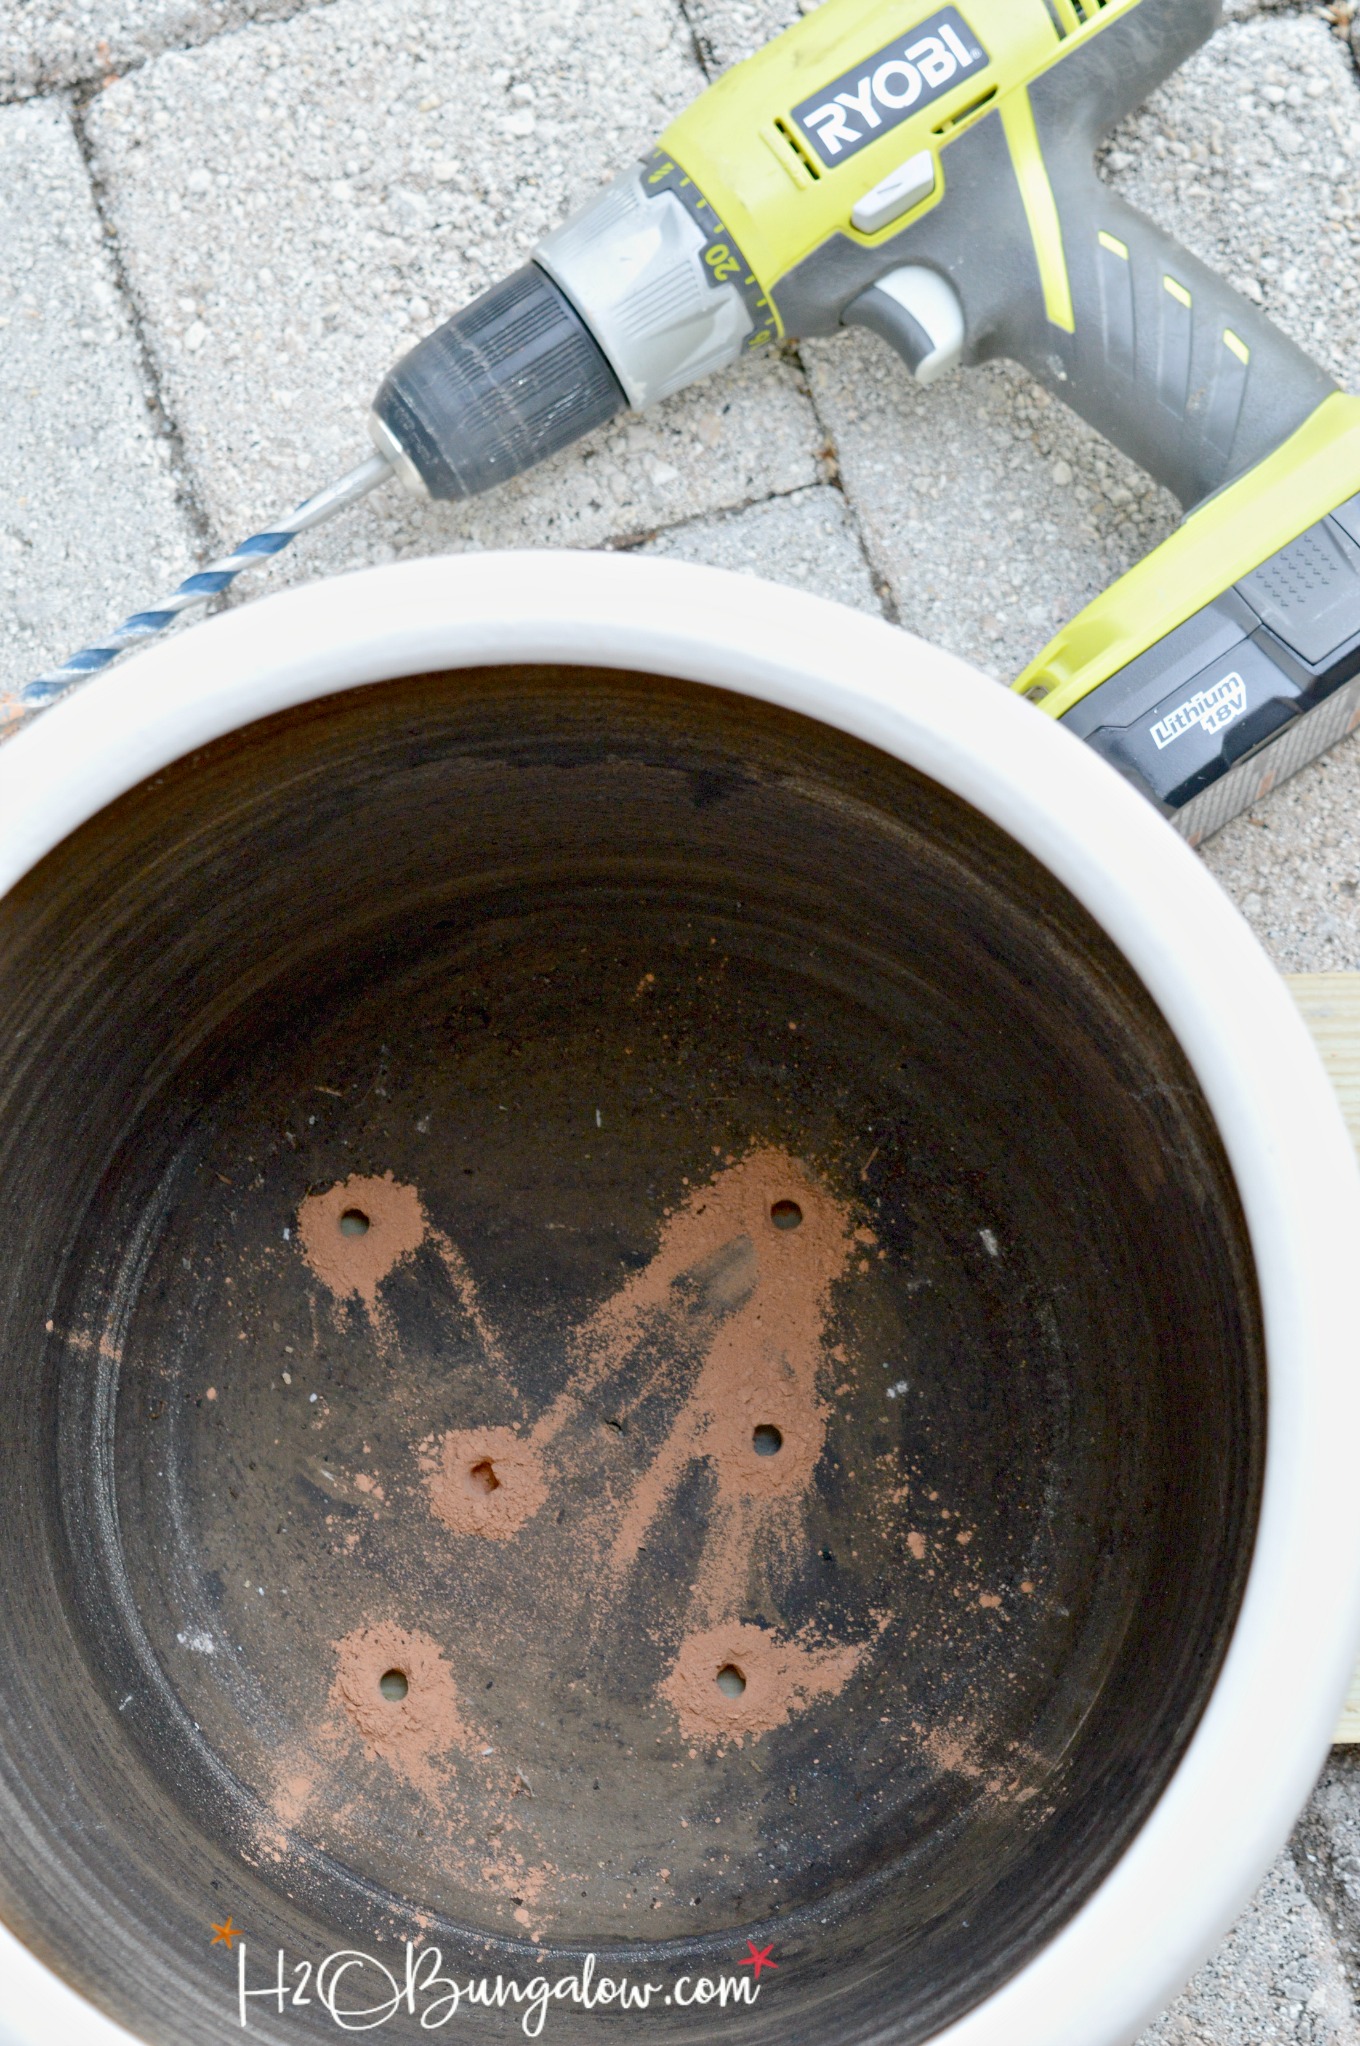
Credit: h2obungalow.com
Cooling The Ceramic During Drilling
Keeping ceramic cool during drilling is very important. Heat can cause cracks or breaks in the pot. High temperatures weaken the material. This can lead to disastrous results.
Some effective cooling techniques include:
- Using water to cool the drill bit.
- Spraying cooling fluid on the area.
- Drilling at a slow speed to reduce friction.
- Taking frequent breaks to let the pot cool.
These methods help maintain the integrity of the ceramic. Keeping it cool ensures a successful drilling experience.
Finishing Touches Post-drilling
After drilling holes, smoothing the edges is important. Use fine sandpaper to gently round the sharp edges. This helps prevent injuries while handling the pot. Always wear gloves for extra safety.
Cleaning up your workspace ensures a safe environment. Gather all the ceramic dust and debris. Use a damp cloth to wipe down surfaces. Dispose of waste materials in a proper bin. Keeping everything tidy makes future projects easier.
Additional Tips For Successful Drilling
Use a slow speed when drilling to prevent cracks. Apply light pressure only. This helps keep the ceramic intact.
Always drill from the outside to the inside. This method reduces stress on the pot. If a crack appears, stop immediately. Allow the pot to cool down before continuing.
To fix small breaks, use epoxy glue. It binds the pieces together and creates a strong hold. Always let the glue dry completely before using the pot again.
For longevity, avoid placing the pot in extreme temperatures. Temperature shocks can lead to cracks and breaks.
Store ceramic pots in a safe place to prevent accidental drops. Regularly check for any signs of wear.
Frequently Asked Questions
How Do I Safely Drill A Ceramic Pot?
To safely drill a ceramic pot, use a diamond-tipped drill bit. Start at a low speed to prevent cracking. Apply water to cool the bit and reduce dust. Maintain steady pressure, and check for chips. This method ensures a clean hole without damaging your pot.
What Tools Do I Need For Drilling Ceramic?
For drilling ceramic, you’ll need a diamond drill bit, a power drill, and water. A marker can help you mark the drilling point. Additionally, a clamp will stabilize the pot during drilling. These tools will make the process easier and safer.
Can I Drill Holes In Any Ceramic Pot?
Most ceramic pots can be drilled, but some are more fragile. Avoid pots with intricate designs or thin walls, as they may crack easily. Test a small, inconspicuous area first. Always ensure you use the right tools and techniques to minimize damage.
How Do I Prevent Cracking While Drilling?
To prevent cracking while drilling, use a low speed and apply water. Start with a small pilot hole to guide the drill bit. Keep even pressure throughout the drilling process. Avoid sudden movements, and don’t force the drill. This will help maintain the integrity of the pot.
Conclusion
Drilling holes in a ceramic pot can enhance drainage and improve plant health. Follow the right techniques for the best results. Always prioritize safety and use the proper tools. With practice, you’ll master this skill. Enjoy your gardening journey and watch your plants thrive in their newly prepared pots!