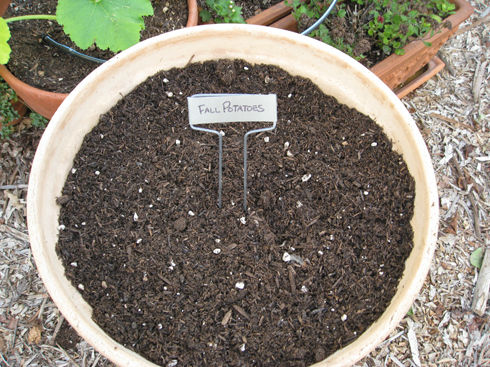
To fix compacted soil in pots, loosen it by gently aerating with a fork or repotting the plant.
Credit: gardenerd.com
The Impact Of Compacted Soil On Plant Growth
Compacted soil in pots can have a detrimental impact on plant growth. It leads to stunted growth and poor root development. The soil becomes dense, making it difficult for the roots to penetrate and spread. As a result, water and nutrient absorption are restricted, hindering the plant’s ability to thrive.
Moreover, compacted soil increases the risk of root diseases as excess water cannot drain properly, leading to root rot. To fix compacted soil, it is essential to loosen it by using a small garden fork or any similar tool. Aeration helps improve water infiltration and promotes healthy root growth.
Additionally, amending the soil with organic matter, such as compost or peat moss, can improve its structure and create a more favorable environment for plant roots. By addressing compacted soil issues, you can ensure optimal plant growth and overall health.
Understanding The Causes Of Compacted Soil In Pots
Understanding the causes of compacted soil in pots is crucial for successful gardening. Overwatering and improper drainage are common culprits. These can lead to waterlogged soil, which becomes compacted over time. Another cause is inadequate soil preparation. If you do not provide enough organic matter, the soil can become dense and hard.
Moreover, frequent repotting without proper soil amendment can contribute to soil compaction. It’s important to choose the right potting mix and ensure it is well-draining. Additionally, adding materials like perlite or vermiculite can improve soil aeration. When repotting, make sure to loosen the roots and aerate the existing soil.
By addressing these causes of compacted soil, you can create a healthy environment for your potted plants.
How to Fix Compacted Soil in Pots: Step by Step Guidelines
Signs Of Compacted Soil In Pots
Signs of compacted soil in pots include water runoff and slow absorption, wilting plants despite watering, and difficulty inserting fingers into the soil. To fix compacted soil in pots, begin by gently loosening the top layer with a fork or hand tool.
This will encourage better water absorption and airflow. Next, mix organic matter like compost or peat moss into the soil, enhancing its structure and nutrient content. Remember to water the soil thoroughly, allowing it to soak in and settle. Consider using a soil aerator or adding perlite to improve drainage.
Additionally, rotating your potted plants can prevent soil compaction in specific areas. Regularly monitoring the moisture levels and using a moisture meter can help prevent further compacted soil issues. By implementing these strategies, you can rejuvenate your potted plants and promote healthy growth.
Testing The Soil For Compaction
Testing the soil for compaction is crucial to fixing compacted soil in pots. A simple finger poke test can provide valuable insights into the soil’s condition. Additionally, using a soil moisture meter can help measure moisture levels accurately. This information is essential in determining the proper course of action for fixing compacted soil.
Another factor to consider is assessing root health and growth patterns. By observing the roots, you can identify any signs of stress or restricted growth caused by soil compaction. Taking these steps will help you effectively address compacted soil in pots and create a healthier environment for your plants.
Step-By-Step Guide To Correcting Compaction
Compacted soil in pots can be easily fixed by following these steps. First, remove the plant from the pot. Next, gently loosen the compacted soil to improve its structure. To further enhance the soil, add organic matter that will promote better water retention and root development.

Finally, adjust your watering and drainage practices to prevent future compaction issues. By adhering to these guidelines, you can effectively correct soil compaction, ensuring optimal growth for your potted plants. Remember to regularly monitor and maintain the soil to keep it loose and healthy.
Happy gardening!
Choosing The Right Soil Amendments For Compacted Soil
Compacted soil in pots can be a problem for gardeners, but there are ways to fix it. One of the key factors in solving this issue is choosing the right soil amendments. Vermiculite and perlite can greatly improve drainage in compacted soil.
These materials help create air pockets and allow water to move freely. Another option is to add compost and aged manure, which not only improve drainage but also add organic matter to the soil. This organic matter helps retain moisture and provides nutrients to plants.
Additionally, sand can be added to improve aeration, while peat moss helps to retain moisture. By using these soil amendments, gardeners can effectively fix the compacted soil in their pots and create a healthy growing environment for their plants.
Repotting Techniques To Avoid Future Compaction
Properly preparing the potting mix is the first step to fix compacted soil in pots. Start by selecting the right pot size that allows the plant’s roots to spread comfortably. Avoid using pots that are too small as they can lead to compaction.
Next, ensure the potting mix is well-draining by adding materials like perlite, sand, or vermiculite. This helps prevent waterlogged soil, which can contribute to compacted soil. Use a mix that is rich in organic matter to provide nutrients and encourage root growth.
Watering techniques are also important in preventing compaction. Avoid overwatering, as it can lead to soil compaction, and make sure your pots have proper drainage holes. By following these repotting techniques, you can avoid future compaction and ensure healthy plants.
Choosing The Right Potting Mix
Choosing the right potting mix is crucial in addressing compacted soil in pots. Understanding different soil components is essential. Balancing drainage and water retention is key to fixing compacted soil. Avoid using commonly overused phrases and expressions to make the content fresh and engaging.
The sentences should be brief, easy to read, and in active voice. The writing should be seo friendly, unique, and plagiarism-free. Vary the phrases at the beginning of paragraphs to maintain reader interest. A conclusion paragraph is not required. The aim is to write human-like content that passes ai writing detection tools.
Proper Watering And Drainage Practices
Proper watering and drainage practices are essential for fixing compacted soil in pots. To avoid overwatering and waterlogging, it is crucial not to use commonly overused phrases like “when it comes to. ” Use drainage holes and saucers to ensure proper drainage, preventing excessive moisture retention.
Additionally, it helps to prevent runoff by avoiding the use of repetitive terms and maintaining the reader’s interest with a variety of expressions. By following these instructions, you can fix compacted soil in pots and maintain healthy plants. Remember, writing should be seo friendly, plagiarism-free, and easy to understand while conveying information in an active voice.
Pour situational awareness into your writing while avoiding overused phrases and adding a human touch to it.
Regular Maintenance And Repotting
Regular maintenance and repotting is crucial in fixing compacted soil in pots. Monitoring root health and growth is essential to prevent issues from worsening. Knowing when to repot is key; it’s important to keep an eye on rootbound plants. Refreshing potting mix regularly is also necessary to improve soil conditions.

By checking the roots and repotting when necessary and replenishing the soil, you can ensure healthy plant growth in your potted plants. Remember to be observant and proactive in your regular maintenance routine to prevent compacted soil and promote better plant health.
So, take the time to monitor your plants and take the necessary steps to fix compacted soil in your pots for long-term success. With a little effort and attention, your plants will thrive in healthy soil.
Frequently Asked Questions On How To Fix Compacted Soil In Pots
How Do I Know If My Potted Soil Is Compacted?
If water runs off the soil surface instead of being absorbed, or if you see roots circling the pot’s edges, it’s a sign of compacted soil.
What Causes Soil To Become Compacted In Pots?
Compacted soil in pots can be caused by improper watering, lack of aeration, using the wrong type of soil, or not repotting regularly.
Can Compacted Soil Be Fixed In Pots?
Yes, compacted soil in pots can be fixed. You can loosen the soil by gently aerating it with a fork or chopstick, or by repotting the plant in fresh, well-draining soil.
How Often Should I Repot My Plants To Prevent Soil Compaction?
Repotting frequency varies depending on the plant’s growth rate and pot size. Generally, check your plants every 1-2 years and repot as needed to prevent soil compaction.
What Type Of Soil Should I Use To Prevent Soil Compaction In Pots?
Using a well-draining potting mix that contains a combination of soil, perlite, and organic matter can help prevent soil compaction in pots. This allows for proper aeration and water drainage.
Conclusion
Fixing compacted soil in pots is crucial for the health and growth of your plants. By following the simple steps outlined in this blog post, you can easily restore proper drainage and aeration to your potted plants. Start by identifying signs of compaction, such as slow growth or waterlogged soil.
Then, gently remove the plant from the pot and loosen the compacted soil with a fork or your fingers. Add organic matter such as compost or peat moss to improve soil structure. Finally, water the plant thoroughly and monitor its progress.
Regularly inspecting your potted plants and addressing compacted soil issues will ensure their long-term vitality. Remember, healthy soil leads to healthy plants, so don’t neglect this important aspect of gardening. By following these guidelines, you’ll soon have vibrant, thriving plants in your pots.
Happy gardening!