Are you ready to grow your very own stunning redbud tree from seed? Germinating redbud seeds may seem tricky at first, but with the right steps, you can watch tiny green sprouts emerge and bring beauty to your garden.
In this guide, you’ll discover simple, effective methods to crack open those tough seed coats and give your seeds the perfect start. Keep reading, and soon you’ll be nurturing vibrant young trees that add charm and color to your outdoor space.
Let’s get your redbud seeds growing!

Credit: www.wikihow.com
Preparing Redbud Seeds
Preparing redbud seeds is the first step for successful germination. It involves careful collection, cleaning, and storage. These steps protect the seeds and help them sprout strong and healthy. Proper preparation also prevents mold and damage.
Collecting Mature Seeds
Collect seeds in late summer or early fall. Look for seed pods that are brown and dry. Avoid green or soft pods, as these seeds are not ready. Use scissors or your hands to remove pods carefully. Collect seeds on a dry day to prevent moisture damage.
Cleaning And Sorting
Break open the seed pods gently to remove the seeds. Remove any debris, such as pod pieces or leaves. Sort seeds by size and color. Healthy seeds are firm and dark brown. Discard seeds that are cracked, soft, or discolored. Clean seeds reduce the risk of disease during germination.
Storing Seeds Properly
Store seeds in a cool, dry place to keep them viable. Use paper envelopes or breathable containers for storage. Avoid plastic bags, which trap moisture. Label containers with the collection date and seed type. Check stored seeds regularly for mold or damage. Proper storage keeps seeds alive for the next planting season.
Seed Scarification Techniques
Redbud seeds have a tough outer shell that stops water from entering. This shell can slow down or stop germination. Seed scarification breaks or softens this hard coat. It helps the seed soak up water and start growing faster. There are a few easy ways to scarify redbud seeds at home.
Mechanical Scarification
Mechanical scarification means scratching or nicking the seed coat. Use sandpaper or a nail file to rub the seed gently. Make sure not to damage the inside. A small scratch or thin spot is enough. This method allows water to enter the seed quickly. It is safe and simple for beginners.
Hot Water Treatment
Hot water treatment softens the seed coat with heat. Boil water and let it cool for a minute. Pour the hot water over the seeds in a container. Let seeds soak until the water reaches room temperature. This process helps the shell crack naturally. It is less risky than mechanical scarification.
Chemical Scarification Options
Chemicals can also soften the seed coat. Sulfuric acid is one option but should be used carefully. Soak seeds in acid for a short time, then rinse well. This method is faster but needs caution. It is best for large seed batches and experienced gardeners.
Stratification Process
The stratification process is essential for germinating redbud seeds. It mimics the natural cold period seeds experience outdoors. This helps break seed dormancy. Seeds become ready to sprout after stratification.
Proper stratification improves seed germination rates. It ensures healthy seedlings. Understanding this process helps gardeners grow strong redbud trees.
Cold Stratification Requirements
Redbud seeds need cold and moisture for stratification. Keep seeds damp but not wet. Use a mix of peat moss and sand or paper towels. Place seeds in a sealed plastic bag to maintain moisture.
The cold temperature triggers the seed to start growing. Dry or warm conditions stop the process. Keep seeds in the right environment for best results.
Duration And Temperature
Cold stratify redbud seeds for about 60 to 90 days. The ideal temperature is between 34°F and 41°F (1°C to 5°C). This temperature range breaks seed dormancy effectively.
Too cold or too warm can harm the seeds. Check seeds regularly to avoid mold or drying out. After this period, seeds will be ready to plant.
Using Refrigeration Methods
Use your home refrigerator for cold stratification. Place the sealed bag with seeds inside. Avoid storing near fruits, as they release gases that can harm seeds.
Label the bag with the date you start stratification. Check moisture weekly and add water if needed. After the required time, plant seeds in soil for germination.
Sowing Redbud Seeds
Sowing redbud seeds starts with preparing the right conditions. Healthy seedlings need careful attention to soil, depth, and water. Each step helps the seed sprout strong and grow well.
Use gentle techniques to avoid damaging the delicate seeds. Follow these tips for the best results in your garden or pots.
Choosing The Right Soil Mix
Use a light, well-draining soil mix. A combination of peat moss, sand, and compost works well. Avoid heavy or clay soils that hold too much water. Good drainage prevents seed rot and helps roots grow.
Planting Depth And Spacing
Plant seeds about 1 inch deep in the soil. Too deep can stop the seed from sprouting. Space seeds 2 to 3 inches apart for enough room. This spacing allows seedlings to grow without crowding.
Watering Guidelines
Keep the soil moist but not soggy. Water gently after planting and daily if the soil dries. Use a spray bottle or fine watering can to avoid washing seeds away. Moist soil helps seeds swell and break open.
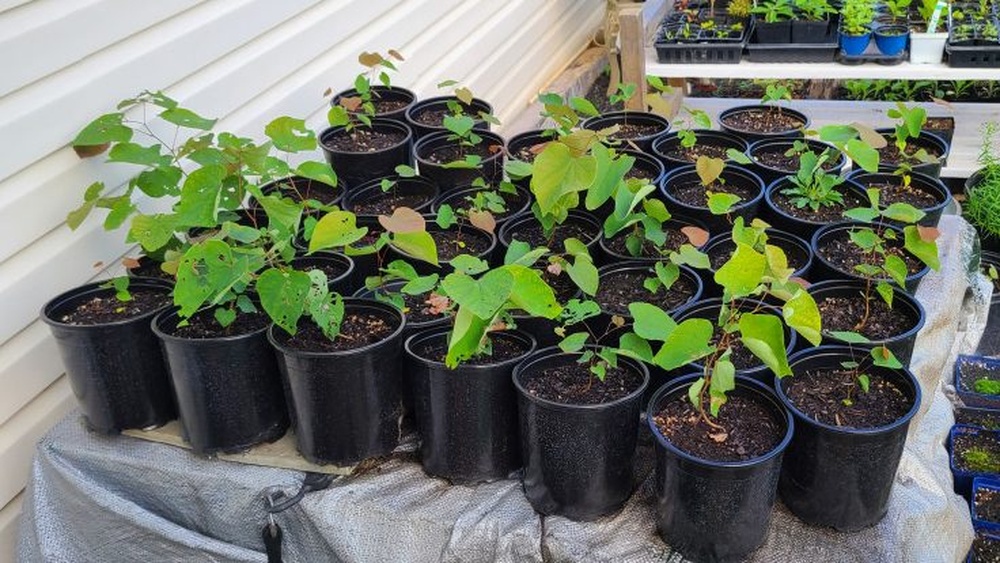
Caring For Seedlings
Caring for redbud seedlings is an important step in growing healthy trees. Young plants need the right conditions to grow strong roots and leaves. Proper care helps seedlings survive and thrive. Here are some key tips for taking care of your redbud seedlings.
Light And Temperature Needs
Redbud seedlings need plenty of light to grow well. Place them where they get bright, indirect sunlight. Avoid direct, harsh sun that can burn tender leaves. Keep the temperature between 65°F and 75°F. This range helps seedlings develop without stress. Avoid cold drafts or hot, dry air.
Fertilizing Young Plants
Feed seedlings with a mild, balanced fertilizer. Use a diluted liquid fertilizer every two weeks. Too much fertilizer can harm young roots. Choose one with equal parts nitrogen, phosphorus, and potassium. Fertilizing supports strong leaf and root growth.
Transplanting Tips
Move seedlings to bigger pots when roots fill the small containers. Handle seedlings gently to avoid root damage. Transplant on a cloudy day or in the shade. Water the seedlings well after transplanting. This reduces transplant shock and helps plants settle in.

Credit: www.youtube.com
Common Challenges
Germinating redbud seeds can be tricky due to several common challenges. These issues often slow down growth or stop seeds from sprouting. Knowing how to handle these problems helps protect your seeds and boosts success.
Dealing With Mold And Fungus
Mold and fungus often grow on damp seed surfaces. This can kill young seedlings quickly. Keep seeds in a clean container and avoid excess moisture. Use fresh, sterile soil and allow some air flow. If mold appears, remove affected seeds fast to stop spreading.
Pest Prevention
Small pests like insects can damage redbud seeds. They eat or bore into seeds, stopping growth. Store seeds in a sealed container to keep pests out. Check seeds regularly for signs of bugs or holes. Using natural pest repellents near your planting area helps too.
Troubleshooting Germination Issues
Seeds might not sprout due to poor conditions. Cold temperatures or dry soil often cause this. Soak seeds in warm water before planting to soften the seed coat. Keep soil moist but not wet. Ensure seeds get enough warmth and light. Patience is key; some seeds take longer to sprout.

Credit: www.youtube.com
Frequently Asked Questions
How Long Does It Take To Germinate Redbud Seeds?
Redbud seeds usually take 30 to 60 days to germinate. Cold stratification for 60 days improves germination rates. Keep seeds moist and warm after stratification for better results.
Do Redbud Seeds Need Scarification Before Planting?
Yes, scarification helps soften the hard seed coat. Use sandpaper or nick seeds gently to improve water absorption. This process speeds up germination and increases success rates.
What Is The Best Temperature For Redbud Seed Germination?
The ideal temperature is between 70°F and 75°F (21°C to 24°C). This range encourages quicker and more consistent seed sprouting. Keep the soil moist but not waterlogged.
Can Redbud Seeds Germinate Without Cold Stratification?
Cold stratification greatly improves germination but is not always required. Seeds may germinate slower or less reliably without it. Mimicking natural winter conditions helps break seed dormancy.
Conclusion
Germinating redbud seeds takes patience and care. Soak the seeds and provide warmth for better results. Keep the soil moist but not too wet. Watch for sprouts to appear in a few weeks. Transplant seedlings carefully once they grow stronger.
Growing redbud trees from seed brings joy and beauty. Enjoy the process and watch your garden flourish. Simple steps lead to healthy, vibrant trees. Start today and see your efforts bloom soon.