Growing alfalfa sprouts at home is an easy and rewarding way to add fresh, nutritious greens to your meals. These tiny sprouts are packed with vitamins, minerals, and protein, making them a healthy addition to salads, sandwiches, and more.

Best of all, they grow quickly and require minimal effort, making them an excellent choice for beginners and seasoned gardeners alike. With just a few simple steps, you can enjoy homegrown alfalfa sprouts in a matter of days.
In this article on how to grow alfalfa sprouts in a tray at home, we will cover everything you need to know to get started.
Why Grow Alfalfa Sprouts at Home?
Growing alfalfa sprouts at home comes with numerous benefits that make it a worthwhile endeavor. Not only are they incredibly fresh and flavorful compared to store-bought options, but homegrown sprouts are also free of preservatives and harmful chemicals. This ensures you’re consuming a natural, nutrient-rich food that’s perfect for boosting your overall health.
Additionally, growing your own alfalfa sprouts is cost-effective, as a small amount of seeds can yield a large batch of sprouts. It’s also an environmentally friendly practice, reducing packaging waste and transportation impact associated with supermarket products. Most importantly, the process is simple and rewarding, offering a sense of accomplishment with every harvest.
Materials Needed
To grow alfalfa sprouts in a tray at home, you will need the following materials:
- Alfalfa Seeds
- Sprouting Tray or Jar With Lid
- Water
- Paper Towels or Cheesecloth
- Spray Bottle (Optional)
8 Steps on How to Grow Alfalfa Sprouts in a Tray
Step 1: Soak the Seeds
Begin by measuring out approximately 1-2 tablespoons of alfalfa seeds, depending on the size of your sprouting tray or jar. Rinse the seeds thoroughly under cold water to remove any debris. Place the seeds in a bowl or directly in your sprouting jar, and add enough water to completely submerge them.
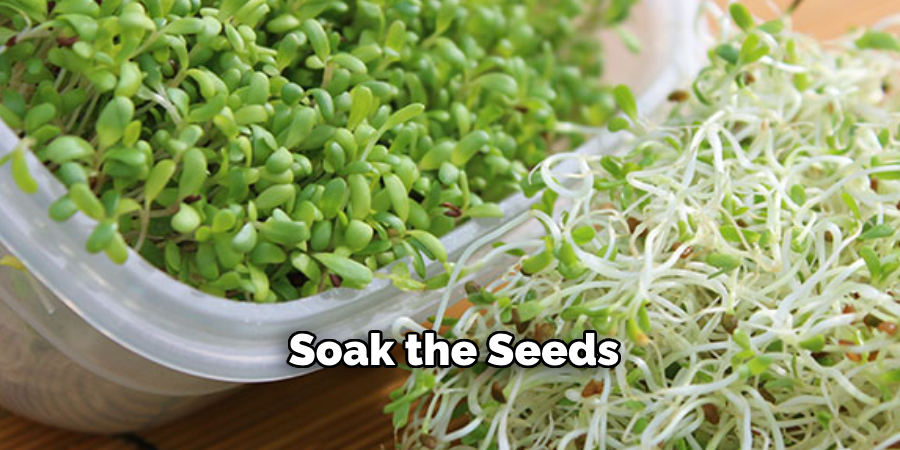
Allow the seeds to soak for 6-12 hours or overnight. This soaking process hydrates the seeds, triggering the initial phase of germination. After soaking, drain the water and rinse the seeds once more to ensure freshness before proceeding to the next step.
Step 2: Rinse and Drain
After the initial soak, it is crucial to rinse and drain the seeds properly to maintain a healthy sprouting environment. Using cool, clean water, rinse the seeds thoroughly to eliminate any residue or starch released during soaking.
Drain the water completely, ensuring no standing water remains, as excess moisture can lead to mold or spoilage. If using a sprouting jar, position it at an angle to allow proper drainage and airflow. Repeat this rinsing and draining process 2-3 times a day to keep the seeds hydrated and facilitate the sprouting process efficiently.
Step 3: Place Seeds in Tray
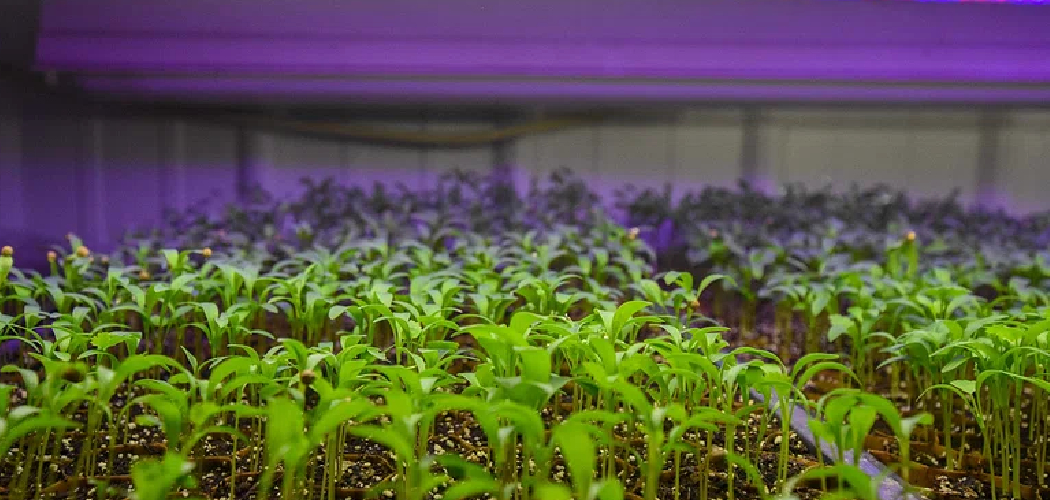
Once the seeds have been rinsed and drained properly, spread them evenly across a sprouting tray or similar container. Ensure the seeds are in a single layer to allow for adequate airflow and even growth. Avoid overcrowding, as this can lead to poor ventilation and hinder the sprouting process.
Place the tray in a location with indirect sunlight and moderate temperature, as extreme heat or direct sunlight can dry out the seeds or stifle their growth. Keep the seeds moist by misting them lightly, if necessary, between rinsing cycles.
Step 4: Water and Cover
After spreading the seeds, gently rinse them with clean, room-temperature water to ensure they remain hydrated. Once rinsed, cover the tray with a breathable lid or cloth to maintain humidity while allowing airflow. Avoid using airtight covers, as proper ventilation is crucial to prevent mold or bacterial growth.

Check on the seeds regularly, ensuring they stay moist but not waterlogged, and continue rinsing them as needed throughout the sprouting process.
Step 5: Check and Maintain Moisture
During the sprouting process, it is essential to check the moisture levels of the seeds daily. Use a gentle touch to ensure the seeds feel damp but not overly wet, as excessive moisture can encourage mold growth. If the seeds begin to dry out, lightly mist them with clean, room-temperature water.
Be consistent with your rinsing routine, typically two to three times per day, to keep the seeds fresh and hydrated. Maintaining the right balance of moisture will foster healthy, even sprouting.
Step 6: Provide Proper Temperature and Light
To ensure successful sprouting, maintain an optimal temperature range of 65-75°F (18-24°C). Keep the seeds in a warm, well-ventilated area away from direct sunlight, as excessive heat or sunlight can dry them out or hinder their growth.
Indirect light is ideal, especially for sprouting greens, as it encourages vibrant, healthy growth. If necessary, use a grow light to provide consistent light exposure without overheating the sprouts. Proper temperature and light conditions will support robust and nutrient-rich sprouts.
Step 7: Monitor and Water Regularly
Check your sprouts daily to ensure they remain moist but not overly wet. Use a spray bottle to lightly mist them with water if they start to dry out, but avoid soaking them, as excessive moisture can lead to mold or root rot.

Observing the sprouts regularly also helps you detect any issues early, such as uneven growth or discoloration, allowing for timely adjustments. Maintaining consistent hydration will help the sprouts develop evenly, resulting in a healthy and vibrant crop.
Step 8: Harvest and Enjoy!
Your microgreens should be ready for harvest in about 2-3 weeks, depending on the type of seed used. Simply snip off the greens just above the soil line when they reach a height of 1-2 inches (2.5-5 cm). Rinse them gently before using in salads, sandwiches, or as a garnish for your favorite dishes.
Following these steps on how to grow alfalfa sprouts in a tray will yield a continuous supply of fresh and nutritious greens right at your fingertips. Experiment with different types of seeds to discover new flavors and nutrient profiles. And don’t forget to share your successful sprouting journey with family and friends!
Additional Tips for Growing Microgreens
- Use organic, non-GMO seeds for best results.
- Keep the tray in a warm location, between 65-75°F (18-24°C), for optimal growth.
- Avoid over-watering as it can lead to mold or rot.
- Consider using a spray bottle filled with water to lightly mist the soil instead of pouring water directly onto the tray.
- Rotate the tray every few days to ensure even exposure to light.
- Harvest your microgreens when they are between 1-3 inches in height.
- To harvest, cut the greens just above the soil line with clean scissors or a sharp knife.
- Rinse and dry your harvested microgreens before consuming.
- Experiment with different types of seeds and mixtures for unique flavor profiles.
- Consider using a heat mat under the tray to promote faster growth in cooler climates.
- Don’t be afraid to get creative with how you use microgreens – add them to smoothies, salads, sandwiches, or as a garnish on top of dishes.
Common Problems and Solutions
Growing microgreens can be a rewarding experience, but it’s not without its challenges. Below are some common problems you might encounter and how to address them:
Mold Growth
Excess moisture and poor ventilation can lead to mold. Ensure proper air circulation by using a fan, avoid overwatering, and allow the growing medium to dry slightly between waterings.
Uneven Growth
If your microgreens grow unevenly, it might be due to inconsistent light exposure or seeding density. Use a grow light or place your setup in a well-lit area to ensure equal light distribution. Spread seeds more evenly across the tray during planting.
Slow or Stunted Growth
Cold temperatures or insufficient nutrients could slow growth. Try using a heat mat to maintain optimal temperatures, especially in cooler environments, and ensure your growing medium is nutrient-rich.

Yellowing Leaves
Lack of light is often the cause of yellowing leaves. Make sure your microgreens are getting enough direct sunlight or supplemental grow light for at least 12-16 hours a day.
Poor Germination
If seeds fail to sprout, they may be old or of low quality. Always use fresh, high-quality seeds and ensure even watering during the germination phase to promote success.
By identifying and addressing these issues, you can maintain healthy, thriving microgreens and enjoy their flavor and nutrition all year round.
Frequently Asked Questions
Q1: How Long Does It Take for Microgreens to Grow?
A: On average, microgreens take 7-14 days to reach harvestable size. The exact time may vary depending on the type of seed, growing conditions, and personal preference for size and flavor.
Q2: How Often Should I Water My Microgreens?
A: It is important to keep the soil consistently moist but not waterlogged. Check the soil moisture daily and water as needed, usually every 1-3 days depending on temperature and humidity levels.
Q3: Can I Use Regular Potting Soil for Growing Microgreens?
A: Yes, you can use regular potting soil for growing microgreens. However, it is recommended to mix in some additional organic matter or compost to provide more nutrients for the plants. You can also purchase specific microgreen soil mixes that are specially formulated for optimal growth of microgreens.
Conclusion
Growing microgreens at home is a simple and rewarding activity that brings both nutritional and culinary benefits. By following proper care techniques, choosing the right soil, and maintaining ideal growing conditions, you can enjoy fresh and healthy microgreens in just a few weeks.
Whether you are a gardening enthusiast or just starting out, microgreens are a great way to explore sustainable and efficient gardening practices right from your kitchen or backyard. Start small, experiment with different varieties, and experience the joy of growing your own food! Thanks for reading this article on how to grow alfalfa sprouts in a tray.