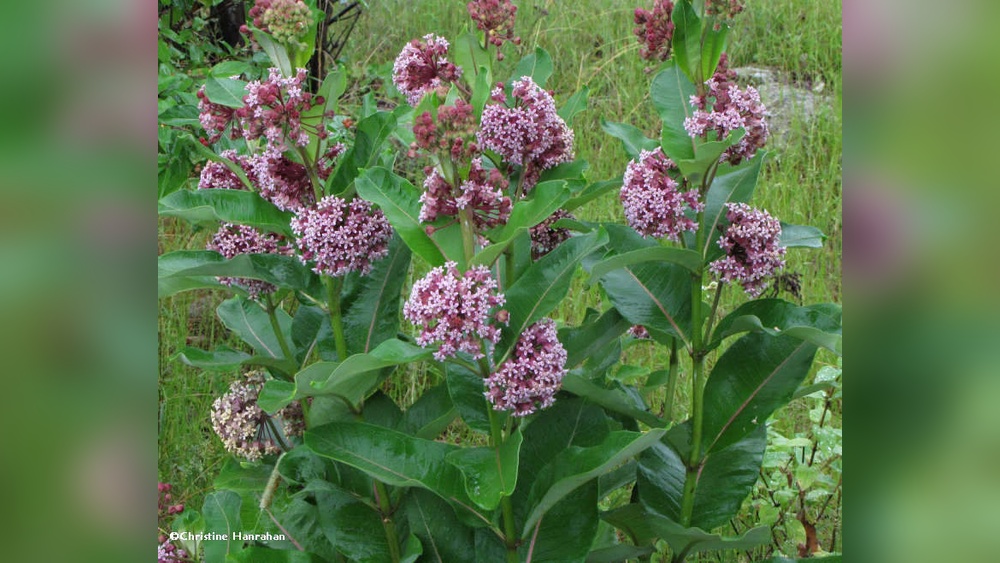
If you want to add beautiful, vibrant Asclepias plants to your garden, starting from seed is a rewarding way to do it. Growing Asclepias, also known as milkweed, is easier than you might think, and it brings incredible benefits for butterflies and pollinators.
Imagine watching monarch butterflies flutter around your yard, all because you took a few simple steps to grow these plants yourself. You’ll discover clear, easy-to-follow tips that will help you turn tiny seeds into thriving Asclepias plants. Ready to see your garden come alive with color and life?
Keep reading to learn exactly how to grow Asclepias from seed successfully.

Credit: theodorepayne.org
Selecting Quality Asclepias Seeds
Selecting quality Asclepias seeds is the first step to growing healthy milkweed plants. Good seeds increase your chances of strong growth and beautiful flowers. It helps to understand which seeds fit your garden and how to check their quality. This section guides you through choosing the right species, where to buy seeds, and how to test their viability.
Choosing The Right Species
Asclepias has many species, each with different needs and looks. Pick a species that grows well in your climate and soil. Common types include Butterfly Milkweed, Swamp Milkweed, and Common Milkweed. Each attracts different pollinators and fits various garden styles. Know your local environment to match the species well.
Where To Buy Seeds
Buy seeds from trusted nurseries or native plant sellers. Avoid cheap or unknown sources that may sell poor quality seeds. Local seed suppliers often offer plants native to your area. This choice helps your plants grow stronger and supports local wildlife. Check reviews and ask questions before buying.
Checking Seed Viability
Seed viability shows how many seeds can sprout. Fresh seeds usually have higher viability. Check the seed packet for the date and storage advice. You can test seeds by soaking them in water for a few hours. Seeds that sink usually have better chances to grow than floating ones. Plant a few seeds first to see how many sprout before planting a large batch.

Credit: monarchbutterflygarden.net
Preparing Seeds For Planting
Preparing Asclepias seeds before planting helps improve germination rates. Seeds often need special care to sprout well. This preparation mimics natural conditions and breaks seed dormancy. Follow these simple steps to get your seeds ready for planting.
Cold Stratification Process
Cold stratification helps Asclepias seeds sprout by simulating winter. Place seeds in a damp paper towel. Put the towel in a sealed bag. Store it in the refrigerator for 30 to 60 days. This cold period softens the seed coat and triggers growth signals.
Scarification Techniques
Scarification breaks the hard seed coat to allow water inside. Rub seeds gently with sandpaper or a nail file. Do not damage the inner seed. Another way is to nick the seed coat with a small knife. Scarification helps speed up germination by making seeds absorb water faster.
Soaking Seeds Before Sowing
Soaking softens the seed coat and starts the germination process. Place seeds in warm water for 24 hours. Change the water once if it cools down. After soaking, plant the seeds immediately. This step improves seed moisture and helps seeds sprout quicker.
Planting Asclepias Seeds
Planting Asclepias seeds is the first step to growing healthy milkweed plants. These plants attract butterflies and help support local wildlife. Proper planting ensures good seed germination and strong growth.
Follow simple steps to prepare soil, plant seeds at the right depth, and space them well. This gives your Asclepias the best chance to thrive.
Best Soil Types
Asclepias grows best in well-drained soil. Sandy or loamy soil works well. Avoid heavy clay soil that holds too much water. The soil should be loose to help roots spread easily. A neutral to slightly acidic pH is ideal. This helps the seeds sprout and grow strong.
Ideal Planting Depth
Plant Asclepias seeds about 1/4 inch deep in the soil. Planting too deep can stop seeds from sprouting. Cover seeds lightly with soil or fine sand. Keep the soil moist but not waterlogged. This depth helps seeds get enough light and warmth to grow.
Spacing For Growth
Space seeds or seedlings 12 to 18 inches apart. This gives each plant room to grow wide and tall. Crowded plants compete for water and nutrients. Proper spacing improves air flow and reduces disease risk. It also makes it easier to care for the plants as they grow.

Credit: growitbuildit.com
Germination Tips
Growing Asclepias from seed can be rewarding. Seeds need the right conditions to sprout well. Follow these germination tips to help your seeds grow strong and healthy. Pay close attention to temperature, light, water, and the containers you use.
Optimal Temperature And Light
Asclepias seeds germinate best at temperatures between 70°F and 85°F. Keep the seeds warm but not too hot. Use a heating mat if needed. Bright, indirect light helps seeds grow. Avoid direct sunlight that can dry them out.
Watering Guidelines
Keep the soil moist but not wet. Too much water causes seeds to rot. Spray water gently using a mist bottle. Check soil daily and water as needed. Good drainage prevents waterlogging and seed damage.
Using Seed Trays And Containers
Choose trays or containers with drainage holes. Use a light, well-draining seed-starting mix. Fill containers with soil and press seeds lightly on top. Cover seeds with a thin layer of soil. Label each tray for easy identification.
Caring For Seedlings
Caring for Asclepias seedlings is a vital step for strong, healthy plants. Seedlings need gentle care to grow well. Proper attention during this stage helps ensure your milkweed thrives. Small actions now lead to big rewards later.
Thinning Seedlings
Thin the seedlings when they have two sets of leaves. Remove weaker plants carefully. Leave space between seedlings, about 3 to 4 inches apart. This gives each plant room to grow. Crowded seedlings compete for light and nutrients. Thinning helps strong plants develop better roots and leaves.
Fertilizing Young Plants
Use a mild fertilizer to feed young plants. Choose a balanced, water-soluble fertilizer. Apply it every two weeks in small amounts. Avoid over-fertilizing; this can harm seedlings. Light feeding supports steady growth and strong stems. Healthy seedlings prepare for outdoor planting.
Protecting From Pests
Watch seedlings daily for pests like aphids or caterpillars. Gently remove insects by hand or use a soft spray of water. Avoid strong chemicals that can damage tender plants. Natural remedies like neem oil work well. Early pest control keeps seedlings safe and growing strong.
Transplanting To Garden
Transplanting Asclepias seedlings to your garden is an important step. It helps plants grow strong and healthy outside their pots. This process needs care and the right timing. Preparing the garden bed and helping seedlings adjust will improve their survival. Follow these simple steps for a smooth transplant.
When To Transplant
Wait until seedlings have at least 4-6 true leaves. They should be about 4-6 inches tall. Transplant after the last frost date in your area. Soil temperature should be at least 60°F (15°C). Avoid moving seedlings on very hot or windy days. Early morning or late afternoon is best for transplanting.
Preparing The Garden Bed
Choose a sunny spot with well-drained soil. Loosen the soil to a depth of 8-12 inches. Remove weeds and rocks from the bed. Mix compost or organic matter into the soil. This adds nutrients and improves drainage. Create small holes spaced about 18-24 inches apart. This gives each plant room to grow.
Acclimating Seedlings
Harden off seedlings before transplanting. Take them outside for a few hours daily for 5-7 days. Start in a shaded spot and increase sun exposure each day. This helps seedlings get used to outdoor conditions. Water them well before moving to the garden. Plant carefully to avoid damaging roots. Water again after transplanting to settle the soil.
Maintaining Mature Asclepias
Maintaining mature Asclepias plants keeps them strong and healthy. Healthy plants produce beautiful flowers and support local wildlife. Regular care helps prevent diseases and pests. It also encourages new growth and vibrant blooms year after year.
Watering And Mulching
Water mature Asclepias deeply but less often. This encourages strong roots. Avoid wetting leaves to prevent disease. Mulch around the base with organic material. Mulch keeps soil moist and cool. It also stops weeds from growing close to the plant.
Pruning For Health
Prune dead or damaged stems in early spring. Cut back old growth to promote fresh shoots. Remove seed pods to extend blooming time. Use clean, sharp tools for pruning. This reduces the risk of spreading disease. Regular pruning keeps the plant tidy and vigorous.
Encouraging Pollinators
Plant Asclepias where butterflies and bees can find them. Flowers attract monarch butterflies, native bees, and other pollinators. Avoid pesticides near your plants to protect insects. Provide a variety of flowering plants for food. Pollinators help Asclepias produce seeds and spread naturally.
Frequently Asked Questions
How Long Does Asclepias Seed Take To Germinate?
Asclepias seeds typically germinate within 7 to 14 days. Cold stratification for 30 days can improve germination rates. Keep the soil moist and warm, around 70°F, for best results.
What Soil Type Is Best For Growing Asclepias?
Asclepias prefers well-draining, sandy or loamy soil. It thrives in slightly acidic to neutral pH levels. Avoid heavy clay soils to prevent root rot and ensure healthy growth.
Should Asclepias Seeds Be Soaked Before Planting?
Yes, soaking Asclepias seeds for 24 hours softens their hard coat. This speeds up germination by helping water penetrate the seed. Use lukewarm water for the best effect.
How Much Sunlight Do Asclepias Plants Need?
Asclepias plants require full sun, at least 6 hours daily. They grow best in bright, direct sunlight. Adequate sunlight promotes healthy foliage and abundant flowering.
Conclusion
Growing Asclepias from seed takes patience and care. Start with healthy seeds and plant them correctly. Keep the soil moist but not too wet. Give the seedlings plenty of sunlight as they grow. Watch for strong roots and healthy leaves.
Small steps lead to beautiful, blooming plants. Enjoy the process and learn with each season. Your efforts will bring life to your garden. Asclepias attracts butterflies and brightens outdoor spaces. Keep nurturing your plants and watch them thrive. Simple care makes a big difference in growth.