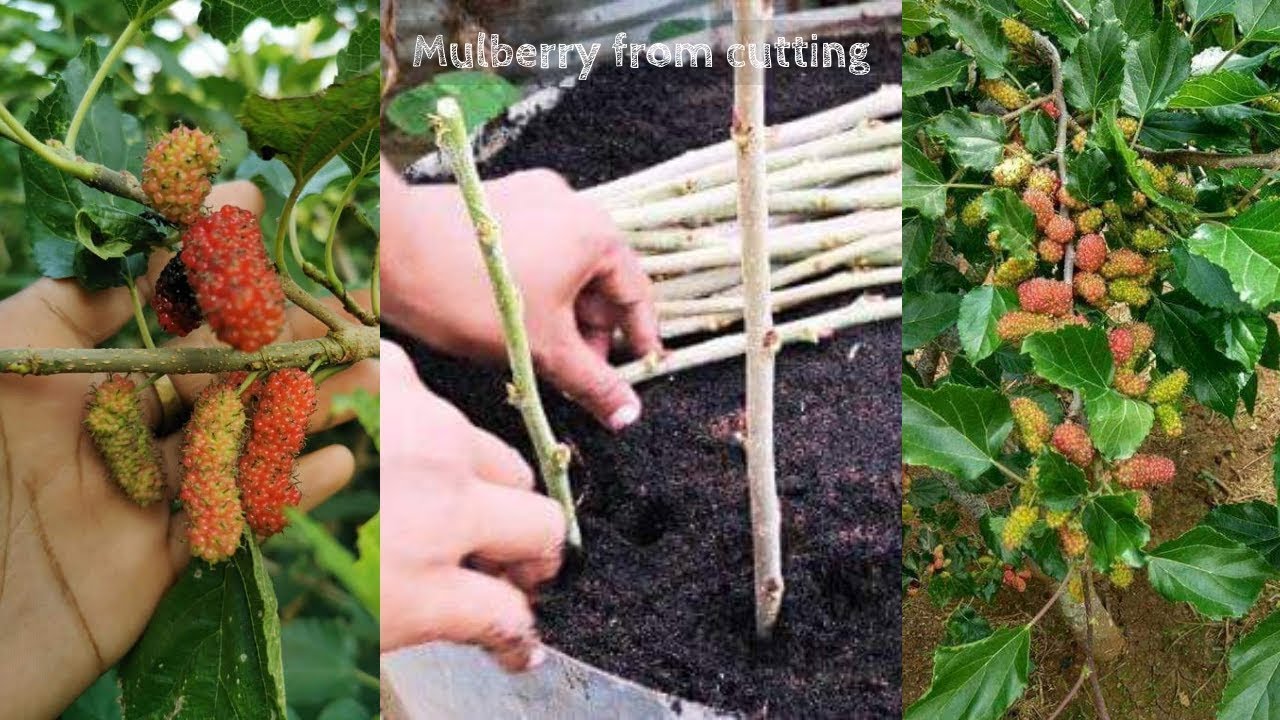
To grow mulberry from cuttings, start by taking 6-8 inch long hardwood cuttings. Mulberry is typically propagated from stem cuttings, which are taken in late winter or early spring before the new growth begins.
Growing mulberry from cuttings is an effective way to propagate these fruit-bearing trees. Whether you want to expand your mulberry orchard or simply want to replicate a favorite variety, taking hardwood cuttings is a reliable method. By following a few simple steps, you can successfully grow mulberry trees from cuttings and enjoy fresh, juicy mulberries in your own backyard.
We will guide you through the process of growing mulberry from cuttings, providing you with all the information and tips you need to get started. So, let’s dive in and learn how to propagate mulberry trees from cuttings for a fruitful harvest.

Credit: growingfruit.org
Collecting A Healthy And Mature Mulberry Branch
When propagating mulberry from cuttings, it is crucial to select a branch that is healthy and mature. Look for a branch with a diameter of at least 1/2 inch, as smaller branches may not have enough energy to establish roots. Additionally, ensure that the branch shows no signs of disease or pests, as these can hinder successful propagation. Before collecting the branch, make sure it is in its dormant stage, typically during late fall or early winter. This ensures that the cutting has minimal active growth and allows for optimal success in root development.
How to Grow Mulberry from Cuttings: Step by Step Guide
Preparing The Cutting For Propagation
Trimming the cutting to a length of 8-12 inches: To start the process of growing mulberry from cuttings, you will need to trim the cutting to a length of 8-12 inches. This will ensure that the cutting has enough stem length to develop roots and establish itself.
Removing any leaves or side shoots from the lower half of the cutting: Next, carefully remove any leaves or side shoots from the lower half of the cutting. By doing this, you are focusing the energy of the cutting on root development rather than supporting unnecessary foliage.
Making a clean diagonal cut at the base of the cutting: Finally, make a clean diagonal cut at the base of the cutting. This will provide a fresh surface area for root formation and improve the chances of successful propagation. Remember to use sharp and sterile pruning tools to prevent any injuries or infections.
Planting The Cutting In A Pot
Filling a pot with well-draining potting soil is the first step in growing a mulberry tree from cuttings. Ensure the pot is large enough to accommodate the cutting and has drainage holes to prevent waterlogging. Next, create a small hole in the soil using your finger or a pencil. This hole should be deep enough to securely hold the cutting.
Gently place the mulberry cutting into the hole, making sure it stands upright. The cutting should have at least two nodes, which are the points where leaves emerge. Position the cutting so that one node is just above the soil surface. Carefully press the soil around the base of the cutting to provide stability.
Remember to keep the potting soil moist but not overly wet. Place the potted cutting in a warm and bright location, preferably away from direct sunlight. With proper care and favorable conditions, the mulberry cutting will establish roots and begin to grow into a healthy tree.
Providing Proper Growing Conditions
When growing mulberry from cuttings, it is important to provide proper growing conditions. Start by placing the pot in a sheltered location with partial sunlight. This will help protect the cutting from harsh elements while still allowing it to receive some sun. Water the cutting regularly to keep the soil slightly moist, as mulberries prefer well-draining soil that is not too wet. However, be careful to avoid overwatering, as this can lead to root rot. Instead, aim for keeping the soil consistently damp, but not soaked.
Monitoring Root Development
If you want to grow mulberry plants from cuttings, it’s important to monitor the root development to ensure successful establishment. After a few weeks, you can check for signs of root growth by gently tugging on the cutting. If it’s anchored by roots, that’s a positive indication of progress.
However, it’s essential to be patient during this process and allow sufficient time for the roots to develop and establish themselves. This can vary depending on various factors, so it’s important not to rush the process. By carefully monitoring the root development and giving the cutting ample time, you can increase the chances of successful and thriving mulberry plants.
Transplanting The Cutting Into The Ground
To successfully grow mulberry from cuttings, it is important to properly transplant the cutting into the ground. Begin by selecting a suitable location that provides full sunlight and has well-draining soil. This will ensure optimal growth and development of the mulberry plant.
Next, dig a hole that is deep enough to accommodate the roots of the cutting. Take care to not damage the roots while digging the hole.
Once the hole is ready, carefully transfer the cutting into the hole and gently backfill it with soil. Ensure that the roots are properly covered and supported by the soil.
By following these transplantation steps, you can give your mulberry cuttings the best chance to grow and thrive in their new environment.
Providing Adequate Water And Nutrients
Watering the newly transplanted cutting regularly is crucial for its establishment and growth, especially during dry spells. Ensuring the soil remains consistently moist promotes root development and helps prevent stress on the plant. Be careful not to overwater, as excessively damp conditions can lead to root rot and other problems.
Applying a balanced fertilizer is essential to provide the nutrients necessary for healthy growth. Choose a fertilizer specifically formulated for fruiting plants and follow the package instructions for the correct dosage and frequency of application. This will help support the mulberry cutting as it develops roots and starts producing new leaves and branches.
Mulching around the base of the plant is beneficial for multiple reasons. The mulch layer helps retain moisture in the soil, reducing the need for frequent watering. Additionally, it acts as a weed suppressant, preventing unwanted plants from competing with the mulberry cutting for nutrients and water. Apply a layer of organic mulch, such as wood chips or straw, around the base of the plant, leaving a small gap between the mulch and the stem to prevent rotting.
Pruning And Training The Mulberry Plant
Growing mulberry from cuttings can be a rewarding experience that allows you to expand your garden and enjoy the delicious fruits. Pruning and training the mulberry plant is an important step to ensure its health and maximize its fruit production.
One key aspect of pruning is to remove any damaged or crossing branches. This helps to maintain the overall health of the plant and prevents any potential disease or pest issues.
In addition to removing damaged branches, shaping the plant into a desired form is essential. This can involve creating a single trunk or promoting a bushy shape, depending on your preference and space availability.
Another aspect of pruning is removing suckers, which are the shoots that emerge from the base of the plant. By removing these suckers, you can maintain a manageable size for the mulberry plant and ensure better fruit production.
Overall, pruning and training the mulberry plant is a crucial step in successfully growing it from cuttings. By following these practices, you can enhance the health and productivity of your mulberry plant while enjoying the benefits of its delicious fruits.
Dealing With Rooting Failure
Failed root development can be disheartening when trying to grow mulberry from cuttings. Identifying the potential causes of this issue is crucial for successful propagation. One common reason is inadequate watering and improper soil conditions. Adjusting the watering according to the cutting’s needs and ensuring well-draining soil can significantly enhance root development.
If rooting continues to be unsuccessful, it may be worth considering alternative propagation methods. Experimenting with techniques like air layering or using a root hormone can increase the chances of success. By exploring different methods, it’s possible to find the approach that works best for the type of mulberry cutting being propagated.
Managing Pest And Disease Problems
Managing Pest and Disease Problems is an integral part of growing mulberry trees successfully. Recognizing common pests and diseases that affect mulberry trees is crucial for early intervention. Some common pests that can infest mulberry trees include aphids, mites, and scale insects. These pests can be controlled using organic insecticides, which are effective in limiting their presence. It is also important to address any fungal diseases that may affect mulberry trees.
Organic fungicides can be used to prevent the spread of diseases such as powdery mildew and leaf spot. Additionally, maintaining good garden hygiene is essential to prevent the spread of pests and diseases. Regularly removing fallen leaves and debris can help minimize the chances of infestation. By being proactive in managing pest and disease problems, you can ensure the healthy growth and development of your mulberry trees.
Addressing Environmental Stress Factors
To address environmental stress factors, learn how to grow mulberry from cuttings. This eco-friendly technique promotes sustainability and allows you to propagate new mulberry plants without harming the environment.
When growing mulberry from cuttings, it is crucial to address environmental stress factors to ensure successful propagation. Extreme temperatures and frost can have detrimental effects on the cutting, so it’s important to protect it. This can be done by covering the cutting with a protective material such as a frost cloth or a cloche during cold seasons.
Proper ventilation is also key to prevent fungal infections. This can be achieved by placing the cutting in a well-ventilated area or using a fan to circulate air around the plant. Fungal infections can hinder the growth and development of the cutting, so it is crucial to provide adequate ventilation.
Additionally, mulberry cuttings require adequate sunlight for robust growth. Find a location where the cutting can receive at least 6-8 hours of direct sunlight every day. This will promote the development of strong and healthy roots, resulting in a thriving mulberry plant.
Frequently Asked Questions Of How To Grow Mulberry From Cuttings
Can I Grow A Mulberry Tree From A Cutting?
Yes, you can grow a mulberry tree from a cutting. Simply take a healthy branch, remove the leaves from the bottom, and place it in water or a pot with moist soil. Keep it in a sunny spot, ensuring it stays hydrated, and roots will develop.
Will Mulberry Cuttings Root In Water?
Yes, mulberry cuttings can root in water.
How Long Does It Take To Get Mulberries From A Cutting?
Mulberries can take around 2-3 years to bear fruit from a cutting. The plant needs time to establish roots and grow before producing berries. Patience is required during this process.
How Can You Tell If A Mulberry Tree Is Male Or Female?
Mulberry trees can be identified as male or female by examining the flowers. Male trees have cylindrical flower clusters, while female trees have rounded flower clusters.
Conclusion
To conclude, growing mulberry from cuttings is a practical and rewarding method to expand your garden. By following the steps mentioned in this blog post, you can easily propagate mulberry trees and enjoy their delicious fruits. With proper care and attention, your cuttings will thrive and transform into beautiful, fruitful trees.
So, why wait? Start growing mulberry from cuttings today and witness the beauty of nature in your own backyard.