Are you a tomato plant enthusiast? Do you want to learn how to hang tomato plants and create a beautiful hanging garden? Look no further!
Hanging tomato plants is an excellent solution for gardeners with limited space or those looking to simplify the process of growing tomatoes. This method not only maximizes vertical space but also helps prevent common issues such as pests and soil-borne diseases. By suspending the plants, you allow them to grow freely while promoting healthy airflow and convenient access for watering and harvesting. Additionally, hanging tomato plants can add a unique touch to your garden, creating a stunning visual display.

Whether you’re new to gardening or an experienced grower, hanging tomato plants is an innovative and rewarding way to enjoy fresh, homegrown tomatoes.
What Are the Benefits of Hanging Tomato Plants?
There are several benefits to hanging tomato plants, including:
- Space-saving: If you have a small garden or limited space, hanging tomato plants can be a great solution. They occupy minimal space and enable you to utilize vertical space in your garden.
- Pest Prevention: By keeping your tomatoes off the ground, you reduce the risk of pests attacking your plants. This is especially beneficial for pesky creatures like slugs and snails that tend to crawl on the ground.
- Disease Prevention: Hanging tomato plants also helps prevent soil-borne diseases by avoiding contact with contaminated soil. In traditional gardening methods, it’s essential to rotate crops, but with hanging tomato plants, this is not necessary.
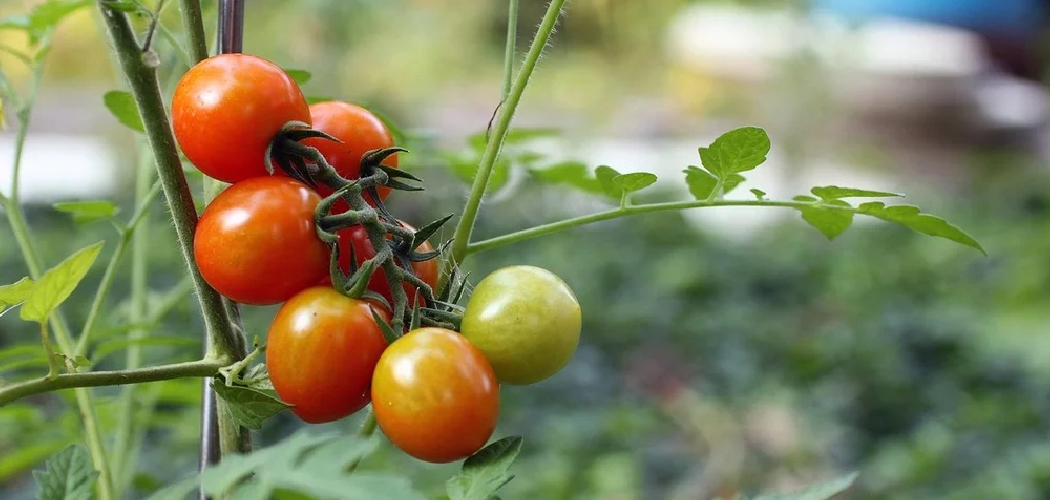
- Aesthetic Appeal: Hanging tomato plants can add a unique and eye-catching element to your garden. They create a beautiful cascading effect, adding interest and dimension to an otherwise flat space. You can even mix different varieties of tomatoes in one hanging basket for a vibrant display.
What Will You Need?
To get started with hanging tomato plants, you will need the following items:
- Hanging Baskets or Containers: Choose baskets that are at least 12 inches in diameter to provide enough space for the roots to grow.
- Potting Mix: Use a high-quality potting mix specifically designed for container gardening. Avoid using soil from your garden as it may contain pests and diseases.
- Tomato Seedlings or Starter Plants: You can purchase these from a local nursery or start them from seeds indoors.
- Fertilizer: Hanging tomato plants require regular fertilizing throughout the growing season to ensure healthy growth and abundant fruit production.
10 Easy Steps on How to Hang Tomato Plants
Step 1. Choose the Right Container:
Selecting the appropriate container is crucial for the success of your hanging tomato plants. Look for a sturdy yet lightweight pot or hanging basket that has adequate drainage holes at the bottom. Good drainage is essential to prevent waterlogging, which can lead to root rot.
Ensure the container is deep enough to accommodate the root system of your tomato plants; typically, a depth of 12-14 inches works well. Additionally, consider the weight of the container when it’s full of soil and water—opt for materials like plastic or resin to keep it manageable for hanging.

Step 2. Prepare the Potting Mix:
Choosing the right potting mix is crucial for the healthy growth of your tomato plants, especially in a container or upside-down planter. Avoid using garden soil, as it is often too dense and can lead to poor drainage or compaction. Instead, select a lightweight, well-draining potting mix specifically formulated for container gardening. Look for a blend that incorporates ingredients like peat moss, perlite, or vermiculite, as these help retain moisture while ensuring excellent aeration for the roots. To further enhance the nutrient content, consider incorporating organic compost or a slow-release fertilizer that provides essential nutrients over time.
Step 3. Create a Hole for the Plant:
Once you have prepared your container with the appropriate potting mix, it is time to create a hole for your plant. Using your hands or a small gardening tool, dig a hole in the center of the potting mix that is large enough to accommodate the plant’s root ball. Ensure the hole is neither too shallow nor too deep—ideally, the top of the root ball should be level with or slightly below the surface of the soil. This helps the plant acclimate to its new environment and promotes healthy root growth. Gently loosen the surrounding soil, if necessary, to create space for the roots to spread out.
Step 4. Plant the Seedling:
Carefully remove the seedling from its container, taking care not to damage the delicate roots. If the seedling is tightly packed, gently massage the root ball to loosen it. Position the seedling in the hole you prepared, ensuring that it is upright and centered. Adjust the depth of the hole as necessary, aiming to align the root ball with the soil surface. Once the seedling is in place, backfill the hole with the displaced potting mix, using your hands to press the soil around the roots for stability gently.
Step 5. Add Fertilizer:
Once the seedling is securely planted, it’s time to provide it with the nutrients it needs to thrive. Select a balanced, slow-release fertilizer that is suitable for the type of plant you are growing. Follow the manufacturer’s instructions to determine the appropriate amount. Sprinkle the fertilizer evenly around the base of the plant, taking care to avoid direct contact with the stem or leaves, as this can cause damage. Lightly mix the fertilizer into the top layer of soil to ensure even distribution, and water thoroughly to help the nutrients penetrate the soil and reach the roots.

Step 6. Water Thoroughly:
Thoroughly watering your plants is crucial to their health and growth. After applying fertilizer, soak the soil deeply to ensure the nutrients reach the root zone. Use a gentle stream of water to avoid disturbing the soil or exposing roots. Check that the water penetrates at least 6-8 inches deep, as shallow watering can lead to weak root systems. Be cautious not to overwater, as this can lead to issues such as root rot. Monitor the soil moisture level regularly to maintain the correct balance necessary for optimal plant growth.
Step 7. Hang the Planter in a Sunny Spot:
Select a location that receives ample sunlight, as most plants need at least 6-8 hours of direct sunlight per day to thrive. Use a sturdy hook or bracket that can support the planter’s weight, ensuring it is securely anchored to prevent accidents. If your chosen spot experiences intense midday sun, consider providing partial shade to protect sensitive plants from scorching. Regularly rotate the planter to ensure even exposure to sunlight, promoting balanced growth and a healthy appearance.
Step 8. Secure the Planter:
Once you have chosen the ideal spot, ensure the planter is securely fastened in place. Check that all hooks, brackets, or chains are appropriately installed and capable of supporting the planter’s weight when fully watered. Double-check the stability by gently tugging on the planter. If it wobbles or shifts, reinforce the mounting hardware to eliminate any risk of falling.
Step 9. Provide Support for the Plant:
To ensure your plant grows healthily and maintains its shape, you may need to provide additional support. Depending on the type of plant, this could involve adding stakes, trellises, or plant ties to guide its growth and prevent it from drooping. Securely attach the plant to the support structure using soft ties or garden tape, taking care not to damage the stems. Regularly check the supports as the plant grows, adjusting them as needed so the plant remains well-supported and upright.
Step 10. Maintain Regular Care:
Regular care is essential to ensure the health and vitality of your plant. Begin by establishing a consistent watering schedule, ensuring the soil remains adequately moist but not waterlogged, as overwatering can lead to root rot. Monitor your plant for signs of pest infestations or diseases, and promptly address any issues with appropriate treatments. Fertilize the plant as needed according to its specific requirements, using either organic or synthetic plant food to promote healthy growth and blooms. Regular pruning is also essential for removing dead or damaged leaves and encouraging new growth.

Following these steps will help you grow thriving and fruitful hanging tomato plants, making the most of your garden or outdoor space.
5 Things You Should Avoid
- Overwatering the Plants
While tomato plants need regular watering, overwatering can lead to waterlogged soil, root rot, and hinder the plant’s ability to absorb nutrients. Always check the soil moisture before adding water.
- Using Poor-Quality Containers
Hanging containers that don’t have proper drainage or are made of flimsy materials can harm the plants. Ensure your container is sturdy and has adequate drainage holes to prevent water from standing.
- Placing in Insufficient Sunlight
Tomato plants require at least 6 to 8 hours of direct sunlight daily to thrive. Hanging them in shady or poorly lit areas will stunt their growth, resulting in fewer tomatoes.
- Neglecting Regular Maintenance
Failing to prune, check for pests, or monitor plant health can reduce your tomato yield. Conduct regular inspections and address issues promptly to maintain the plants’ productivity.
- Overcrowding the Plants
Planting multiple tomato plants together in a limited container can lead to competition for nutrients, space, and water. Always ensure there’s enough room for each plant to grow and spread its roots.

Conclusion
How to hang tomato plants can be a practical and efficient way to maximize space while maintaining a healthy and productive garden.
By following proper planting techniques, ensuring adequate sunlight, and providing consistent watering, you can create an ideal environment for your tomatoes to thrive. Additionally, regular maintenance, such as pruning and pest control, will help sustain the health and yield of the plants.
Keep these tips in mind, and you’ll enjoy a successful harvest from your hanging tomato garden.
You Can Check It Out To Get Rid of Cutworms on Tomato Plants