
Adding windows to your garden shed can enhance its lighting, ventilation, and overall functionality. Natural light can transform a dark shed into a bright and welcoming space, while improved airflow prevents moisture buildup and maintains a comfortable environment. However, installing windows in an existing shed might feel daunting for those unfamiliar with such projects.
Thankfully, it becomes a manageable and rewarding DIY task with the right tools, materials, and step-by-step guidance. This guide on how to install garden shed windows will provide all the information you need—from careful planning and preparation to ensuring a durable, weatherproof finish—making your project successful and stress-free.
Choosing the Right Window for Your Shed
When selecting windows for your garden shed, your choices regarding style, material, and size are crucial to achieving both functionality and aesthetics. Below are the key steps in choosing the ideal window for your project.
Step 1: Types of Shed Windows
The most common types of shed windows include single-hung, double-hung, sliding, and fixed windows. Single-hung and double-hung windows are easy to open, providing good ventilation. Sliding windows are ideal if you prioritize space-saving functionality, while fixed windows, though immobile, are excellent for adding light without introducing drafts. Consider your shed’s design and how you plan to use it when deciding on the window type.
Step 2: Window Material Choices
Window frames come in materials such as wood, vinyl, and aluminum. Wood frames can lend a natural charm but require regular maintenance. Vinyl is a popular, low-maintenance option offering excellent durability and insulation. Aluminum frames are lightweight, weather-resistant, and ideal for areas prone to extreme conditions. For long-term performance, prioritize materials that resist wear and offer energy efficiency.
Step 3: Window Size Considerations
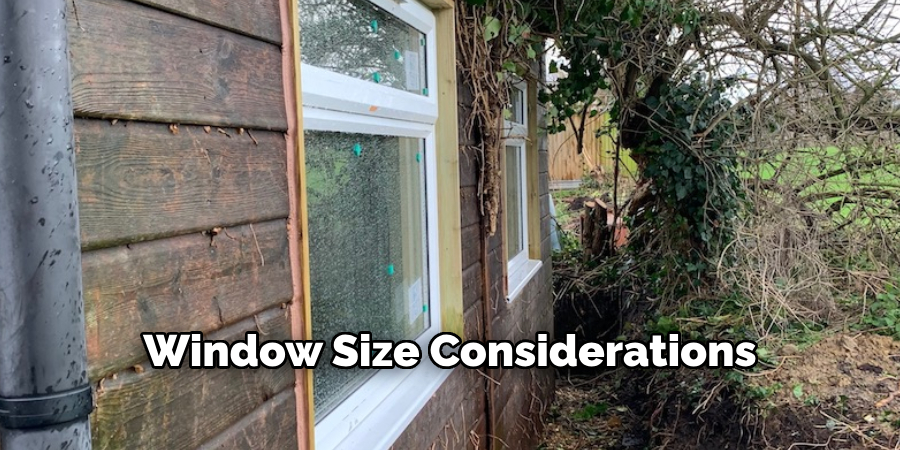
Selecting the right window size is essential. A properly sized window should allow sufficient light and ventilation without compromising the shed’s structural integrity. Measure carefully to ensure the window complements the shed’s design and fits securely, offering a seamless look while meeting your functionality needs.
Preparing for Installation
Step 1: Gather Tools and Materials
To install your shed window effectively, you’ll need the following tools and materials:
- Tools: Measuring tape, level, saw (circular or jigsaw), drill, hammer, nails, screws, window kit, caulk gun, and weatherstripping.
- Materials: Window, framing lumber, flashing tape, and silicone sealant.
Having everything organized and ready will simplify the installation process and ensure efficiency.
Step 2: Measure and Mark the Window Opening
Begin by carefully measuring the dimensions of the chosen window. With these measurements, mark the location on the shed wall where the window will be installed. Use a pencil or chalk to outline the opening, ensuring clear, precise lines. Mark all four corners and use a carpenter’s square to verify that the edges are straight and aligned for an accurate cut. This step is crucial to avoid ill-fitting gaps or misaligned openings.
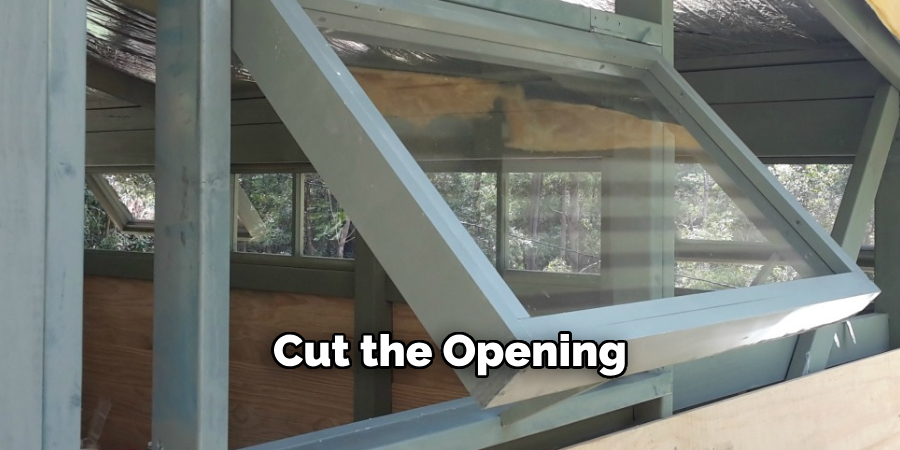
Step 3: Cut the Opening
Carefully cut along the marked lines using a circular saw or jigsaw to create the window opening. Work slowly and steadily, checking your progress to ensure the cut stays on track. Before cutting, double-check all measurements to confirm they match the window’s dimensions. This ensures the window fits snugly into the frame without gaps that could compromise insulation or structural integrity. Once the opening is cut, clear away debris and prepare the surface for framing.
Framing the Window Opening
Step 1: Install Vertical and Horizontal Supports
Begin by installing vertical 2×4 supports on each side of the window opening to frame the space. These supports will provide structural reinforcement and serve as the foundation for mounting the window. Next, attach a horizontal top header across the upper edge of the opening and bottom sill support along the base. Make sure all components are securely fastened with screws or nails, as they are essential for stabilizing the window and preventing unwanted shifting over time.
Step 2: Strengthening the Frame
To further enhance your window frame’s stability, add 2×4 braces horizontally between the vertical studs. These braces will distribute the structural load and secure the frame more effectively. Once the additional braces are in place, check that the frame is square by measuring diagonally from corner to corner. The two diagonal measurements should be equal; if not, adjust the components until the frame is perfectly square. Ensuring a solid, level frame is critical for properly installing the window.
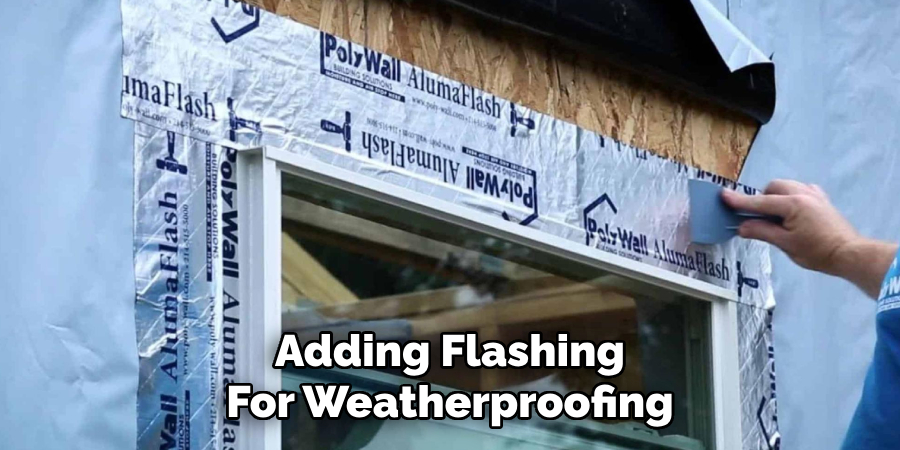
Step 3: Adding Flashing for Weatherproofing
To protect against water infiltration, apply flashing tape around the edges of the window opening. Start at the bottom and work your way up, overlapping the tape slightly at each layer. This overlapping technique directs water away from the shed walls, preventing water damage and ensuring long-term durability. Properly applied flashing is integral to creating a weatherproof and energy-efficient window installation.
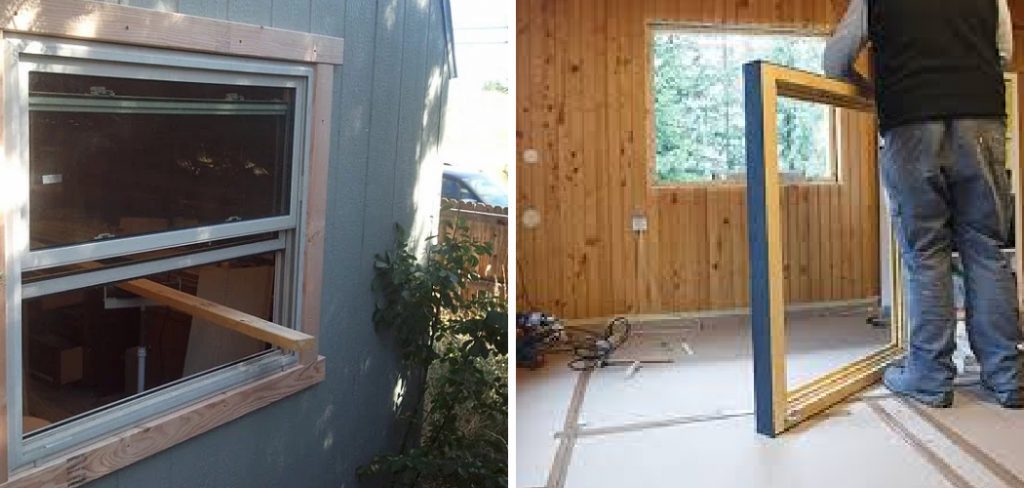
How to Install Garden Shed Windows: Installing the Window
Step 1: Positioning the Window
Begin by carefully placing the window into the framed opening in your shed. Use a level tool to ensure that the window is both level and square within the frame. Place shims around the edges of the window as needed to make fine adjustments and to hold it securely in place. Proper positioning at this stage is crucial to ensure the functionality and longevity of the window.
Step 2: Securing the Window
Once the window is positioned correctly, drill pilot holes through the window frame and into the studs of the shed’s frame. These pilot holes prevent the wood from splitting during installation. Use screws to attach the window firmly to the frame, ensuring the window sits flush with the exterior of the shed wall. Double-check each screw to confirm they are tightly secured, providing optimal stability for the window.
Step 3: Sealing the Edges
To create a weather-tight seal, apply a continuous bead of silicone sealant along the edges of the window frame where it meets the shed. Pay extra attention to corners and gaps to prevent water infiltration and drafts. If additional sealing is required, consider using weatherstripping to reinforce the protection further. Proper sealing not only ensures energy efficiency but also protects the shed from external elements, contributing to the long-term resilience of your structure.
Finishing Touches
Step 1: Installing Trim Around the Window
Attach wooden trim around the window to conceal the edges of the frame and provide a cleaner, polished appearance. Measure the trim pieces carefully to ensure a precise fit, cutting them at accurate angles for mitered corners if desired. Secure the trim using finishing nails, and use a level to confirm that each piece is aligned correctly and straight. This step not only enhances the visual appeal of the installation but also helps protect the frame edges from wear and tear.
Step 2: Paint or Stain the Window Frame and Trim
Add a layer of exterior-grade paint or stain to the window frame and trim to complement the shed’s design while offering additional weather resistance. Choose a color or finish that aligns with your shed’s aesthetic, whether natural wood tones or bold, contrasting shades. Apply paint or stain in even coats, allowing adequate drying time between applications to ensure a smooth, durable finish.
Step 3: Check for Proper Operation
Before concluding the project, test the window by opening and closing it multiple times to ensure smooth and proper functionality. Confirm that your window operates without issues if it includes an adjustable mechanism. Make adjustments to ensure optimal performance and stability, completing the professional installation process.
Maintaining Your Shed Windows
Proper maintenance of your shed windows is essential for preserving their functionality and appearance over time. Follow these simple steps to ensure your windows remain in top condition:
Step 1: Cleaning the Window Glass
Clean the window glass regularly using a mild glass cleaner and a soft, lint-free cloth to remove dirt and grime. This practice keeps the windows looking pristine and ensures optimal visibility. Avoid using abrasive cleaners or tools that may scratch the surface of the glass.
Step 2: Inspecting the Seals
Periodically examine the silicone sealant around the edges of the window. If you notice any signs of wear, cracks, or peeling, reapply sealant to maintain a watertight and draft-free seal. Additionally, check the weatherstripping for damage or deterioration, replacing it as needed to prevent exposure to drafts and moisture that could compromise your shed’s interior.
Step 3: Lubricating Moving Parts
Keep the moving parts in excellent working condition for windows that slide or hinge by applying a silicone-based lubricant. This will reduce friction and prevent rust or sticking, ensuring smooth operation. Make lubrication a regular part of your maintenance routine to prolong the lifespan and efficiency of your shed windows.

Conclusion
Installing windows in your garden shed greatly enhances natural lighting, ventilation, and overall comfort, making the space more functional and inviting. A successful installation requires careful planning, precise measuring, and durable, weatherproof materials to ensure a long-lasting result. Regular maintenance, such as cleaning, inspecting seals, and lubricating moving parts, will keep your windows performing optimally and looking their best. By following these steps and incorporating regular upkeep, you’ll maximize the value of your shed. For more detailed guidance and tips, refer back to this guide on how to install garden shed windows and maintain them effectively.