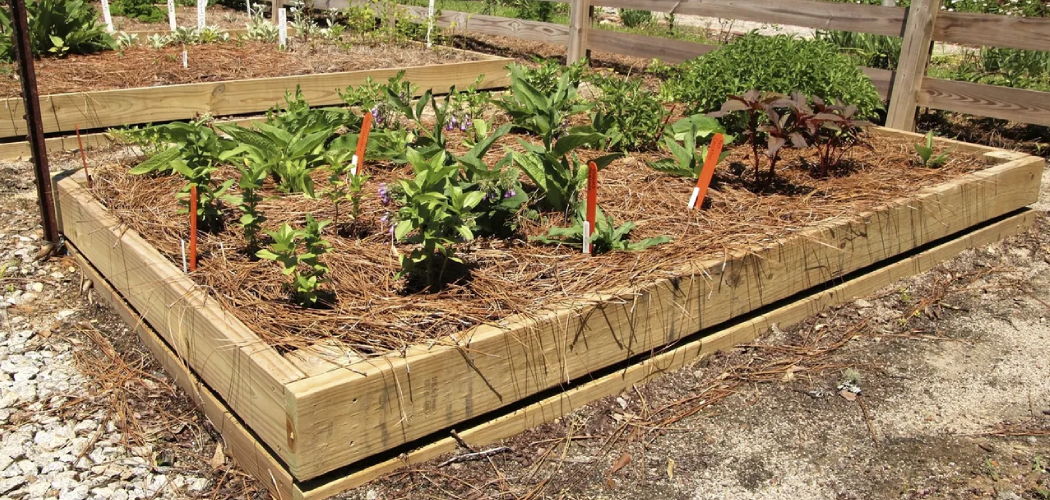
If you’re wondering how to level a raised garden bed, the process is quite simple. Begin by utilizing a leveler tool to ensure the surface of the bed is even. This will help you identify any areas that require adjustment.
Next, to achieve the desired levelness, carefully adjust the legs or supports of the raised garden bed. By making these necessary adjustments, you can ensure that the bed is perfectly level, providing a stable foundation for your plants to grow. Following these steps will help you create an ideal environment for your garden and promote healthy plant growth.

Importance Of Leveling A Raised Garden Bed
Leveling a raised garden bed is a crucial step that often gets overlooked by many gardeners. While it might seem like a minor detail, ensuring that your garden bed is perfectly level can have a significant impact on the health of your plants and the overall success of your garden.
In this section, we will explore the importance of leveling a raised garden bed and why it should be a top priority for every gardener.
Ensure Proper Drainage And Prevent Water Pooling
- A level garden bed allows for proper drainage, ensuring that water does not accumulate and cause damage to your plants.
- When a garden bed is not level, water tends to pool in certain areas, leading to waterlogging and root rot.
- By leveling your garden bed, you can prevent water from sitting and stagnating, promoting a healthy growing environment for your plants.
Promote Healthy Plant Growth And Root Development
- A level garden bed provides an even distribution of nutrients, sunlight, and water to all plants.
- If your garden bed is uneven, some plants may receive more water or nutrients than others, resulting in stunted growth and an imbalance in your garden.
- Leveling the garden bed ensures that all plants have an equal opportunity to thrive and develop strong root systems.
Prevent Soil Erosion And Nutrient Loss
- A level garden bed helps prevent soil erosion, which can occur when water flows more rapidly in certain areas.
- Eroded soil can wash away valuable nutrients, leaving your plants malnourished.
- By leveling the garden bed, you can create a more stable and balanced environment, reducing the risk of soil erosion and nutrient loss.
Leveling a raised garden bed is an essential step in creating a healthy and productive garden. It ensures proper drainage, promotes healthy plant growth, and prevents soil erosion and nutrient loss. By taking the time to level your garden bed, you set the stage for a thriving garden that will reward you with bountiful harvests and beautiful blooms.
So, the next time you start a new garden project, don’t forget to give your garden bed the attention it deserves by making it level. Happy gardening!
Tools And Materials Needed For Leveling
When it comes to leveling a raised garden bed, having the right tools and materials is key. With the right equipment, you can ensure that your garden bed is perfectly level, providing a stable foundation for your plants to thrive.
Let’s take a look at the essential tools you’ll need for this task:
Shovel Or Garden Spade
- A shovel or garden spade is essential for digging and removing soil from the garden bed.
- This tool helps you create a level surface by removing excess soil or redistributing it to fill in low spots.
- Look for a sturdy shovel or spade with a comfortable grip to make the job easier.
Level (Spirit Or Laser)
- A level is essential for achieving a precise level surface on your raised garden bed.
- A spirit level uses a bubble inside a vial to determine if the bed is level horizontally and vertically.
- A laser level emits a straight beam of light to accurately measure the bed’s elevation.
- Choose the type of level that suits your needs and budget.
Tamper Or Hand Compactor
- A tamper or hand compactor is used to compress the soil or compost in the garden bed.
- It helps to ensure that the soil is evenly packed and free from air pockets.
- Look for a tamper or hand compactor with a sturdy handle for easy and efficient soil compression.
Screed Or Straight Board
- A screed or straight board is used to level the soil or compost in the garden bed.
- It acts as a guide to even out the surface, ensuring a consistent level throughout.
- Use a straight board, such as a 2×4, to scrape off excess soil or compost and fill in low spots.
Rake
- A rake is useful for smoothing the surface of the soil or compost in the garden bed.
- It helps to create an even surface by removing any bumps or uneven areas.
- Look for a sturdy rake with flexible tines for easy maneuverability.
Soil Or Compost
- Soil or compost is essential for filling the raised garden bed and creating a level surface.
- Choose high-quality soil or nutrient-rich compost to provide a healthy growing environment for your plants.
- Ensure that you have enough soil or compost to fill the bed to the desired level.
Now that you know the necessary tools and materials needed for leveling a raised garden bed, you’re ready to get started. With these resources at hand, you’ll be able to create a level and sturdy foundation for your beautiful garden oasis.
Happy gardening!
How to Level a Raised Garden Bed: Step-By-Step Guide
1. Assess The Current Condition Of The Garden Bed
Before leveling a raised garden bed, it is important to assess its current condition. This will help you determine the extent of leveling required and the necessary steps to achieve a flat and even surface. Take note of any noticeable dips, slopes, or uneven areas in the bed that need attention.
2. Remove Any Existing Plants, Weeds, And Debris
To level a raised garden bed effectively, you must start with a clean slate. Remove any existing plants, weeds, and debris from the bed to ensure a smooth and even surface. This will also prevent any obstructions during the leveling process.
3. Use The Shovel Or Garden Spade To Loosen The Soil
Once the bed is cleared, use a shovel or garden spade to loosen the soil. This will make it easier to work with and allow for better leveling results. Gently turn over the soil, breaking up any clumps and removing any large rocks or roots that may impede the leveling process.
4. Check For Low And High Spots With The Level
Next, use a level to check for low and high spots in the garden bed. Place the level in different areas of the bed and observe if it indicates any unevenness. This step will help you identify specific areas that require adjustment.
5. Fill Low Areas With Additional Soil Or Compost
If there are low spots in the garden bed, fill them with additional soil or compost. Leveling the bed involves bringing the surface to an even height, and adding extra soil or compost to low areas will help achieve this.
Ensure that the added soil or compost is evenly distributed and compacted lightly.
6. Compact The Soil Using A Tamper Or Hand Compactor
After adding soil or compost to the low areas, use a tamper or hand compactor to compact the soil. This will help stabilize the bed and create a firm, even surface. Apply gentle pressure and work your way across the bed, paying extra attention to the areas that were filled.
7. Place A Screed Or Straight Board Across The Bed
To ensure an even surface, place a screed or straight board across the bed. This will act as a guide when leveling the soil and help you achieve a consistent height throughout the garden bed. Make sure the screed or board is sturdy and positioned parallel to the ground.
8. Use The Level To Check For Evenness
Using the level again, check if the bed is now level and even. Place the level on top of the screed or board and observe if it indicates any high or low areas in the soil. This step will help you fine-tune the leveling process for optimal results.

9. Adjust The Soil Using The Rake If Necessary
If the level indicates any unevenness, adjust the soil using a rake. Rake the soil gently, redistributing it as needed to achieve a smooth and level surface. Pay close attention to the areas that require adjustment and continue to check with the level until the bed is properly leveled.
10. Repeat The Leveling Process Until The Bed Is Evenly Leveled
Leveling a raised garden bed may require multiple iterations of the leveling process. Repeat the steps mentioned above if necessary, ensuring that the bed is evenly leveled before proceeding. Take your time and make small adjustments as needed to achieve a well-balanced surface.
11. Smooth Out The Surface With The Rake
Once the garden bed is leveled and even, use the rake to smooth out the surface. This will help create a neat and aesthetically pleasing appearance while also ensuring proper water drainage. Take care to remove any excess soil or debris that may have accumulated during the leveling process.
Leveling a raised garden bed can be a rewarding task that sets the stage for successful gardening. By following these step-by-step instructions, you’ll be well-equipped to achieve a flat and even surface, providing the perfect foundation for healthy plants and productive gardening.
Tips For Achieving An Even Surface
When it comes to leveling a raised garden bed, achieving an even surface is crucial for proper drainage and plant growth. Follow these tips to ensure your garden bed is level and ready for planting:
Start Leveling From The Center And Work Your Way Towards The Edges
- Begin by checking the levelness at the center of the garden bed.
- Use a leveling tool, like a long straight board or a carpenter’s level, to assess the surface.
- Gradually add or remove soil to adjust the height, aiming for an even surface from the center towards the edges.
- Continue checking the levelness as you move towards the edges of the bed, making any necessary adjustments along the way.
Use Long, Sweeping Motions While Leveling
- When adding or removing soil to achieve an even surface, use long, sweeping motions.
- This technique helps distribute the soil evenly, ensuring a smooth and level bed.
- Avoid quick and abrupt movements, as they can lead to uneven soil distribution.
Take Breaks To Step Back And Assess The Overall Levelness
- It’s essential to take breaks during the leveling process to step back and assess the overall levelness of the garden bed.
- This allows you to see any areas that might still need adjustment and make appropriate changes.
- It’s easy to get caught up in the details, so taking breaks helps maintain a broader perspective.
Check The Level From Different Angles To Ensure Accuracy
- To ensure a truly level surface, it’s vital to check the level from different angles.
- Move around the garden bed and view it from different vantage points.
- This technique helps identify any areas that might appear level from one angle but may be off when viewed from another.
Water The Bed Lightly To Help Settle The Soil Before Planting
- Once the garden bed is leveled, lightly water the soil to help settle it.
- This step allows the soil to compact and minimizes future settling.
- Ensure the water is evenly distributed throughout the bed, reaching all corners and edges.
Achieving an even surface in your raised garden bed is essential for optimal plant growth and irrigation. By following these tips, you’ll create a level foundation that helps maintain proper drainage and provides an ideal growing environment for your plants.
Maintaining A Level Raised Garden Bed
Raised garden beds are a popular choice for many gardeners, offering numerous benefits such as improved drainage, better soil quality, and reduced weed growth. However, to maintain these advantages, it’s important to ensure that your raised garden bed remains level.
Regularly checking for unevenness and taking appropriate measures can help in preventing any potential issues down the line. Additionally, avoiding excessive soil compaction and promoting proper drainage is essential for the overall health of your plants. In this section, we will explore these key aspects of maintaining a level raised garden bed.
Regularly Check For Unevenness And Adjust As Needed:
- Inspect the garden bed for uneven areas, which can be caused by settling of the soil or external factors such as heavy rainfall or erosion.
- Use a level or a straight board to assess the evenness of the bed, making sure it is consistently level from end to end.
- If you notice any uneven spots, gently loosen the soil and redistribute it to achieve a level surface.
- Pay attention to the corners of the raised bed, as they are particularly prone to sinking or tilting over time.
Avoid Compacting The Soil Too Much To Maintain Proper Drainage:
- Be cautious when working around the raised bed to avoid compacting the soil excessively, as it can hinder water drainage and root growth.
- Opt for a step-by-step approach when working in the garden bed, stepping only on designated areas or using stepping stones to distribute your weight evenly.
- Regularly aerating the soil by gently loosening it with a garden fork can help improve drainage and prevent compaction.
- Mulching the surface of the soil can also help maintain moisture levels and prevent compaction, while promoting a healthy ecosystem for beneficial soil organisms.
Add Additional Soil Or Compost To Any Areas That Have Settled:
- Over time, settling of the soil may occur, resulting in depressions or gaps within the raised bed.
- To rectify this, top up the affected areas with additional soil or compost, ensuring that it is level with the surrounding surface.
- Lightly tamp down the added soil or compost to remove any air pockets and promote stability.
- However, avoid overfilling the raised bed, as excessive soil can lead to poor drainage and hinder plant growth.
By regularly checking for unevenness, avoiding soil compaction, and addressing any settling issues promptly, you can maintain a level raised garden bed that provides optimal growing conditions for your plants. Taking these simple steps will help ensure the long-term success of your gardening endeavors while creating an aesthetically pleasing and functional space.
Common Mistakes To Avoid
Leveling a raised garden bed is an important task that requires careful attention to detail. However, there are some common mistakes that people often make during this process. By being aware of these pitfalls, you can ensure that your raised garden bed is level and ready for planting.
Here are some things to watch out for:
- Overfilling the Low Areas, Causing Unevenness: One of the common mistakes is overfilling the low areas of your garden bed. This can lead to unevenness in the surface, making it difficult to grow plants evenly. To avoid this, make sure to fill the low areas with the appropriate amount of soil and tamp it down gently until it is level with the rest of the bed.
- Neglecting to Check the Level Throughout the Process: Another mistake to avoid is neglecting to check the level throughout the leveling process. It’s important to periodically check if the bed is level as you add soil and make adjustments. This will help ensure that you achieve a level surface and prevent any future issues.
- Failing to Compact the Soil Properly: Properly compacting the soil is crucial when leveling a raised garden bed. Failing to do so can result in uneven settling and shifting of the soil over time. To prevent this, use a hand tamper or a flat board to firmly compact the soil after adding each layer.
- Planting without Ensuring a Level Surface: Once the bed is leveled, it’s essential to make sure the surface is still level before planting. Uneven surfaces can cause water to pool in certain areas, leading to drainage problems and uneven distribution of nutrients. Take the time to double-check the levelness before planting, adjusting as necessary.

By avoiding these common mistakes, you’ll be well on your way to creating a level raised garden bed that provides optimal growing conditions for your plants. Remember to take your time, check the level throughout the process, and ensure the soil is properly compacted.
Happy gardening!
Frequently Asked Questions Of How To Level A Raised Garden Bed
How Do You Level A Raised Garden Bed?
To level a raised garden bed, start by removing any plants and soil from the bed. Use a level to check if the bed is even. If it’s not level, add or remove soil as needed. Compact the soil and check the level again until it’s even.
What Tools Do You Need To Level A Raised Garden Bed?
To level a raised garden bed, you’ll need a level, garden rake or shovel, wheelbarrow, and additional soil or amendments if needed. These tools will help you measure and adjust the bed’s height to ensure a level surface for planting.
What Are The Benefits Of Leveling A Raised Garden Bed?
Leveling a raised garden bed is important for several reasons. It prevents water from pooling in certain areas, promotes proper drainage, and allows plants to grow evenly. Level beds also make maintenance tasks like weeding, harvesting, and watering much easier and more efficient.
Conclusion
Leveling a raised garden bed is a crucial step in ensuring optimal growth and productivity for your plants. By following the steps outlined in this guide, you can easily achieve a level surface for your garden bed. Begin by clearing the area and removing any debris or vegetation.
Use a level tool to check the evenness of the bed, adjusting as necessary. Adding topsoil or compost can help fill in any uneven areas and provide essential nutrients for your plants. Use a rake or garden fork to evenly distribute the soil and create a smooth surface.
Finally, ensure proper drainage by creating a slight slope away from the center of the bed. With these simple strategies, you can create a leveled raised garden bed that allows your plants to thrive and flourish.