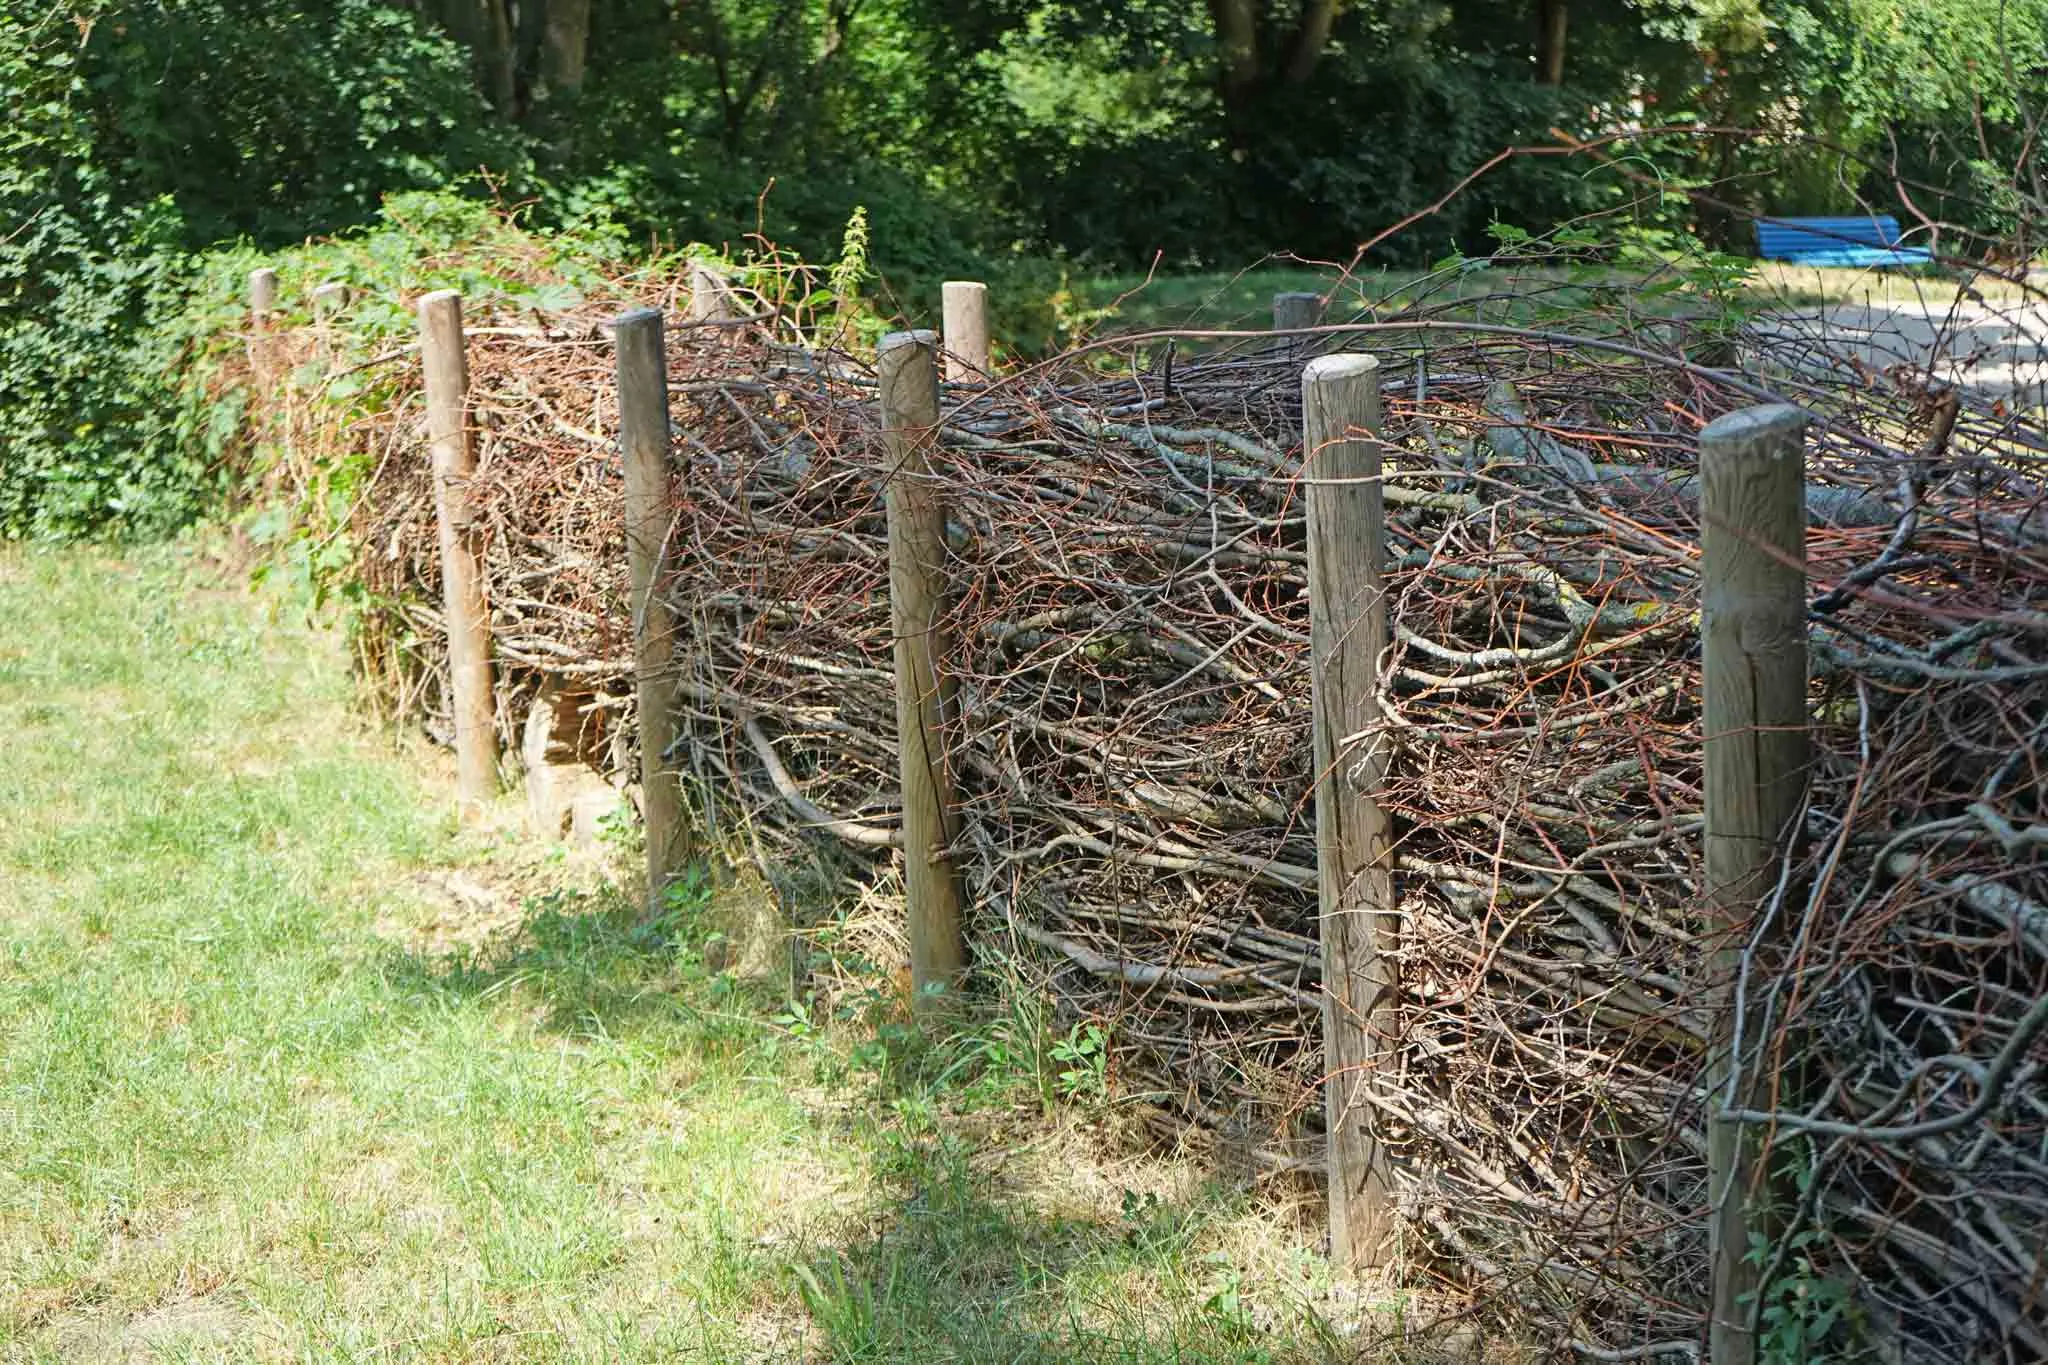
To make a dead hedge fence, gather dead branches, twigs, and other organic materials. Arrange them vertically and horizontally to create a sturdy barrier.
Creating a dead hedge fence combines functionality with natural aesthetics. This eco-friendly alternative serves as a boundary while providing habitat for wildlife. The process utilizes locally sourced materials, promoting sustainability. By incorporating dead branches and twigs, you reduce waste and enhance your garden’s visual appeal.
Credit: www.rosybee.com
Dead hedges also offer excellent windbreaks and privacy screens. This DIY project not only enriches your landscape but also connects you with nature. Whether for decoration or protection, a dead hedge fence reflects a commitment to eco-conscious gardening. Embrace this creative solution to enhance your outdoor space effectively.
How to Make a Dead Hedge Fence : Step by Step Guide
Introduction To Dead Hedge Fencing
Dead hedge fencing offers many benefits. It provides great privacy and sound barriers. This type of fence uses natural materials. It is eco-friendly and promotes wildlife habitat.
Building a dead hedge fence is easy. Gather branches, twigs, and other organic waste. Stack them closely to create a sturdy barrier. This method also helps reduce garden waste.
The historical significance of dead hedges dates back centuries. They were used in European gardens for protection. Farmers often built them to keep animals out. Today, they are popular in sustainable gardening.
Many people appreciate the aesthetic value of dead hedge fencing. It blends well with nature. This fencing style adds charm to any garden.

Credit: www.facebook.com
Materials Needed
To create a dead hedge fence, start by selecting the right branches. Choose flexible branches that are easy to work with. Look for thicker branches for better support.
Deciduous trees like willow or hazel are great choices. Ensure the branches are not too dry. Freshly cut branches will last longer.
For the job, gather these essential tools:
| Tool | Purpose |
|---|---|
| Pruning Shears | To cut branches easily |
| Gloves | To protect your hands |
| Twine or Wire | To secure branches together |
| Shovel | For digging holes if needed |
Planning Your Dead Hedge
Start by deciding the length and height of your dead hedge fence. Measure the area where you want to build it. Think about the purpose of the fence. A taller fence offers more privacy. A shorter fence can let in light.
Consider the location carefully. Choose a spot with good drainage. Avoid areas that flood easily. Check for nearby trees or structures that may block sunlight. These factors can affect plant growth.
Take into account the local climate. Different plants thrive in different weather conditions. Make sure to select plants that suit your area’s temperature and rainfall.
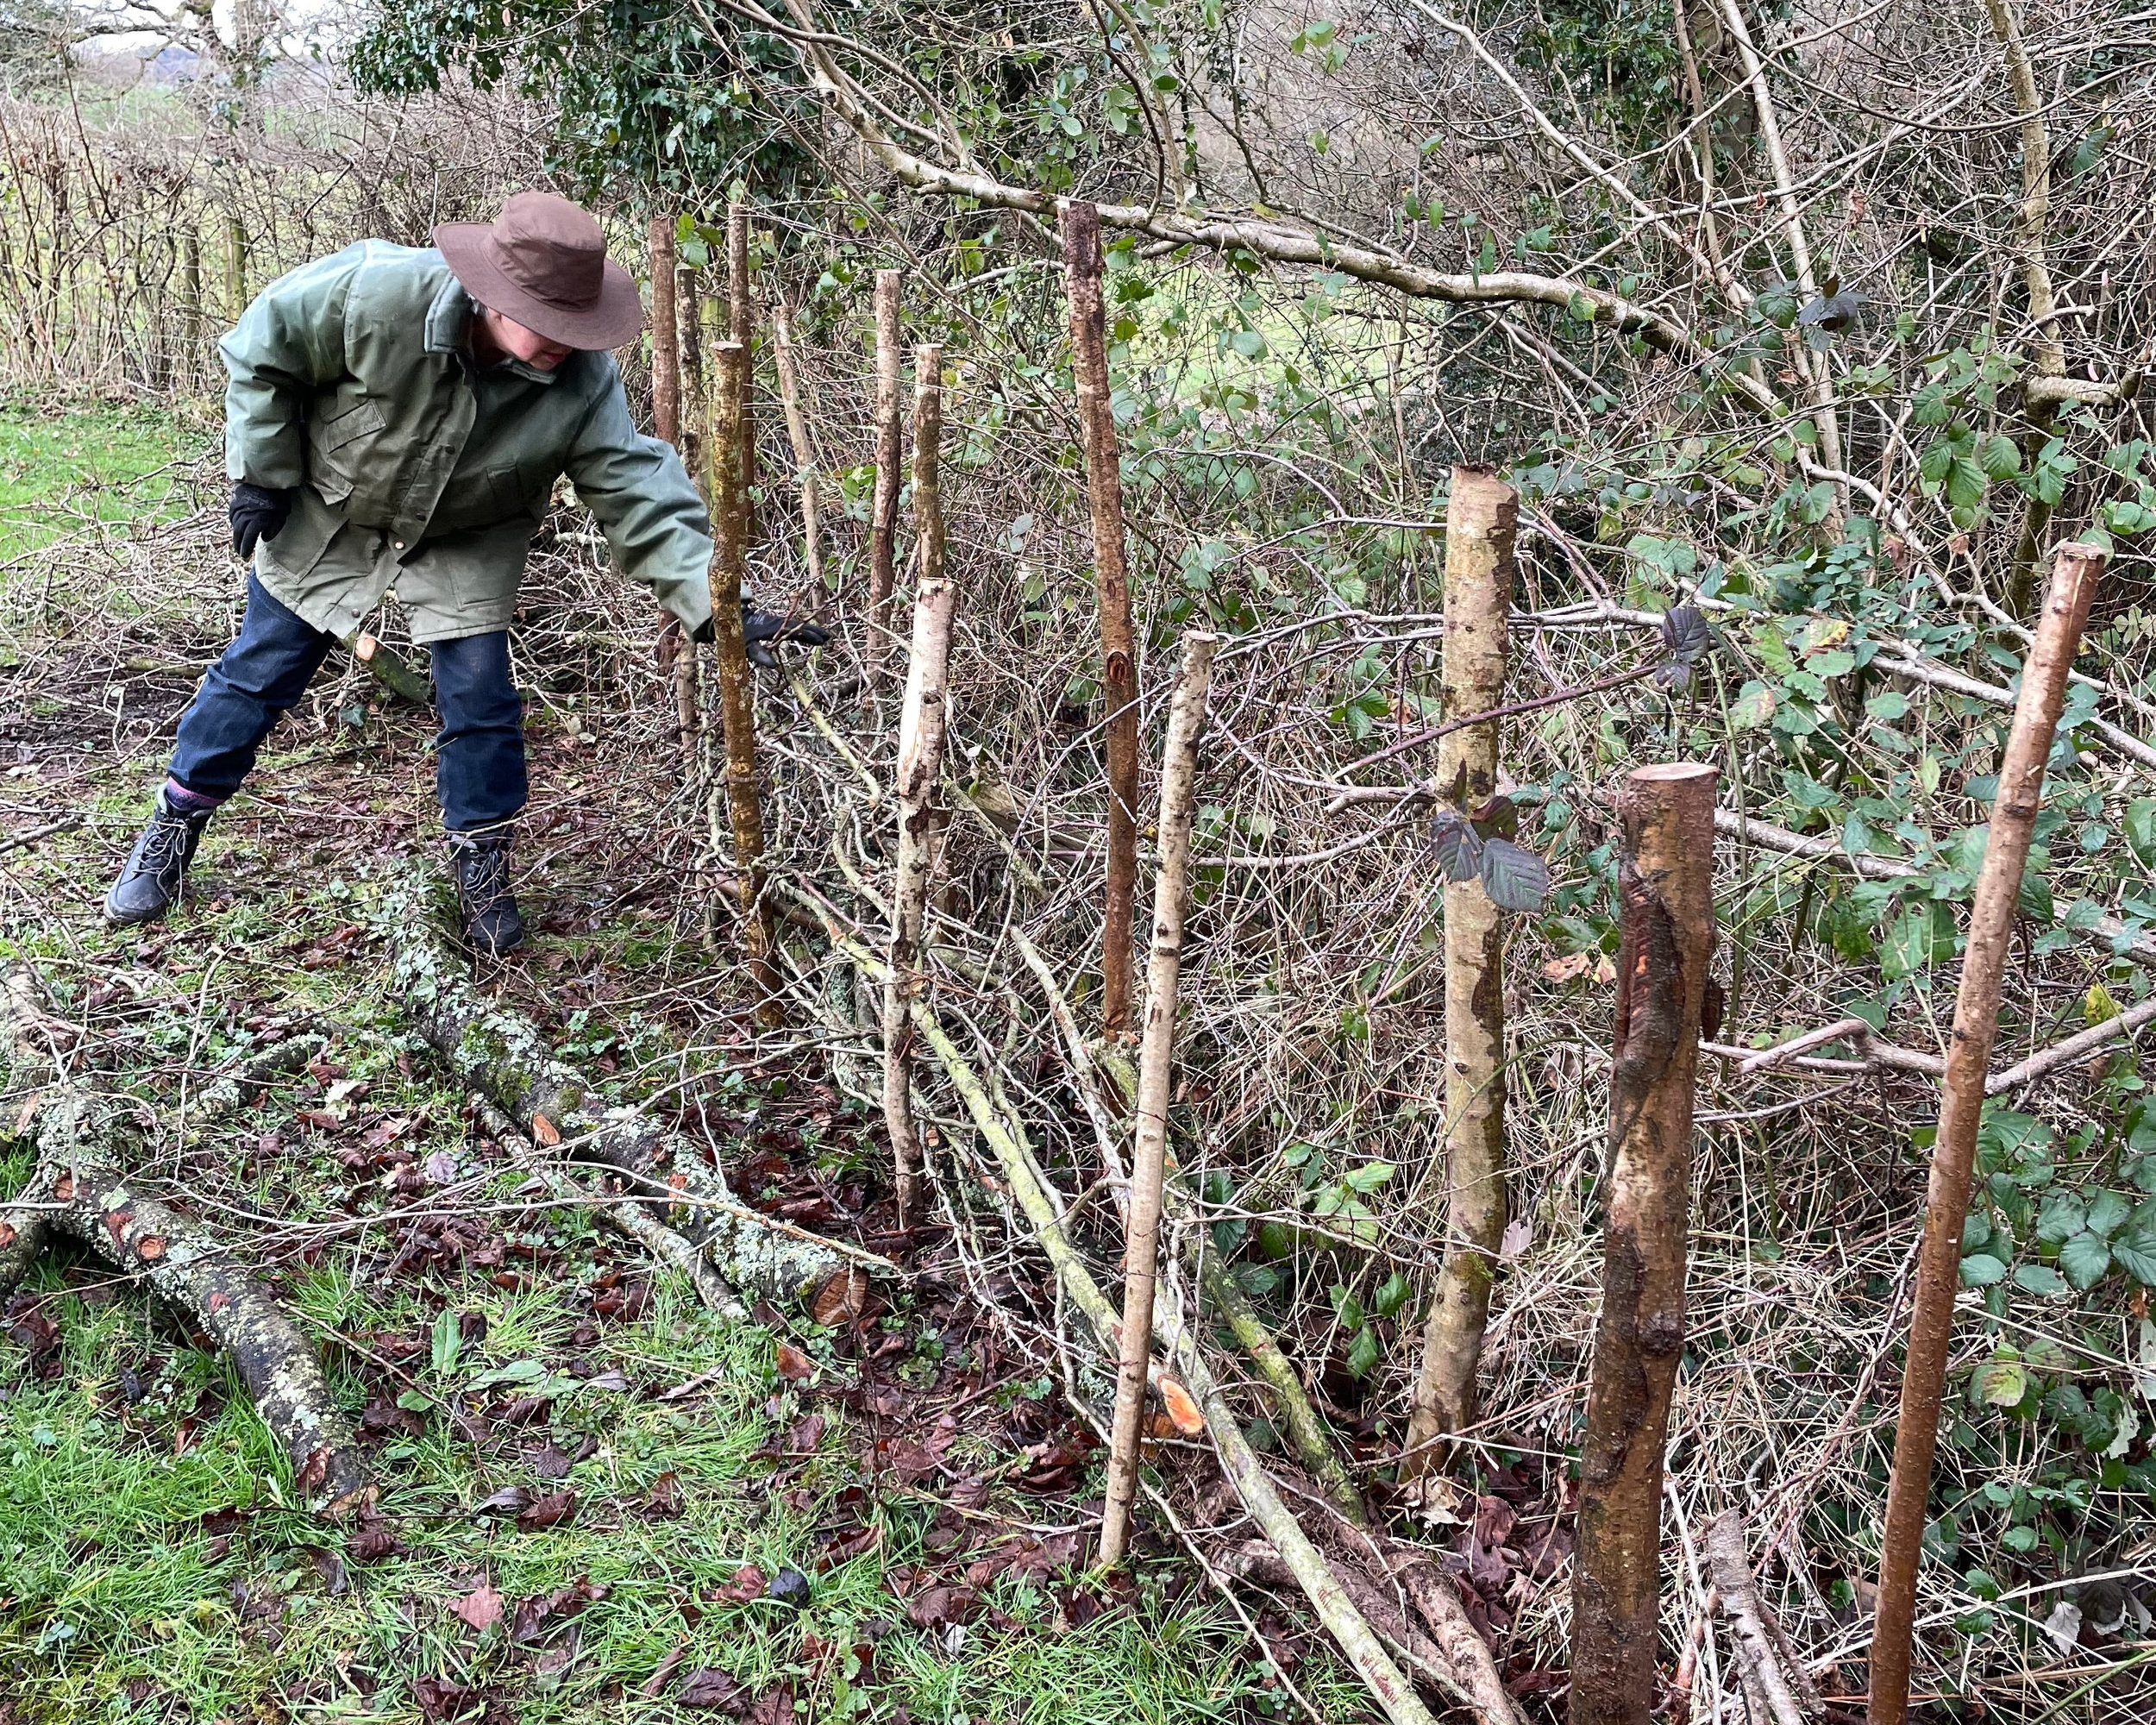
Building The Base
Start by choosing a level area for your dead hedge fence. Clear any debris or weeds from the ground. This will help create a strong base.
Next, dig a trench about 12 inches deep. This trench will hold the branches securely in place. Place larger branches at the bottom for stability.
To stabilize the structure, use smaller branches and twigs. Lay them on top of the larger ones. Fill in any gaps to create a solid wall.
Pack the earth around the branches to hold them tight. Water the area to help the soil settle. This ensures a sturdy and long-lasting fence.
Layering The Branches
Layering branches creates a strong and beautiful dead hedge fence. Start by collecting various sizes of branches. Use thicker branches as the base for support. Place smaller branches on top for better coverage.
For weaving, choose a diagonal pattern. This helps interlock the branches tightly. Make sure to push branches deeply into the ground. This adds to the fence’s stability.
Ensure density by adding more layers of branches. Fill gaps to keep out animals and wind. A well-built hedge fence lasts longer and looks nicer.
For durability, use natural materials. This helps the fence blend into nature. Regularly check for any loose branches and fix them promptly.
Finishing Touches
To secure the top layer of a dead hedge fence, use sturdy twine or wire. Wrap it tightly around the branches. This keeps them in place and prevents movement. Strong ties help maintain the fence’s shape.
For aesthetic enhancements, consider adding climbing plants. Vines or flowers can create a beautiful look. They attract butterflies and birds. This also helps blend the fence into the surroundings. Paint or stain the fence for added style. Choose colors that match your garden.
Adding decorative items like birdhouses or lanterns can enhance its charm. This gives your fence a unique touch. Enjoy the beauty of nature while keeping your space private.
Maintenance Tips
Perform regular checkups on your dead hedge fence to keep it strong. Look for gaps or any damage that may have occurred. Regular inspections help maintain the fence’s appearance and function.
For repairing gaps, gather natural materials like twigs or branches. Fill in any empty spaces carefully. This keeps the fence looking neat and helps it blend with nature.
Check for broken branches or weak spots. Remove any damaged parts and replace them with healthy ones. This ensures your fence remains sturdy and effective.
Keep an eye on the surrounding area too. Weeds and overgrowth can affect the fence’s health. Trim back any excess vegetation to give your fence space to thrive.

Credit: www.youtube.com
Environmental Impact
Creating a dead hedge fence offers many benefits for wildlife. This type of fence provides shelter for birds, insects, and small mammals. It serves as a natural habitat for various species. Animals can find food and nesting spots easily.
Dead hedges also promote biodiversity. Different plants grow around the fence, attracting more species. This helps maintain a healthy ecosystem. The use of natural materials reduces the need for man-made products.
By using sustainable practices, you contribute to a greener environment. This method reduces waste and encourages the recycling of organic materials. A dead hedge fence fosters soil health by preventing erosion.
Frequently Asked Questions
How Do I Start A Dead Hedge Fence?
Begin by selecting suitable materials like branches and twigs. Ensure they are dense and sturdy for better structure. Next, choose a location with good drainage and sunlight. Lay the first layer of materials horizontally, stacking them tightly to create a strong foundation.
What Materials Are Best For A Dead Hedge?
The best materials include hazel, willow, and thorny species. These plants offer strength and natural durability. Avoid softwood, as it may decay quickly. For aesthetics, consider using a mix of different species. This variety will enhance wildlife habitats and improve the fence’s overall appearance.
How Long Does A Dead Hedge Last?
A well-constructed dead hedge can last between 5 to 15 years. The lifespan depends on the materials used and the local climate. Regular maintenance, such as replacing rotting branches, can extend its longevity. Ultimately, the hedge’s health will also contribute to its resilience against weather conditions.
Can A Dead Hedge Provide Wildlife Benefits?
Absolutely! A dead hedge serves as a habitat for many creatures. Birds, insects, and small mammals find shelter and food in the thicket. Additionally, it promotes biodiversity by supporting various plant species. Creating a dead hedge can greatly enhance the ecosystem in your garden.
Conclusion
Creating a dead hedge fence is a rewarding project. It enhances your garden’s beauty and supports local wildlife. By using natural materials, you contribute to sustainability. Whether for privacy or aesthetics, this method is both practical and eco-friendly. Embrace this DIY opportunity and enjoy the benefits of your handiwork for years to come.