Moss poles are an invaluable tool for supporting climbing plants such as pothos, monstera, and philodendrons. These plants, known for their natural tendency to climb in their native environments, benefit greatly from the vertical structure provided by moss poles. By mimicking their natural habitat, moss poles help guide the plant’s growth upward, encouraging healthier foliage and stronger stems.

They also offer support for aerial roots, creating a more stable and lush display. This guide is designed to teach you step-by-step how to make a moss pole for climbing plants using affordable materials. With the right techniques, you can enhance your plants’ growth and give them the support they need to thrive, all while adding an attractive feature to your indoor garden.
Why Use a Moss Pole?
Moss poles offer numerous benefits that support the health and growth of climbing plants, making them a vital addition to any indoor garden. By mimicking the natural climbing conditions found in a plant’s habitat, a moss pole encourages larger leaves, stronger stems, and faster growth. This vertical support system enables plants to grow upward more effectively, resulting in healthier, more robust foliage.
Beyond their functional advantages, moss poles also enhance the aesthetic and structural appeal of your plants. They help keep vining species upright, creating an organized and visually pleasing display in your home. A well-supported plant is not only healthier but can also serve as a stunning centerpiece in your indoor garden.
Additionally, moss poles improve root attachment for aerial roots. These roots can secure themselves to the pole’s moss surface, drawing in additional moisture and nutrients, which in turn promote better growth and overall plant vitality.
Moss poles are particularly well-suited for certain types of plants. Popular examples include Monstera deliciosa, Pothos, Philodendron, and other vining houseplants. These species naturally grow upward in the wild, and a moss pole allows them to thrive in a way that respects their innate climbing tendencies.

Materials Needed to Make a Moss Pole
Creating your own moss pole is a simple and rewarding project. Here’s a list of materials you’ll need to get started:
Core Materials
- PVC pipe, bamboo stake, or wooden dowel
These act as the central support structure of your moss pole. Choose a height appropriate for your plant, adding room for future growth.
Moss Options
- Sphagnum moss
This is the preferred choice due to its excellent moisture retention properties, which help plants thrive.
- Coco coir
An eco-friendly alternative, coco coir is great for those looking for a sustainable option, though it retains slightly less moisture than sphagnum moss.
Binding Materials
- Twine, fishing line, zip ties, or floral wire
These materials are used to securely attach the moss to the pole, ensuring it stays in place for long-term support.
Other Tools
- Scissors
To trim the moss and binding materials as needed.
- Gloves
Protect your hands when handling moss, especially if it is pre-soaked or rough in texture.
- Water
Used for soaking the moss before attaching it to the pole.
- Optional netting or mesh wrap
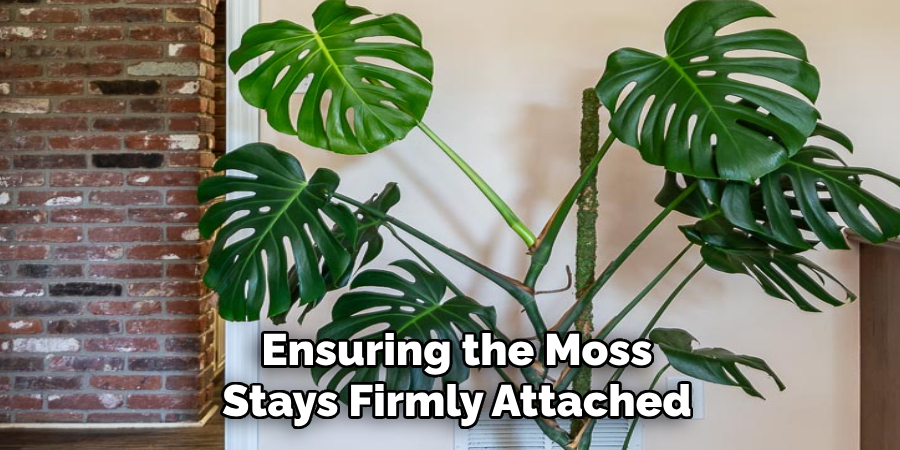
This can be used to provide an extra layer of reinforcement, ensuring the moss stays firmly attached.
By gathering these materials, you’ll be ready to create a functional and sturdy moss pole that helps your climbing houseplants thrive.
Preparing the Moss
Hydrating the Moss
Start by soaking the sphagnum moss in a container of water until it is fully saturated. This step ensures the moss becomes pliable and easier to work with when attaching it to the pole. Allow the moss to sit in the water for a few minutes to absorb as much moisture as possible.
Draining Excess Water
Once the moss is thoroughly soaked, gently remove it from the water and squeeze out the excess liquid. Be careful not to over-squeeze, as the moss should remain damp but not dripping. Properly damp moss helps provide the needed moisture for your climbing plants.
Fluffing the Moss
After draining, spread the moss out evenly on a clean surface to fluff it. Fluffing ensures that the moss is distributed evenly, making its application to the pole easier and more effective. This prepares the moss for the next steps in creating your moss pole.
How to Make a Moss Pole for Climbing Plants: Assembling the Moss Pole
Step-by-Step Construction
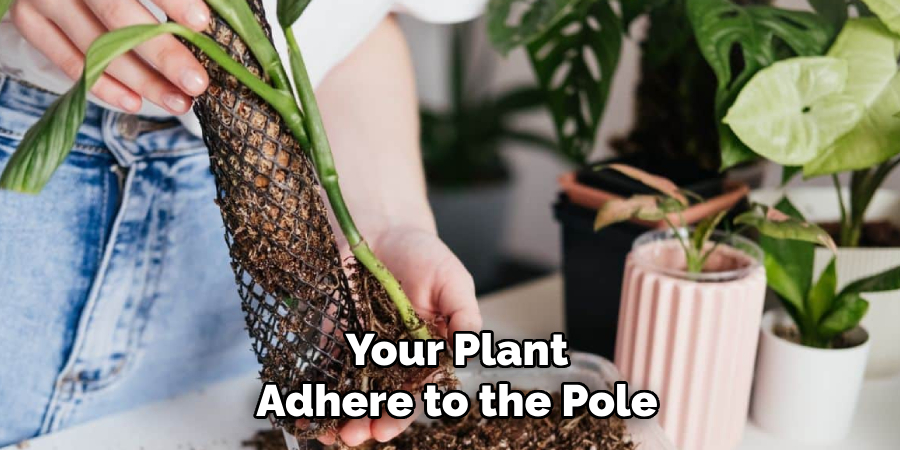
Step 1: Lay the moss along the length of your selected stake or PVC pipe. Distribute the moss in an even layer, ensuring it covers the full length of your support. This initial placement is crucial for creating a stable and uniform moss pole.
Step 2: Wrap the moss tightly and evenly around the stake or pipe. Begin at one end of the pole and work your way down, or vice versa, depending on your preference. Maintain consistent pressure to ensure the moss is snug and remains securely in place.
Step 3: Secure the moss with twine, zip ties, or wire at multiple points along the pole. Place fasteners approximately every 2-3 inches, or closer if necessary, to reinforce the moss and prevent it from slipping or falling off. Ensure that the securing materials are not too tight to damage the moss or the plant’s roots later on.
Optional: Adding Mesh or Netting
For increased durability and better support, consider wrapping a layer of mesh or netting over the moss. This added layer not only keeps the moss in place but also provides a textured surface for your plant’s aerial roots to grip as they grow upward.
Checking for Gaps
Inspect the moss pole thoroughly for any gaps or bare spots. If you notice areas that appear thin or uneven, add additional moss and secure it. A well-packed moss pole provides better moisture retention and a more effective climbing surface for your plant.
Length Consideration
When assembling your moss pole, ensure it is slightly taller than your plant’s current height. This extra length accommodates future growth, ensuring the plant has sufficient support as it climbs upward over time.

Installing the Moss Pole in a Pot
Placement in Soil
When installing the moss pole, begin by determining the best position within the pot. Ideally, place it as close to the plant’s base as possible without damaging the roots. If you are planting a new plant, position the moss pole first, then plant around it, ensuring the pole is stable and centered. For an already potted plant, carefully insert the pole into the soil, angling it slightly away from the plant to avoid root disturbance.
Stabilizing the Pole
To prevent the moss pole from wobbling, press it firmly into the soil until it reaches the bottom of the pot. This ensures it is anchored securely. If the pot is large, consider adding additional support by tying or fastening the pole to a stake or the pot’s rim. A stable moss pole is crucial for supporting your plant’s growth and promoting healthy climbing habits.
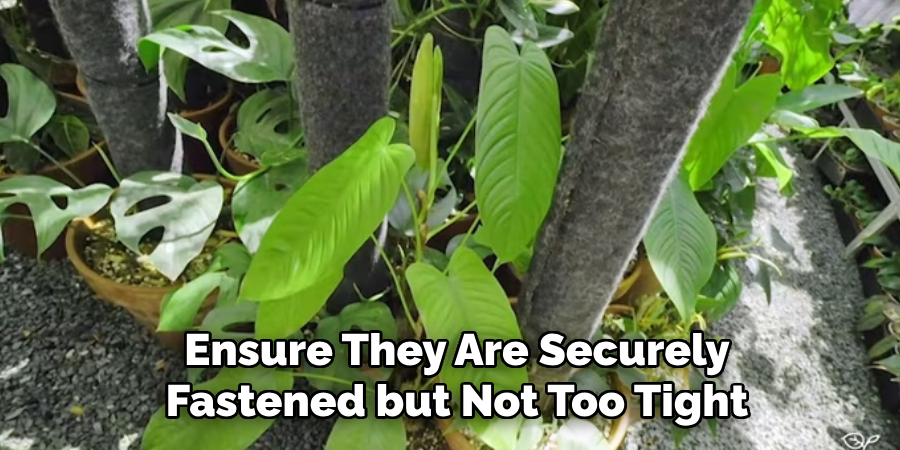
Securing the Plant
Once the moss pole is installed, gently guide your plant’s stems toward the pole. Using plant tape or soft twine, tie the stems loosely to the moss pole to provide support without restricting growth. Avoid tying too tightly, as this could damage the stems. Adjust the ties as the plant grows, encouraging it to climb naturally up the pole.
Maintaining a Moss Pole
Moisture Management
To ensure your moss pole remains beneficial for your plant, keeping it adequately moist is essential. Regularly spray or mist the moss with water to provide hydration, which supports the development of aerial roots. Ensure the moss remains damp but not soggy to prevent mold or mildew growth. Depending on the environment, you may need to mist daily or several times a week. A consistent moisture level encourages healthy growth and helps your plant adhere to the pole.
Cleaning and Refreshing
Over time, the moss on your pole may degrade or lose its ability to retain moisture effectively. It’s essential to periodically inspect the condition of your moss and refresh or replace it as needed. To do this, gently remove the old moss and wrap fresh moss around the pole, securing it with twine or garden ties. Replacing the moss annually or whenever it becomes overly compacted or discolored can maintain an optimal growing environment for your plant.
Encouraging Climbing
Training your plant to climb the moss pole requires patience and gentle handling. Gradually guide your plant’s vines toward the pole and secure them loosely with soft ties. Over time, the aerial roots will naturally grip the moss, enabling the plant to climb on its own. Be sure to adjust ties as the plant grows, ensuring it remains supported without being constricted.
Common Mistakes and How to Avoid Them
Overly Dry Moss
Failing to mist the moss pole regularly can lead to overly dry moss, which may hinder the plant’s ability to anchor its aerial roots effectively. This can slow down growth and prevent the plant from climbing properly. To fix this, maintain a consistent misting schedule, especially in dry environments, and consider using a humidifier if your space lacks adequate humidity.
Using Inappropriate Materials
Not all supports or substitutes are suitable for climbing plants. For example, plastic or smooth poles may lack the texture needed for aerial roots to latch onto securely. Similarly, low-quality moss substitutes might disintegrate quickly or fail to retain moisture. Always choose high-quality sphagnum moss and sturdy, natural poles to ensure an ideal climbing surface.
Improper Tying Techniques
Tying vines too tightly can damage the plant’s stems and restrict growth. Use soft, flexible ties and ensure they are securely fastened but not too tight. Check ties regularly and adjust them as the plant grows to avoid unnecessary pressure on the vines.
Conclusion
Moss poles are a fantastic tool to support climbing plants, promoting healthy growth and enhancing their natural beauty. They mimic the plants’ natural environment, allowing roots to anchor and vines to flourish. Learning how to make a moss pole for climbing plants is straightforward and allows for customization based on your specific plants and available materials. Use high-quality moss and sturdy supports to get the best results. Remember to keep the moss pole moist and periodically check that the plant’s attachment remains secure. With these small efforts, you’ll create an ideal structure for your climbing plants to thrive.