To make garden rows with a hoe, use the hoe to create small, neat trenches in the soil. Garden rows can be a practical and efficient way to organize your plants and maximize space in your garden.
Whether you’re a seasoned gardener or just starting out, learning how to make garden rows with a hoe can be a valuable skill. With the help of a hoe, you can create neat and sturdy rows that provide an optimal space for your plants to grow.
In this article, we will guide you through the process of making garden rows with a hoe, offering tips and techniques to ensure your rows are even and well-spaced. So let’s grab our hoes and start creating beautiful rows for our garden!

How to Make Garden Rows With a Hoe: 10 Easy Steps
Step 1: Preparing The Soil
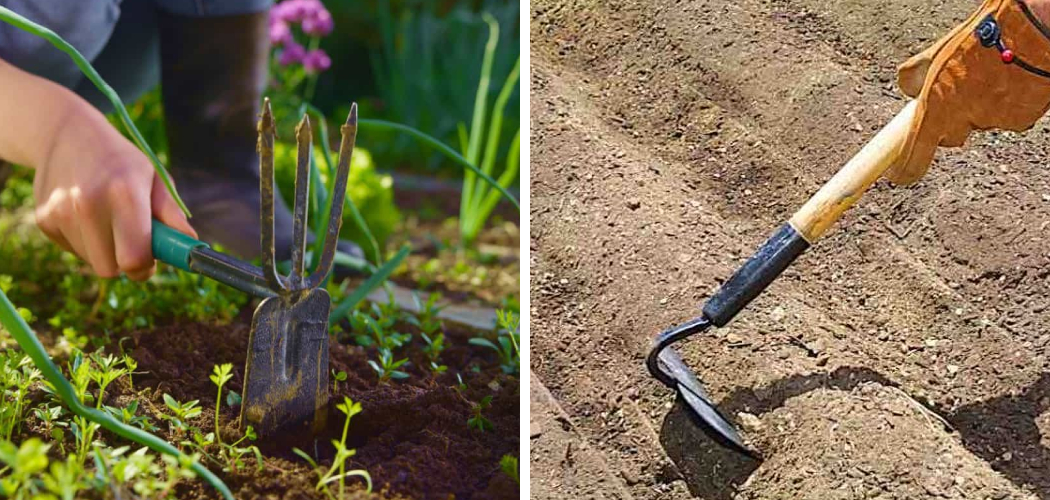
Preparing the soil for garden rows with a hoe involves a few important steps. Begin by clearing the area of debris and weeds that may hinder the growth of your plants. Use a garden fork to loosen the soil, making it easier to work with.
This step helps to improve drainage and allows the roots to penetrate deeper. Gently insert the garden fork into the ground and turn it slightly to break up any compacted soil. Repeat this process across the entire area where you plan to create your garden rows.
By preparing the soil properly, you provide a fertile foundation for your plants to thrive. So get your hoe ready and follow these steps for successful garden rows.
Step 2: Marking The Rows
To create garden rows with a hoe, the second step involves marking the rows using stakes. Start by determining the spacing between each row, taking into account the specific needs of the plants being grown. Place stakes at the starting and ending points of the rows to provide a clear guide.
This ensures that the rows are straight and evenly spaced. By using stakes as markers, it becomes easier to maintain the desired alignment throughout the process of hoeing the garden rows. This simple yet effective technique helps to optimize the space available and allows for efficient cultivation.
So, when creating garden rows with a hoe, remember to mark the rows with stakes for precise and systematic gardening.
Step 3: Hoeing The Rows
Maintaining consistent row width in the garden is crucial for effective hoeing. By following these ideal techniques, you can make the best use of your hoe. Start by positioning yourself at one end of the row and align the hoe parallel to the row.
Using a push-pull motion, push the hoe forward to cut through the soil and then pull it back towards you to remove any weeds or debris. Continue this process along the entire length of the row, making sure to maintain a steady, even pace.
Keep an eye on the row width, ensuring it remains consistent throughout. This will help create neat, organized garden rows and make your hoeing efforts more productive and efficient. Happy hoeing!
Step 4: Correcting Row Imperfections
To correct imperfections in your garden rows, you can fix crooked rows using a level or string. This ensures straight and aligned rows. Adjust the depth of your rows according to the specific crops you will be planting. This is important for optimal growth and yields.
By following these steps, you can create garden rows using a hoe that are well-organized and visually appealing. Starting with correcting row imperfections, you will have a solid foundation for the rest of your gardening process. So grab your tools and get ready to create perfectly placed rows in your garden.
Happy gardening!
Step 5: Adding Organic Matter

Garden rows can be made with a hoe by following several key steps. One important step in the process is adding organic matter to the soil. This can be accomplished by incorporating compost or organic fertilizers into the rows. Adding organic matter is crucial because it enriches the soil, providing essential nutrients to plants.
Incorporating organic matter can be done by using techniques such as mixing the compost or fertilizer into the soil with a hoe or rake. This ensures that the organic matter is evenly distributed within the rows, promoting healthy plant growth.
By incorporating organic matter, gardeners can improve the overall quality of their soil and increase the productivity of their crops.
Step 6: Mulching The Rows
Properly applying mulch to garden rows is essential for maximizing their benefits in your garden. Mulching provides numerous advantages, such as conserving soil moisture, preventing weed growth, and maintaining a more consistent soil temperature. There are several mulching options available, including organic materials like straw, wood chips, or shredded leaves, as well as artificial mulches like landscape fabric or black plastic.
Each mulching method offers its own unique benefits and drawbacks, so it’s important to consider your specific gardening needs and preferences. When applying mulch to your garden rows, make sure to spread a layer that is about 2-3 inches thick, taking care to avoid piling the mulch directly against the base of plants.
This will help maintain a healthy growing environment and enhance the growth and productivity of your plants.
Step 7: Watering And Maintenance
Watering guidelines for newly formed garden rows are crucial for the success of your plants. Proper watering ensures they receive enough moisture to grow healthily and bear abundant fruits and vegetables. As a rule of thumb, the soil in your garden rows should remain consistently moist but not waterlogged.
To achieve this, water your garden rows deeply, ensuring the water reaches the roots of the plants. Aim for a slow and steady watering process, allowing the soil to absorb the moisture gradually. Regular maintenance tasks, such as weeding and mulching, also contribute to the health and productivity of your plants.
By removing weeds, you eliminate competition for nutrients and water, while mulching helps retain moisture for longer periods.
Step 8: Ways To Prevent Erosion
To prevent erosion in garden rows, implementing strategies is crucial. One effective method is the use of cover crops or windbreaks. By incorporating cover crops between garden rows, soil erosion can be mitigated. These crops act as a protective layer, holding the soil in place and preventing it from washing away during heavy rainfall or strong winds.
Windbreaks, on the other hand, create a barrier that reduces the impact of wind on the soil, minimizing the likelihood of erosion. Both techniques not only help maintain the integrity of the garden rows but also promote healthier soil by retaining moisture and enhancing nutrient levels.
Implementing these strategies can significantly reduce erosion risks, ensuring the longevity and productivity of your garden. So, consider incorporating cover crops and windbreaks to safeguard your garden rows against erosion.
Step 9: Tips For Efficient Hoeing

To efficiently hoe larger garden areas, it’s crucial to maintain good posture and avoid unnecessary strain. Position yourself upright with a straight back and relaxed shoulders. Use both hands to grip the hoe handle firmly, positioning it at a comfortable height.
Prioritize pushing the hoe through the soil rather than pulling it back, exerting force from your legs and core muscles. Move steadily and maintain a steady rhythm to cover a larger area without overexertion. Avoid bending or lifting heavy loads when hoeing, as this can strain your back.
By following these tips, you can make the most of your hoe and save time while tending to your garden rows.
Step 10: Harvesting And Evaluating Results
Harvesting and evaluating the results of crops grown in garden rows is crucial to assess their success and productivity. It allows you to gauge the effectiveness of the hoe-made rows and make necessary improvements for future harvests. To ensure proper techniques for harvesting, follow these guidelines.
Carefully monitor the growth and development of your crops, observing signs of readiness for harvesting. Use sharp pruning shears or scissors to cut off the mature plants and handle them with care. Inspect the harvested crops for quality and quantity, checking for any signs of damage or disease.
Keep a record of the harvest results, including the weight, size, and overall condition of the produce. Evaluate the yield and compare it to your expectations and previous harvests to determine the effectiveness of your garden rows. By following these steps, you can optimize the productivity of your hoe-made garden rows.
Frequently Asked Questions On How To Make Garden Rows With A Hoe
How Do I Prepare Garden Rows With A Hoe?
To prepare garden rows with a hoe, start by removing any weeds or grass from the area. Then, push the hoe into the soil and pull it toward you, creating a shallow trench. Repeat this process, spacing the rows according to your planting plan.
Finally, smooth the soil in the rows using the flat side of the hoe.
What Type Of Hoe Is Best For Making Garden Rows?

A draw hoe or a garden hoe with a flat edge is ideal for making garden rows. These types of hoes allow you to easily create straight, evenly spaced rows by dragging them through the soil.
How Deep Should Garden Rows Be With A Hoe?
The depth of garden rows created with a hoe depends on the type of crops you are planting. Generally, aim for a depth of around 1 to 2 inches. However, refer to the planting instructions for your specific crops to ensure you create the appropriate depth for optimal growth.
Conclusion
To sum it up, making garden rows with a hoe is a simple and effective method for creating a well-organized and productive garden. By following a few steps, you can ensure that your rows are straight and evenly spaced, allowing for optimal growth and easy maintenance.
Start by preparing the soil and marking out the rows with stakes and string. Then, using a hoe, create furrows by pushing the soil to the side. Repeat this process until all the rows are formed. Remember to weed regularly and provide ample water and nutrients for your plants.
By using a hoe to make garden rows, you can save time and effort while maximizing your garden’s potential. So, grab your hoe and get started on creating beautiful, productive garden rows. Happy gardening!