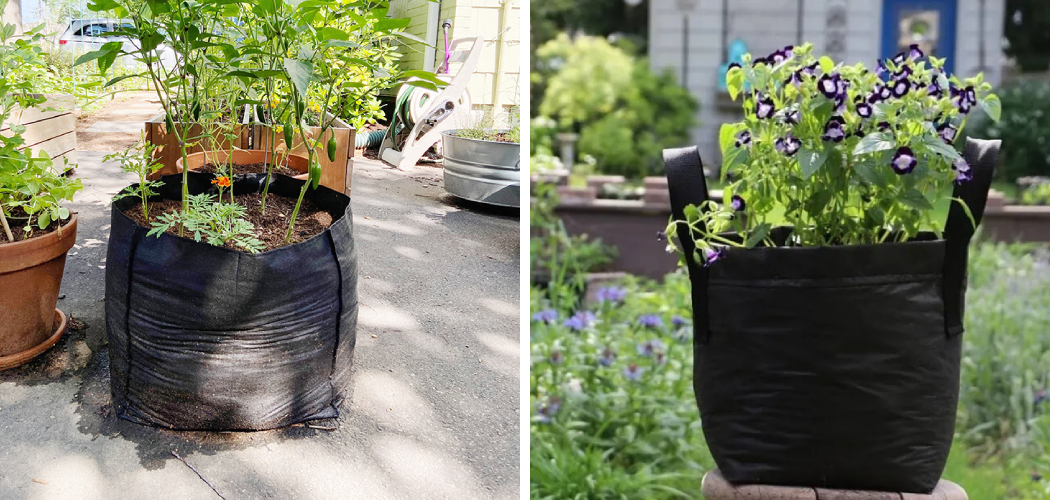
To make growing bags, choose a suitable container, fill it with a well-draining growing medium, and plant your desired seeds or plants. Growing bags are a convenient and efficient way to grow plants, providing them with adequate space and drainage for healthy growth.
They can be made from various materials such as fabric, plastic, or even recycled materials like burlap sacks. By following these steps, you can create your own growing bags and enjoy the benefits of container gardening. Start by selecting a container, filling it with the appropriate growing medium, and then planting your chosen seeds or plants.
With proper care and maintenance, your growing bags will support the growth of your plants and provide a productive gardening experience.

Benefits Of Using Growing Bags For Plants
Growing bags offer numerous benefits for plants, such as improved drainage and aeration. The specially designed material ensures that excess water drains quickly, preventing waterlogging and root rot. Moreover, the breathable fabric allows for better air circulation around the roots, promoting healthier growth.
Another advantage is that growing bags prevent roots from becoming root-bound. The fabric’s porous nature encourages the roots to grow in a more natural, fibrous pattern, preventing them from circling and becoming tangled. Additionally, these bags are easily transportable, making it convenient to move plants around as needed.
Whether you have a small urban garden or a larger plot, using growing bags is a practical and effective solution for cultivating healthy plants.
Factors To Consider When Selecting Materials
When selecting materials for growing bags, several factors need to be considered. One important factor is breathability and permeability. This ensures proper airflow and prevents waterlogging. The bags should also be durable and strong, capable of withstanding the weight of the soil and plants.
Uv resistance is another important consideration, as it helps protect the bags from damage caused by prolonged exposure to sunlight. Additionally, it is crucial to choose non-toxic materials to ensure the bags are safe for growing edible plants. By carefully considering these factors, you can select the right materials for your growing bags and create optimal conditions for your plants to thrive.
How to Make Growing Bags: Step by Step Guide
Gather The Necessary Materials
Gather the necessary materials for making growing bags, such as fabric material like burlap or polypropylene. Use scissors to cut the fabric to the desired size. Measure the fabric using a measuring tape or ruler to ensure accurate dimensions. Sew the edges of the fabric together using thread or a heavy-duty sewing machine to create a sturdy bag.
Avoid commonly overused words and phrases to keep the content engaging. Vary sentence structures to maintain reader interest. Create a concise and informative paragraph for an seo-friendly blog post on making growing bags.
Measure And Cut The Fabric
To make growing bags, start by determining the desired size and shape. Use a measuring tape or ruler to mark the dimensions on the fabric. Next, cut the fabric according to the measurements.
Sewing The Sides Of The Bag
To sew the sides of the growing bag, start by folding the fabric in half. Make sure the right sides are facing each other. Using either a straight stitch or a zigzag stitch, sew along the two sides of the fabric.
Remember to leave the top open for filling the bag with soil and plants. Using a zigzag stitch can provide added strength to ensure the bag doesn’t tear or fray easily. Sewing the sides securely is essential for maintaining the shape and durability of the growing bag.
By following these steps, you’ll be able to create a sturdy and functional growing bag for your plants.
Reinforce The Bottom Of The Bag
To reinforce the bottom of the growing bag, cut a separate piece of fabric. This fabric will create a double layer on the bottom. Sew the bottom piece to the bag, reinforcing the seam. This will provide extra support and prevent the bag from tearing under the weight of the soil and plants.
By reinforcing the bottom, you can ensure the longevity of your growing bag and give your plants a stable environment to thrive in. So, make sure to follow this step to strengthen your growing bag and enjoy a successful gardening experience.
Turn The Bag Inside Out
To turn the bag inside out, reach inside and gently pull the fabric through the top opening. Once the fabric is out, flip the bag so that the right side of the fabric is facing out.
Choosing The Right Soil And Fertilizer
To ensure successful growth of plants in growing bags, it is crucial to choose the right soil and fertilizer. Opt for a well-draining soil mix that suits the specific plant you are growing. This will prevent water stagnation and root rot.
Incorporating organic matter or compost into the soil mix can provide essential nutrients for the plants. It is advisable to regularly fertilize the growing bags according to the specific requirements of the plants. This will help promote healthy growth and vibrant foliage.
Remember to use a variety of fertilizers to maintain a balanced nutrient profile. By selecting the appropriate soil and fertilizers, you can create the ideal growing conditions for your plants in growing bags.
Proper Watering Techniques
Proper watering techniques are essential when it comes to growing plants in bags. Water the plants thoroughly until water comes out from the drainage holes. This ensures that the entire root system receives an adequate amount of moisture. However, it is important to allow the soil to dry out slightly between waterings.
Overwatering can lead to waterlogged roots and cause damage to the plants. By giving the soil a chance to dry slightly, you prevent the risk of root rot and promote healthier growth. Remember to monitor your plants regularly and water them accordingly, keeping in mind their specific needs.
It is always better to underwater than to overwater, as plants can recover from slight dehydration, but not from excessive moisture.
Reusing And Cleaning Growing Bags
Empty the soil from the bags after harvesting or at the end of the growing season. Brush off any loose soil or debris from the bag. Wash the bags using mild soap and water, and allow them to air dry completely.
Frequently Asked Questions For How To Make Growing Bags
How Do You Make A Homemade Grow Bag?
To make a homemade grow bag, follow these simple steps. First, gather a durable fabric bag, such as burlap or weed barrier cloth. Next, cut the fabric to your desired size, ensuring it’s large enough to accommodate plant growth. Then, fold down the top of the bag to create a sturdy edge.
Secure it with heavy-duty staples or stitching. Additionally, consider adding drainage holes at the bottom of the bag to prevent water accumulation. Finally, fill the bag with a nutrient-rich potting mix and plant your seeds or seedlings. Ensure proper watering and sunlight exposure for optimal growth.
Homemade grow bags are a cost-effective solution for cultivating plants, and they provide ample space for root development. Happy gardening!
Can I Make My Own Grow Bags?
Yes, you can make your own grow bags. All you need is some basic materials and a little bit of diy know-how. Start by selecting a strong and breathable fabric, like burlap or a sturdy plastic. Cut it into a desired size, leaving ample space for the plant roots to grow.
Sew or staple the sides together, ensuring a secure and durable construction. Create drainage holes at the bottom to prevent waterlogging. Fill the grow bags with a nutrient-rich soil mix and plant your desired crops. Remember to water and maintain the plants regularly.
Making your own grow bags allows for customization and cost savings, making it a great option for avid gardeners.
What Material Is Used To Make Grow Bags?
Grow bags are made from a variety of materials, including fabric, plastic, and biodegradable materials. Fabric grow bags are commonly used for their breathability and ability to promote healthy root growth. They allow for better drainage, prevent root circling, and encourage air pruning.
Plastic grow bags are durable and retain moisture, making them suitable for areas with high temperatures or water scarcity. Biodegradable grow bags are made from materials like coconut coir, peat moss, or wood pulp, which break down over time, adding nutrients to the soil.
The choice of material depends on the specific needs of the plants and the gardener’s preference for sustainability. These bags are a versatile and cost-effective solution for container gardening.
What Can I Use Instead Of A Grow Bag?
Options for substituting a grow bag include using containers, pots, or raised beds. These alternatives offer benefits like better drainage, more room for plant growth, and improved mobility. Containers, typically made of plastic or ceramic, provide flexibility and easy mobility.
Pots, made from clay or plastic, can be used for various plants and are available in different sizes. Raised beds offer ample space for root development and allow for easier maintenance. Gardeners can customize the size and materials used for raised beds, such as wood or stone.
Consider the specific needs of your plants and the space available to determine the best alternative to a grow bag.
Conclusion
Creating your own growing bags is a cost-effective and sustainable solution for any gardener, whether you have limited space or want to try something new. By following the steps outlined in this blog post, you can customize your growing bags to suit your specific needs and preferences.
Using the right materials, such as breathable fabric and a sturdy support system, will ensure optimal plant growth and longevity for your bags. Additionally, maximizing drainage and providing adequate water and nutrient supply will promote healthy root development and overall plant health.
Don’t forget to consider the size and shape of your bags, as well as the types of plants you plan to grow. With a little planning and creativity, your homemade growing bags will be a valuable addition to your gardening endeavors.
Happy growing!