To make landscaping rocks look wet, apply a water sealant or use a glossy stone enhancer. Imitating the glistening effect of wet rocks can enhance the overall aesthetics of your landscape.
Adding a water sealant will create a wet look that lasts longer and protects against damage from weathering. Alternatively, using a glossy stone enhancer can bring out the natural colors and textures of the rocks while providing a wet appearance.
By implementing these methods, you can achieve the desired wet look for your landscaping rocks and elevate the beauty of your outdoor space.

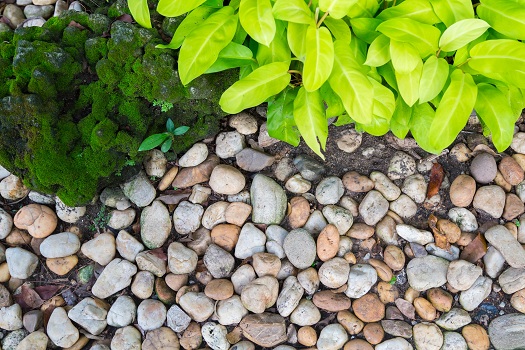
Credit: justrockhounding.com
Understanding The Benefits Of Wet-Look Landscaping Rocks
Landscaping rocks are a popular choice for many homeowners looking to add texture and visual interest to their outdoor spaces. While natural rocks can certainly enhance the beauty of a landscape, there is a way to take their appearance to the next level – by making them look wet.
Creating a wet-look effect on landscaping rocks can bring out their natural colors and patterns, making them even more visually appealing. In this section, we will explore the benefits of wet-look landscaping rocks and why you should consider this option for your outdoor space.
Enhancing The Aesthetics Of Your Outdoor Space
- Wet-look landscaping rocks can transform your outdoor space from ordinary to extraordinary.
- The glossy finish adds a touch of sophistication and elegance to your landscape design.
- The intensified colors of the rocks create a vibrant and eye-catching focal point in your yard.
- The wet-look effect can be particularly striking when sunlight reflects off the rocks, creating a shimmering effect.
Creating A Natural And Organic Feel
- Wet-look landscaping rocks mimic the appearance of rocks after rainfall, giving your yard a natural and organic feel.
- The wet-look finish evokes a sense of freshness and life, creating a soothing atmosphere in your outdoor space.
- The gleaming rocks can resemble natural water bodies, such as rivers or lakes, further enhancing the overall natural aesthetic of your landscape design.
Increasing The Visual Depth Of Your Landscape
- The wet-look effect adds depth and dimension to your landscape, making it look more visually appealing.
- With the glossy finish, the rocks appear more prominent and create a sense of layers in your outdoor space.
- The contrast between wet-look rocks and other elements in your landscape, such as plants or mulch, can make them stand out and create a visually stunning focal point.
- The added depth and visual interest can make even a small outdoor area look more expansive and impressive.

By understanding the benefits of wet-look landscaping rocks, you can make an informed decision on whether to incorporate this element into your outdoor design. Whether you want to enhance the aesthetics of your space, create a natural and organic feel, or increase the visual depth of your landscape, wet-look rocks can provide a unique and visually appealing solution.
With their ability to transform any ordinary yard into an extraordinary oasis, it’s no wonder that the popularity of wet-look landscaping rocks continues to grow. So why not consider adding this stunning element to your outdoor space and enjoy the many benefits it brings?
Preparing Your Rocks For Wet-Look Aesthetic
Landscaping rocks are a great way to enhance the visual appeal of your outdoor space and create a stunning landscape design. One popular technique to make your landscaping rocks stand out is by giving them a wet-look aesthetic. This method adds a glossy appearance to the rocks, making them appear as if they’ve just been rained on or dipped in water.
In this section, we’ll explore the steps to prepare your rocks for a wet-look effect, ensuring the best results for your landscaping project.
Cleaning And Removing Debris From The Surface
Before you begin the process of achieving a wet-look effect on your landscaping rocks, it’s essential to clean and remove any debris from their surface. This ensures a smooth and polished finish. Here are the key points to remember:
- Inspect the rocks for any loose dirt, leaves, or other materials that may have accumulated on their surface.
- Use a stiff brush or broom to scrub away the debris effectively.
- For stubborn stains or grime, you can use water and mild soap to gently wash the rocks.
- Rinse the rocks thoroughly with clean water to remove any leftover soap residue.
Ensuring Proper Drainage In The Landscape Area
To achieve a convincing wet-look effect, it’s crucial to ensure proper drainage in the landscape area where the rocks are placed. Here are a few guidelines to follow:

- Assess the landscape area for any existing drainage issues and resolve them before proceeding with the wet-look technique.
- Ensure that the rocks are not placed in areas where water tends to accumulate or pool.
- Consider creating gravel beds, using landscaping fabric or permeable materials to allow water drainage beneath the rocks.
- Install appropriate drainage systems, such as french drains, if needed, to prevent water from accumulating around the rocks.
Selecting The Right Type Of Rocks For A Wet-Look Effect
Not all rocks are suitable for achieving a wet-look effect. It’s essential to select the right type of rocks that will enhance the glossy appearance you desire. Here are the key points to consider:
- Opt for rocks with smooth surfaces and a naturally polished look, such as river rocks or polished black pebbles.
- Avoid rocks with porous textures or rough surfaces, as they may not achieve the desired wet-look effect.
- Consider the color of the rocks and how it will complement your overall landscape design when wet.
- Take into account the size and shape of the rocks, ensuring they fit well with your landscaping layout.
Achieving a wet-look aesthetic on your landscaping rocks can transform the overall appearance of your outdoor space. By preparing your rocks through proper cleaning, ensuring adequate drainage, and selecting the right type of rocks, you’ll be on your way to creating a visually stunning landscape that’s sure to impress.
So, roll up your sleeves and get ready to make your landscaping rocks glisten like never before.
Applying A Wet-Look Sealant To Landscaping Rocks
Enhancing the appearance of your landscaping rocks can be achieved by making them look wet through the application of a wet-look sealant. This process not only adds a touch of sophistication to your outdoor space but also helps to protect the rocks from harsh weather conditions.
In this section, we will guide you through the process of choosing the right sealant, preparing the necessary tools, and applying the sealant effectively and evenly.
Choosing The Right Sealant For Your Rocks
When it comes to selecting a sealant for your landscaping rocks, it’s important to consider certain factors to ensure optimal results. Here’s what you need to keep in mind:
- Compatibility: Make sure to choose a sealant that is compatible with the type of rock you have. Different rocks may require different sealants, so be sure to do your research beforehand.
- Wet-look finish: Look for a sealant that specifically mentions a wet-look finish. This type of sealant will give your rocks the desired glossy appearance, mimicking the effect of water.
- Uv protection: Opt for a sealant that offers uv protection. This will help prevent the rocks from fading or discoloration caused by exposure to sunlight.
- Water resistance: It’s essential to select a sealant that provides water resistance. This will ensure that the wet look of the rocks remains intact even after being exposed to rain or sprinkler systems.
- Ease of application: Consider choosing a sealant that is easy to apply, especially if you are a beginner. Look for one that comes with clear instructions and requires minimal effort for an even finish.
Preparing The Sealant And Necessary Tools
Before applying the wet-look sealant to your landscaping rocks, it’s important to prepare the sealant and gather the necessary tools. Follow these steps:
- Read the instructions: Carefully read the instructions provided with the sealant to understand the recommended application method and any specific preparation steps.
- Clean the rocks: Thoroughly clean the landscaping rocks to remove any dirt, debris, or loose particles. This will ensure better adhesion of the sealant and prevent any imperfections in the finish.
- Gather the tools: Collect the tools you will need for application, such as a paintbrush or a roller (depending on the size of the rocks), protective gloves, and a drop cloth to protect the surrounding area.
Applying The Sealant Effectively And Evenly

Now that you have chosen the right sealant and prepared the necessary tools, it’s time to apply the sealant to your landscaping rocks. Follow these guidelines for optimal results:
- Shake the sealant: Give the sealant container a good shake to ensure it is well-mixed before application.
- Start from the top: Begin applying the sealant from the top of the rocks and work your way down. This will prevent any drips or uneven spots.
- Use even strokes: Apply the sealant using even strokes, either with a paintbrush or a roller. Make sure to cover the entire surface of each rock, ensuring an even distribution of the sealant.
- Allow drying time: Follow the recommended drying time mentioned on the sealant container before applying any additional coats if needed.
- Clean up: Once you have completed the application, clean your tools according to the instructions provided with the sealant. Dispose of any remaining sealant properly.
By carefully selecting the right sealant, preparing your tools, and applying the sealant effectively and evenly, you can easily achieve a wet-look effect on your landscaping rocks. Enjoy the enhanced beauty and protection that this simple process adds to your outdoor space.
Maintaining The Wet-Look Appearance Of Your Landscaping Rocks
============================================================
Landscaping rocks can add a touch of elegance and beauty to your outdoor space. One way to enhance the allure of these rocks is by making them look wet. This wet-look effect not only adds depth and dimension to the rocks, but it also gives them a fresh and polished appearance.
To help you maintain the wet-look appearance of your landscaping rocks, we’ve compiled a few key tips and tricks.
Regular Cleaning And Removing Stains
Regular cleaning is essential to keep your landscaping rocks looking their best. Buildup of dirt, debris, and stains can diminish the wet-look effect. Here are some ways to clean and remove stains from your rocks:

- Use a garden hose or pressure washer to rinse off loose dirt and debris.
- Scrub the rocks gently with a brush or broom to remove stubborn stains.
- Create a mixture of mild detergent and water, and use it to scrub the rocks.
- Rinse off the cleaning solution thoroughly to prevent any residue.
- For tough stains, you can use a specialized rock cleaner or stain remover, following the manufacturer’s instructions.
Remember, regular cleaning not only keeps your rocks looking wet but also helps prevent any long-term damage or discoloration.
Reapplying Sealant To Preserve The Wet-Look Effect
Sealing your landscaping rocks is an effective way to preserve the wet-look effect and protect them from weathering. Here are some key points to consider when reapplying sealant:
- Ensure that the rocks are thoroughly clean and dry before applying the sealant.
- Choose a high-quality sealer that is specifically designed for landscaping rocks.
- Apply the sealant evenly, following the instructions provided by the manufacturer.
- Use a brush or roller to ensure that the sealant penetrates the porous surface of the rocks.
- Allow sufficient drying time before exposing the rocks to moisture or foot traffic.
By regularly reapplying sealant, you can prolong the vibrant and glossy appearance of your landscaping rocks.
Protecting And Preventing Damage To Your Rocks
Prevention is better than cure when it comes to maintaining the wet-look appearance of your landscaping rocks. Here are some proactive measures to protect and prevent damage:
- Avoid placing heavy objects directly on the rocks to prevent cracking or chipping.
- Trim nearby trees or shrubs to prevent branches from damaging the rocks.
- Avoid using harsh chemicals or cleaners that can strip away the sealant or discolor the rocks.
- Place mats or protective covers under grills, furniture, or other items to prevent staining or scratches.
- Consider installing a drainage system to prevent water pooling or erosion around the rocks.
Taking steps to protect your landscaping rocks can go a long way in maintaining their wet-look appearance for years to come.
To keep your landscaping rocks looking beautifully wet, follow these simple steps: regular cleaning and stain removal, reapplying sealant, and protecting the rocks from damage. By taking these preventative measures, you can enjoy the captivating wet-look effect of your landscaping rocks for a long time.
Troubleshooting Common Issues With Wet-Look Landscaping Rocks
If you’re looking to enhance the appearance of your landscaping rocks, making them look wet can add a beautiful touch. However, there may be some common issues that you encounter along the way. In this section, we will explore some troubleshooting tips to help you overcome these challenges and achieve the desired wet-look effect.

Uneven Or Patchy Sealant Application
- Ensure proper cleaning: Before applying sealant, make sure the surface of the rocks is free from dirt, debris, and loose particles. Clean the rocks thoroughly to create a smooth and even base for the sealant.
- Apply an even coat: When applying the sealant, use a sprayer or brush to evenly distribute the product over the rocks. Avoid concentrated areas or excessive overlap, as this can lead to uneven or patchy application.
- Allow sufficient drying time: Follow the manufacturer’s instructions regarding drying time between coats. Applying subsequent coats too soon can cause the sealant to pool or appear streaky.
Streaks Or Discoloration On The Rock Surface
- Choose the right sealant: Ensure you are using a sealant that is specifically designed for wet-look applications on rocks. Different types of rocks may require different sealant formulas for optimal results.
- Test in inconspicuous area: Prior to applying the sealant to the entire surface, test it in a small, inconspicuous area. This will allow you to assess its compatibility with the rocks and avoid any potential streaking or discoloration issues.
- Apply multiple thin coats: Instead of one heavy coat, consider applying multiple thin coats of sealant. This will help prevent streaking and allow for better absorption into the pores of the rocks.
Short Lifespan Of The Wet-Look Effect
- Choose a durable sealant: Look for a high-quality sealant that offers durability and longevity. Opt for products that are specifically formulated to withstand outdoor elements and protect against uv rays.
- Regular maintenance: To prolong the wet-look effect, perform regular maintenance such as resealing as recommended by the manufacturer. This will help prevent the sealant from deteriorating and maintain the desired appearance.
- Be mindful of foot traffic: Heavy foot traffic or abrasive materials can wear down the sealant over time. Consider placing protective barriers or signage to minimize direct contact with the sealed rocks.
Remember, achieving the perfect wet-look effect on your landscaping rocks may require some trial and error. By following these troubleshooting tips, you can overcome common issues and enjoy the visually appealing results for years to come.
Frequently Asked Questions For How To Make Landscaping Rocks Look Wet
How Do You Make Landscaping Rocks Look Wet?
To make landscaping rocks look wet, you can use a water-based sealant or a high-gloss coating. Applying these products will give the rocks a wet and shiny appearance, enhancing their natural colors and textures. It’s important to ensure the rocks are clean and dry before applying any sealant or coating for best results.
Can I Use Oil To Make Landscaping Rocks Look Wet?
No, it is not recommended to use oil to make landscaping rocks look wet. Oil can create a greasy residue on the rocks and may attract dirt and debris. It can also have a negative impact on the surrounding plants and vegetation.
It’s best to use water-based sealants or high-gloss coatings specifically designed for this purpose.
How Long Does The Wet Look On Landscaping Rocks Last?
The duration of the wet look on landscaping rocks depends on several factors, including the type of sealant or coating used, weather conditions, and foot traffic. Generally, a good quality sealant can provide a wet look for several months to a year.
However, it’s important to reapply the sealant as needed to maintain the desired appearance.
Can I Achieve A Wet Look On All Types Of Landscaping Rocks?
Yes, you can achieve a wet look on various types of landscaping rocks, including granite, limestone, sandstone, and more. The key is to choose the right sealant or coating that is compatible with the specific rock type. It’s recommended to do a small test patch before applying the product on a larger area to ensure compatibility and desired results.
Will Sealing The Rocks Make Them More Slippery?
Sealing the rocks may create a slightly slippery surface, especially when wet. It’s important to consider safety precautions when using sealed rocks in high-traffic areas or near stairs or walkways. To reduce slipperiness, you can choose a sealant with a non-slip additive or opt for a textured sealant that provides better traction.
Regular maintenance and cleaning can also help minimize slipperiness.
Conclusion
Achieving a wet look for landscaping rocks can greatly enhance the aesthetic appeal of your outdoor space. By following the steps outlined in this blog post, you can effortlessly create an eye-catching feature that showcases the natural beauty of your rocks.
From thoroughly cleaning and preparing the rocks to applying the right sealant or enhancer, each step is crucial to achieving the desired wet look. Additionally, regular maintenance and reapplication of sealants will help preserve the appearance and longevity of your landscaping rocks.
Remember, the key is to choose the right products and techniques that suit your specific needs and preferences. With a little bit of effort and creativity, you can transform your landscaping rocks into a stunning focal point that will make your outdoor area truly captivating.
So, go ahead and embark on this fun and rewarding project, and enjoy the wet look transformation of your landscaping rocks!