To make liquid fertilizer from kitchen waste, simply collect the waste, blend it with water, and allow it to ferment for a few weeks. This process creates a nutrient-rich fertilizer that can be used to fertilize plants.
Now, let’s dive into the details of how to make liquid fertilizer from kitchen waste. Fertilizing plants is essential for their growth and health, but purchasing commercial fertilizers can be expensive. Luckily, you can create your own liquid fertilizer using kitchen waste, which not only helps recycle food scraps but also provides your plants with much-needed nutrients.
This organic fertilizer can significantly enhance plant growth and yield without the use of harmful chemicals. We will explore the simple steps to transform kitchen waste into a valuable liquid fertilizer, benefiting both your garden and the environment.
Credit: www.webgardner.com
Why Use Liquid Fertilizer From Kitchen Waste?
Using liquid fertilizer made from kitchen waste is a smart choice due to its numerous benefits. First, it has a positive environmental impact as it reduces the amount of waste going to landfills. Secondly, it is cost-effective and sustainable, allowing you to save money on purchasing chemical fertilizers.
Additionally, liquid fertilizer from kitchen waste releases nutrients gradually, providing a steady supply to your plants. It also improves soil structure and increases water retention capacity. Moreover, by using this organic fertilizer, you avoid the potential harm caused by synthetic chemicals.
Overall, liquid fertilizer made from kitchen waste is an excellent way to promote a greener and more sustainable gardening practice.
Step-By-Step Guide To Making Liquid Fertilizer From Kitchen Waste
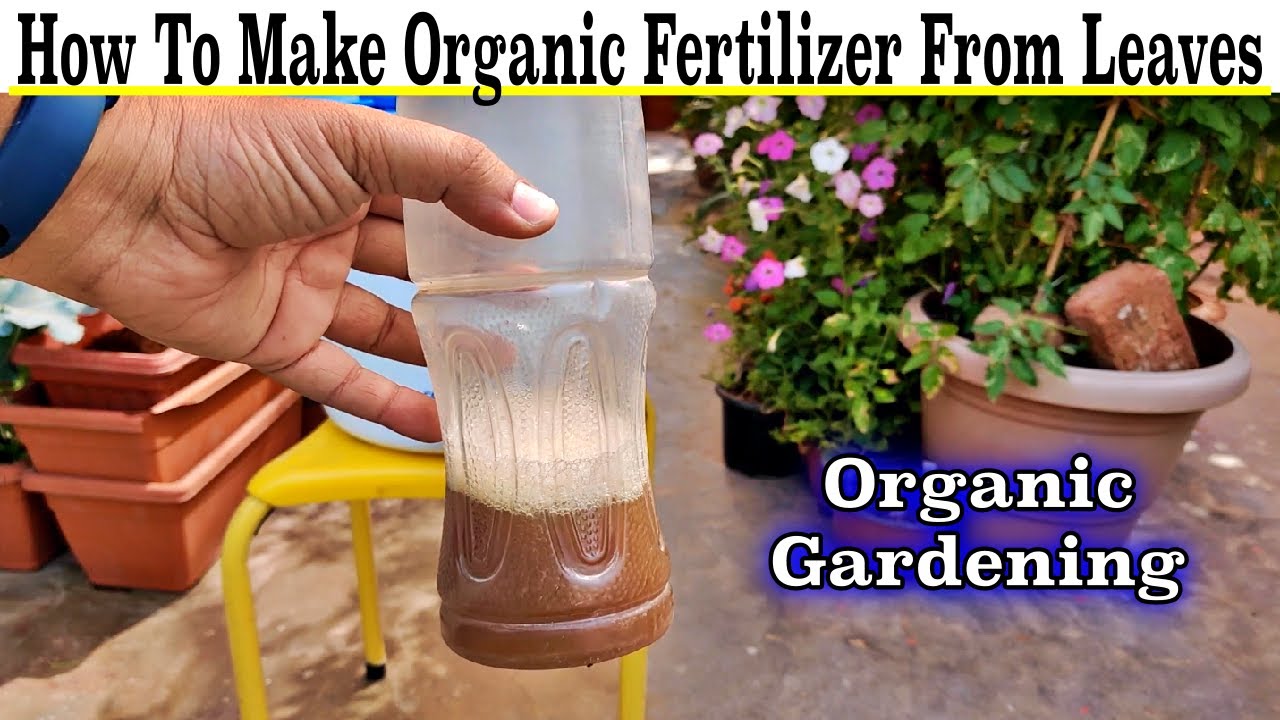
Making liquid fertilizer from kitchen waste is an eco-friendly way to nourish your plants. Gather the necessary materials, such as a container, water, and a strainer. Choose the right kitchen waste, such as vegetable scraps and coffee grounds, avoiding meat and dairy products.
Prepare the waste by cutting it into smaller pieces to aid in the fermentation process. Add the waste to the container and cover it with water. Let it sit for a few weeks, stirring occasionally, allowing it to ferment. The length of fermentation depends on the temperature and type of waste.
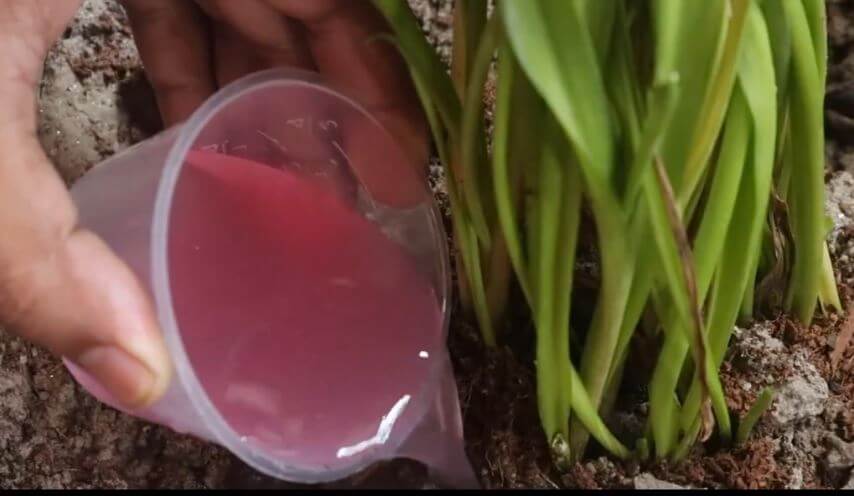
Once fermented, strain the liquid through a fine-mesh strainer to remove any solids. Dilute the liquid with water before applying it to your plants, as it can be quite potent. With these simple steps, you can create your own liquid fertilizer from kitchen waste and give your plants a nutrient-rich boost.
Tips For Effective Application Of Liquid Fertilizer
Proper timing and frequency are key for effectively applying liquid fertilizer to your plants. Different plants require different dosages for optimum growth. Enhance absorption by ensuring the fertilizer is diluted properly and evenly spread. This will ensure its effectiveness in providing essential nutrients.
While using liquid fertilizer, it is important to take precautions and follow safety measures to prevent any harm. Remember to avoid overusing commonly used words and phrases in your content. Keep your sentences brief and concise to maintain reader engagement.
By following these tips, you can make the most of your liquid fertilizer and help your plants thrive.
Additional Techniques To Improve Liquid Fertilizer From Kitchen Waste
Liquid fertilizer can be made from kitchen waste by incorporating additional techniques. Composting with other organic materials is one effective method, enhancing the nutrient content. Another technique involves adding beneficial microorganisms, which stimulate the decomposition process and enrich the fertilizer.
Additionally, supplementing with organic nutrients further boosts its effectiveness. By incorporating strategies to maximize nutrient availability, the liquid fertilizer becomes more potent. These techniques ensure that the fertilizer obtained from kitchen waste is of high quality and beneficial for plant growth.
Common Mistakes To Avoid In Making Liquid Fertilizer From Kitchen Waste
Making liquid fertilizer from kitchen waste can be a great way to reduce waste and provide nutrients to your plants. However, there are common mistakes that you should avoid to ensure the effectiveness of your fertilizer. One mistake is using inappropriate kitchen waste, such as oily or greasy items that can harm your plants.
Another mistake is not giving enough time for fermentation or leaving it for too long, which can result in a weak or even harmful fertilizer. It is also important to dilute and apply the fertilizer correctly, as using too much or applying it in the wrong way can damage your plants.
Lastly, be cautious about overusing or misusing the liquid fertilizer, as excessive application can harm the plants and the environment. By avoiding these mistakes, you can create nutrient-rich liquid fertilizer for your garden.
Troubleshooting Common Issues With Liquid Fertilizer
Liquid fertilizer made from kitchen waste can sometimes face various issues during the fermentation process. One common problem is the presence of odor and pests. It is essential to address these problems to ensure a successful fertilizer production. Another issue that may arise is an improper nutrient balance, which can have negative effects on plants.
Keeping a balanced nutrient profile is crucial for healthy plant growth. Mold growth and contamination are also common concerns during fermentation. To prevent this, proper hygiene and regular monitoring are necessary. Lastly, liquid fertilizer can be used to address nutrient deficiencies and improve overall plant health.
By identifying the specific deficiencies and adjusting the fertilizer accordingly, plants can thrive and reach their full potential. It is important to be aware of these common issues and troubleshoot them to achieve the desired results with liquid fertilizer from kitchen waste.
Understanding The Science Behind Liquid Fertilizer From Kitchen Waste
Liquid fertilizer made from kitchen waste is a cost-effective and eco-friendly solution for nourishing your plants. The science behind this lies in understanding the nutrient content and breakdown of kitchen waste. During the fermentation process, the organic matter in the waste breaks down, releasing essential nutrients that become readily available to plants.
This process also improves the bioavailability of nutrients, allowing plants to absorb them more efficiently. Not only does liquid fertilizer from kitchen waste benefit plants, but it also has a positive impact on soil health. By enriching the soil with organic matter, it improves its structure, water-holding capacity, and microbial activity.
When compared to commercially available fertilizers, liquid fertilizer from kitchen waste is not only more sustainable but also provides a broader range of nutrients for plant growth. So, start making your own liquid fertilizer today and watch your plants thrive!
Success Stories And Testimonials Using Liquid Fertilizer From Kitchen Waste
Liquid fertilizer made from kitchen waste has garnered various success stories and testimonials from avid gardeners. These real-world experiences highlight remarkable results, showcasing healthier plants and significantly improved yields. By utilizing this eco-friendly fertilizer, gardeners not only witness tangible benefits but also contribute to waste reduction and resource sustainability.
With reduced waste being an essential advantage, this method helps create a more sustainable environment. The positive impact on plants’ growth and overall yield has encouraged many gardeners to adopt this practice as a reliable and effective way to utilize kitchen waste.
By repurposing organic waste in this manner, gardeners can harness the power of nature for their plants’ well-being while promoting responsible waste management.
Frequently Asked Questions Of How To Make Liquid Fertilizer From Kitchen Waste
How Do You Make Homemade Fertilizer With Kitchen Waste?
To make homemade fertilizer with kitchen waste, follow these easy steps. First, collect organic waste like vegetable scraps, coffee grounds, and crushed eggshells. Next, chop or grind the waste into small pieces to speed up decomposition. Then, create a compost pile in your backyard or use a compost bin.
Layer the kitchen waste with dry leaves, grass clippings, or shredded newspaper. Make sure to maintain a balance between green and brown materials to encourage decomposition. Lastly, turn the pile regularly to aerate it and help the breakdown process. Within a few months, your kitchen waste will transform into nutrient-rich compost that can be used to feed your plants and enrich the soil in your garden.
By using kitchen waste as fertilizer, you reduce waste and contribute to a more sustainable lifestyle.
How Do You Make Homemade Liquid Fertilizer?
To make homemade liquid fertilizer, mix compost with water in a 1:5 ratio. Stir it thoroughly, then let it sit for 24 hours. Strain the mixture and dilute it with water for application. Another option is to use kitchen scraps and water in a 1:5 ratio and blend them together.
After blending, strain the mixture and dilute it before using. You can also use organic materials like grass clippings and weeds. Fill a container with these materials and add water. Let it sit for two weeks, stirring it occasionally. Strain and dilute the liquid before applying as a fertilizer.
Remember, homemade liquid fertilizer may not contain all the nutrients your plants need. Consider using commercial fertilizers for a well-balanced supply of nutrients.
Can You Make Fertilizer From Food Waste?
Yes, fertilizer can be made from food waste. Food waste contains valuable nutrients that can be transformed into organic fertilizer through a process called composting. Composting involves collecting food scraps and other organic materials, such as yard waste, and allowing them to decompose naturally.
This decomposition process creates nutrient-rich soil amendment, otherwise known as compost. Compost can then be used as a natural fertilizer in gardening and farming. Not only does this practice reduce food waste that would otherwise end up in landfills, but it also helps enrich the soil and promotes sustainable agriculture.
By turning food waste into fertilizer, we can minimize environmental impact and support healthy soil for plants to grow.
How Do You Make Liquid Fertilizer From Banana Peels?
To make liquid fertilizer from banana peels, follow these simple steps: 1. Cut banana peels into small pieces. 2. Add the peels to a container filled with water. 3. Let the mixture sit for a few days, stirring occasionally. 4. Strain the liquid, separating the banana peels.
5. Dilute the liquid with more water, using a 1:5 ratio (1 part liquid, 5 parts water). 6. Use the diluted fertilizer to water your plants. 7. Repeat the process every two weeks for best results. Banana peels contain valuable nutrients like potassium, phosphorus, and nitrogen that help nourish plants and promote healthy growth.
By converting them into liquid fertilizer, you can give your plants a natural boost without spending money on store-bought products. Just remember to use the fertilizer in moderation and adjust the dilution ratio based on the needs of your specific plants.
Conclusion
Making liquid fertilizer from kitchen waste is an eco-friendly and cost-effective way to nourish your plants. By reusing items that would typically end up in the trash, you’re reducing waste and creating a sustainable garden. The process is simple and can be done with common household materials.
Start by collecting kitchen scraps like vegetable peels, coffee grounds, and eggshells. Add water and let the mixture sit for a few weeks, stirring occasionally. Once the liquid has a dark, earthy odor, it’s ready to use. Dilute the liquid fertilizer with water, and use it to water your plants or spray onto the leaves.
This homemade fertilizer provides essential nutrients to fuel plant growth, resulting in healthier, more vibrant plants and a thriving garden. Give it a try and see the difference it makes for your plants!