
To make a rose trellis, you will need a sturdy structure, such as a wooden frame or metal stakes, to support the vines. Attach wire or string between the stakes or frames to create a grid pattern for the roses to grow on.
Plant the roses near the trellis and secure the stems to the wires using twist ties or clips. Regularly prune and train the roses to grow along the trellis, ensuring they receive adequate sunlight and water. With proper care and maintenance, your rose trellis will provide a beautiful and elegant display of flowering vines.
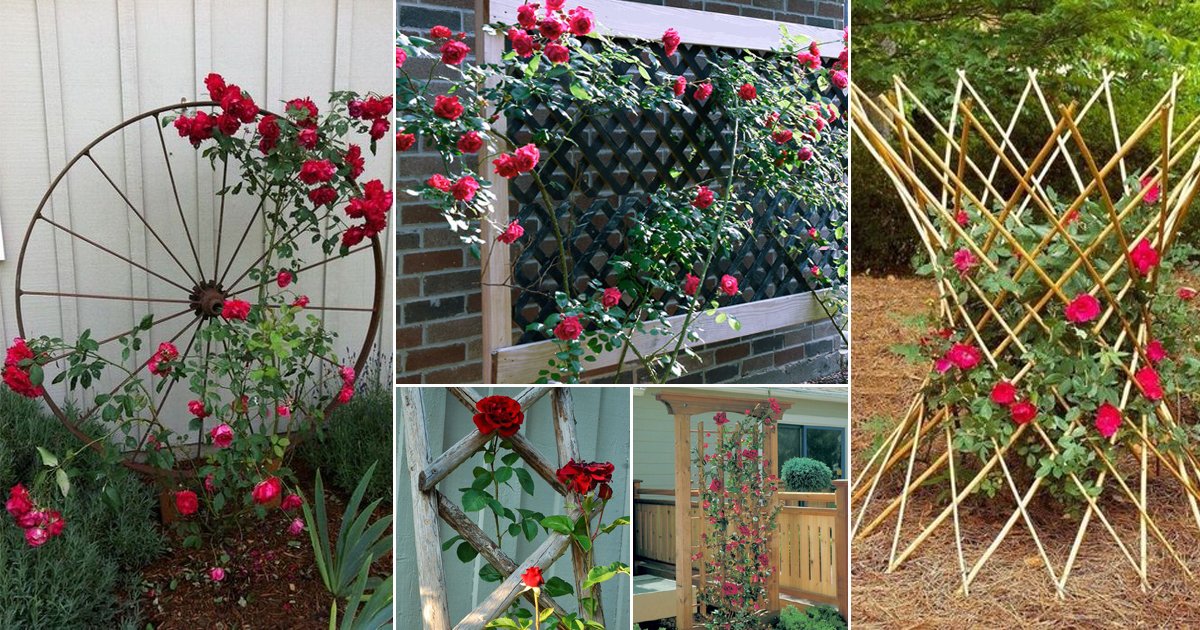
Credit: balconygardenweb.com
Materials Needed
To make a rose trellis, you will need a few materials. First, gather wooden stakes, measuring around 6 feet in height. Next, acquire galvanized wire mesh, ensuring it is at least 2 feet wide. Additionally, obtain wire cutters and a hammer to fix the stakes firmly into the ground.
Next, gather zip ties or garden twine to secure the wire mesh to the stakes. Lastly, grab a measuring tape to ensure equal spacing between the stakes. With these materials in hand, you can easily construct a sturdy and functional rose trellis to support your climbing roses.
Happy gardening!
How to Make Rose Trellis: 6 Detailed Guide
Step 1: Choosing The Right Location
Choosing the right location for your rose trellis is crucial for its growth and overall health. Firstly, consider the amount of sunlight the chosen spot receives, as roses need at least six hours of direct sunlight each day. Additionally, ensure that the location has good air circulation to prevent diseases.
Another factor to consider is the soil type, as roses prefer well-draining soil with a slightly acidic ph level. Take note of any nearby structures or trees that may cast shade or interfere with the trellis. Lastly, think about accessibility for maintenance and watering.
By carefully considering these factors, you can create an ideal environment for your rose trellis to thrive and add beauty to your garden.
Step 2: Preparing The Ground
Preparing the ground for your rose trellis is an essential step in ensuring its success. Begin by clearing any obstacles such as rocks, weeds, or debris from the area. This will provide a clean canvas for your trellis to thrive.
Next, it’s important to prepare the soil by loosening it with a garden fork or tiller. This will improve drainage and allow the roots of your roses to penetrate the ground easily. Consider enriching the soil with compost or organic matter to provide essential nutrients.
Once the ground is clear and the soil is prepared, you’re ready to move on to the next step of constructing your rose trellis. By following these guidelines, you’ll create the perfect foundation for your beautiful climbing roses.
Step 3: Building The Frame
Building the frame for a rose trellis is a crucial step in its construction process. Start by measuring and marking the desired height and width of the trellis on the ground. Then, dig holes for the support posts, ensuring they are evenly spaced.
Place the posts in the holes, making sure they are straight and secure. Next, attach the horizontal and diagonal beams to the posts using screws or nails. These beams will provide stability and support for the trellis. Finally, check that the frame is level and secure before proceeding to the next step of the trellis construction.
Following these instructions will ensure a sturdy and durable frame for your rose trellis.
Step 3.1: Selecting The Type Of Frame
When it comes to creating a rose trellis, selecting the right type of frame is crucial. There are different options available, each with its own pros and cons. One popular choice is a metal frame, which offers durability and strength.

Wood frames, on the other hand, provide a more rustic look and blend well with natural surroundings. Plastic frames are lightweight and easy to install, but may not be as sturdy. Another option is a wire frame, which allows for flexibility and can be easily customized to fit your needs.
Consider the specific requirements of your garden and choose a frame that suits your aesthetic preferences and practical needs. Taking the time to select the right frame will ensure a successful and beautiful rose trellis.
Step 3.2: Measuring And Cutting The Wood
To create a rose trellis, one important step is measuring and cutting the wood for the frame. Begin by carefully measuring the dimensions required for your trellis. Use a tape measure to ensure accuracy. Next, using a saw, cut the wood pieces according to the measurements taken earlier.
Make sure to cut straight and clean lines. It is important to have the correct measurements and cuts to ensure that the trellis is sturdy and properly fits together. Measure twice, cut once, as they say. Remember to always wear protective gear, such as safety glasses and gloves, when handling tools.
Once the wood pieces are cut, you can begin assembling the frame for your rose trellis.
Step 3.3: Assembling The Frame
Assembling the frame for your rose trellis is an essential step in building a sturdy structure. First, gather all the necessary components, including the vertical and horizontal bars, connectors, and screws. Begin by attaching the horizontal bars to the vertical ones using the provided connectors.

Make sure to align them properly and tighten the screws securely. Next, repeat this process for all the remaining bars, ensuring an even distribution across the frame. Double-check the tightness of the screws to ensure stability. Once all the bars are connected, stand the frame upright and adjust it as needed.
Finally, inspect the frame for any loose connections or unstable areas, and make adjustments if necessary. The assembled frame will serve as the foundation for your rose trellis, providing support for the climbing plants as they grow and flourish.
Step 4: Attaching The Trellis Mesh
Attaching the trellis mesh to the frame is crucial to ensure its stability and longevity. Start by positioning the mesh against the frame, aligning it properly. Use garden wire or zip ties to firmly secure the mesh to the frame at regular intervals.
Make sure to maintain equal tension and spacing throughout the attachment process. By doing so, you create a solid foundation for your rose trellis. Avoid loose or sagging areas, as they can compromise the support system. Take your time and double-check each attachment point to ensure a secure fit.
With the trellis mesh securely in place, your roses will have a sturdy structure to climb and bloom to their full potential.
Step 4.1: Types Of Trellis Mesh
Trellis mesh is available in various types, each offering unique features and benefits. Some common options include pvc-coated wire mesh, plastic mesh, and metal trellis. Pvc-coated wire mesh is durable and resistant to rust, making it ideal for long-term use.
Plastic mesh, on the other hand, is lightweight and easy to install, making it a popular choice for diy projects. Metal trellis, such as wrought iron or stainless steel, provides a sturdy and elegant option for supporting climbing roses. Consider the requirements of your specific rose variety and the overall aesthetic you want to achieve before selecting the type of trellis mesh that best fits your needs.
By choosing the right trellis mesh, you can ensure proper support and enhance the beauty of your rose garden.
Step 4.2: Attaching The Trellis Mesh
To attach the chosen trellis mesh to the frame, follow these instructions carefully. Start by securing one end of the mesh to the top corner of the frame using zip ties. Then, stretch the mesh tightly and attach it to the opposite corner of the frame.
Use zip ties every few inches along the top and bottom of the frame to secure the mesh in place. Make sure the mesh is evenly spaced and taut. Repeat this process for the remaining sides of the frame, ensuring the mesh is securely fastened with zip ties.

Once all sides are attached, trim any excess mesh using wire cutters for a neat and professional finish. Your rose trellis is now complete, ready to support and showcase your beautiful climbing roses.
Step 5: Installing The Rose Trellis
Installing the completed rose trellis in the desired location requires careful consideration. First, choose a suitable spot that receives adequate sunlight. Next, ensure the trellis is positioned securely, using stakes or brackets for stability. It’s important to dig deep holes for the support posts and firmly anchor them in the ground.
As you install the trellis, make sure it is level and plumb for a professional finish. Attach the trellis to the support posts using screws or nails, ensuring it is tightly secured. Finally, step back and admire your beautifully installed rose trellis, ready to support the growth of your prized roses.
Following these steps will ensure a strong and sturdy trellis that will enhance the beauty of your garden.
Step 5.1: Digging Holes For Support Posts
Digging holes for the support posts is a crucial step in making a rose trellis. To start, mark the locations of the holes according to your design. Use a shovel to dig the holes, making sure they are deep enough to provide sturdy support.
Remove any rocks or debris from the holes as you dig. Next, place the support posts in the holes, ensuring they are straight and level. Fill the holes with soil, firmly packing it around the posts. Finally, use a level to double-check that the posts are still straight.
This will ensure a strong and stable support system for your rose trellis. Take your time with this step to ensure the long-term durability and functionality of your trellis.
Step 5.2: Securing The Trellis In Place
The next step in securing your rose trellis involves anchoring it firmly in the ground. To do this effectively, start by selecting sturdy stakes or posts that will support the weight of the trellis. Dig holes deep enough to accommodate these stakes and ensure they are spaced evenly along the length of the trellis.
Place the stakes in the holes and use a level to ensure they are perfectly vertical. Fill the holes with soil and firmly pack it around the stakes to provide stability. If necessary, use additional support such as wire or twine to connect the trellis and stakes, creating a secure anchoring system.
By following these steps, you can ensure that your rose trellis will remain in place even in strong winds or adverse weather conditions.
Step 6: Maintaining And Caring For The Rose Trellis
Maintaining and caring for the rose trellis is essential to ensure its longevity. Regularly inspecting the trellis for any damages or signs of wear and tear is important. Should you discover any broken or loose parts, repair or replace them promptly.
It is also crucial to clean the trellis regularly to prevent dirt and debris buildup. You can use a gentle hose spray or a soft brush to remove any accumulated dirt. Additionally, consider applying a protective coating to the trellis, such as a weather-resistant sealant, to enhance its durability.
During the growing season, remember to prune and train the rose vines properly, guiding them along the trellis as they grow. By following these maintenance tips, you can ensure that your rose trellis remains sturdy, attractive, and supportive for your beloved roses.
Frequently Asked Questions For How To Make Rose Trellis
How Do You Build A Rose Trellis?
To build a rose trellis, first, choose a location with access to sunlight. Then, gather sturdy materials like wood or metal stakes, wire mesh, or trellis netting. Install the stakes in the ground, ensuring they are firmly secured. Attach the wire or netting to the stakes, providing support for the climbing roses.
Finally, guide the rose vines to the trellis as they grow.
When Is The Best Time To Construct A Rose Trellis?
The ideal time to construct a rose trellis is in early spring, before new growth appears. This allows for easy installation before the rose vines begin to grow. Constructing the trellis during this time ensures proper support for the roses as they climb and prevents damage to existing growth.
What Are The Benefits Of Using A Rose Trellis?
Using a rose trellis offers several benefits. Firstly, it provides support and structure to ensure healthy growth of climbing roses. Secondly, it enhances the aesthetic appeal of the garden, adding vertical interest and creating a focal point. Lastly, a trellis allows for better air circulation and sun exposure, reducing the risk of diseases and promoting optimal blooming.
Conclusion
Creating a rose trellis is a wonderful way to add beauty and structure to your garden. By following the simple steps outlined in this blog post, you can easily construct a trellis that will support your roses and enhance their growth.
Remember to start by choosing the right materials and design for your needs, ensuring durability and functionality. Next, take the time to properly prepare the site and secure the trellis firmly in place. Finally, provide ongoing care and maintenance to keep your roses thriving and your trellis looking its best.
Whether you are a beginner or an experienced gardener, making a rose trellis can be a rewarding and enjoyable project. So go ahead and get started – your roses will thank you!