Planting celery can be a rewarding experience for both novice and seasoned gardeners. This versatile vegetable thrives in cool weather and is known for its crunchy stalks and fresh taste. While celery requires some patience and care to grow, a little effort can yield a nutritious and flavorful addition to your garden.

Whether you’re growing celery for use in soups, salads, or as a healthy snack, understanding the basics of planting and maintaining celery is key to a bountiful harvest. In this article, on how to plant celery plants.
Choosing the Right Celery Variety
Selecting the right celery variety is an important first step for a successful harvest. There are two main types of celery to consider: Pascal celery and cutting celery. Pascal celery is the most common variety, known for its tall, crisp stalks and mild flavor, making it ideal for fresh eating or cooking. Cutting celery, on the other hand, features thinner, hollow stalks and a stronger, more pronounced flavor, perfect for adding depth to soups and stews.
Additionally, some heirloom varieties or self-blanching types may be suitable for gardeners looking for unique characteristics or easier cultivation. When choosing a variety, consider your climate, growing conditions, and how you plan to use your harvest to ensure the best results.
When to Plant Celery?
Celery thrives in cooler weather, making it essential to time your planting carefully to avoid extreme heat or frost. For most regions, celery should be started indoors 10–12 weeks before the last expected frost date, as it requires a long growing season.
Transplant seedlings into the garden 2–3 weeks before the final frost date, once the soil has warmed to at least 50°F (10°C). If you live in a cooler climate, you can also plant celery in late summer for a fall harvest. Proper timing ensures healthy growth and increases the likelihood of a flavorful, crisp crop.
Needed Materials:
- Celery Seeds or Seedlings
- Seed Starting Mix
- Small Containers or Trays With Drainage Holes
- Clear Plastic Dome or Plastic Wrap
- Grow Lights (Optional)
- Garden Trowel
- Fertilizer
- Mulch
- Watering Can or Hose With a Gentle Sprayer Attachment
6 Simple Step-by-Step Guides on How to Plant Celery Plants:
Step 1: Preparing for Planting
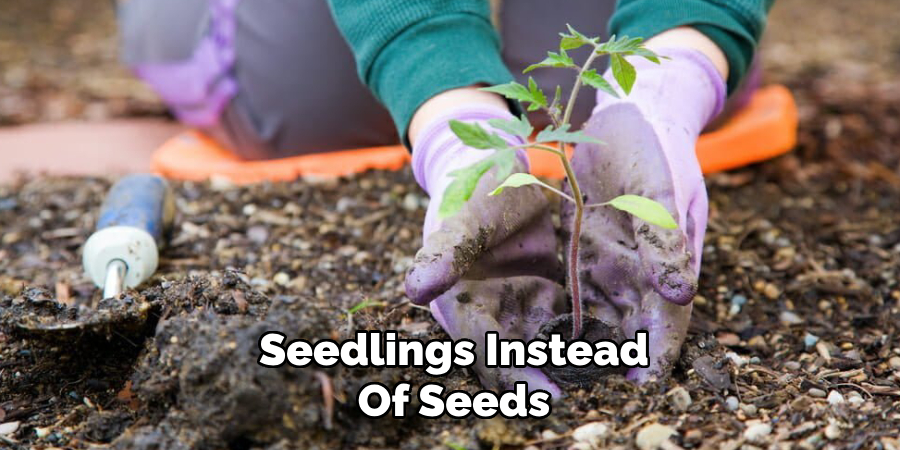
Before planting celery, it is important to prepare the materials and space needed. Start by gathering all the necessary materials listed above. If you are using seedlings instead of seeds, make sure they are healthy and disease-free.
Next, choose a well-drained area of your garden that receives full sun. Celery plants prefer a soil with a pH level of 6.0 to 7.0, so it may be helpful to test your soil and amend it as needed before planting.
Step 2: Starting Seeds Indoors (Optional)
If you want to get a head start on your celery plants, you can start seeds indoors about 8-10 weeks before the last frost date in your area. This is especially beneficial for those who have shorter growing seasons.
Fill small containers with seed-starting mix and plant one or two seeds per container at a depth of 1/4 inch. Keep the soil moist but not soggy and place them in a warm, well-lit area.
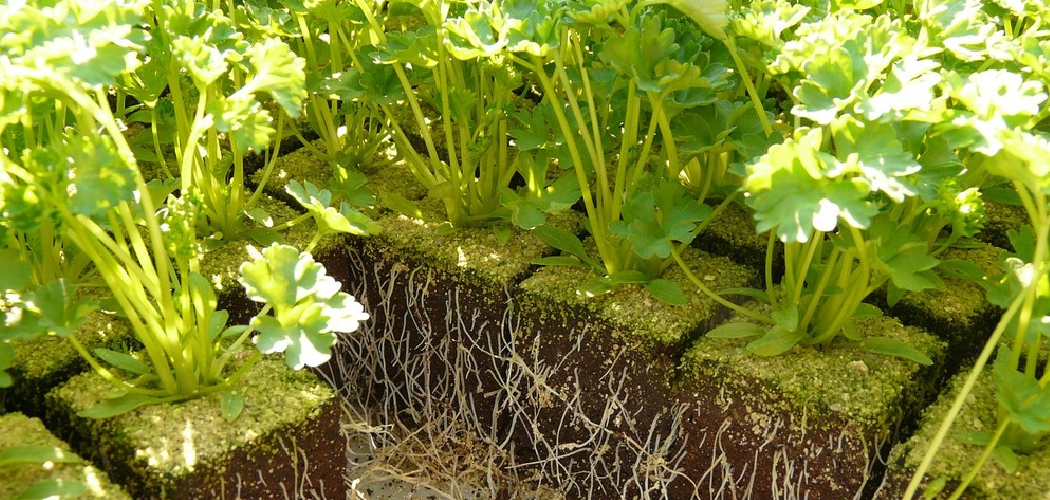
Step 3: Transplanting Seedlings
Once the seedlings have grown to a few inches tall and have developed at least two sets of true leaves, they are ready to be transplanted into the garden.
Choose a spot in your garden that receives full sun and has well-draining soil. Amend the soil with compost or organic matter before transplanting. Dig holes slightly larger than the root ball of the seedlings and gently remove them from their containers. Place them in the holes, making sure they are planted at the same depth as they were in their containers.
Water thoroughly after transplanting and continue to keep the soil moist while the plants establish themselves.
Step 4: Caring for Celery Plants
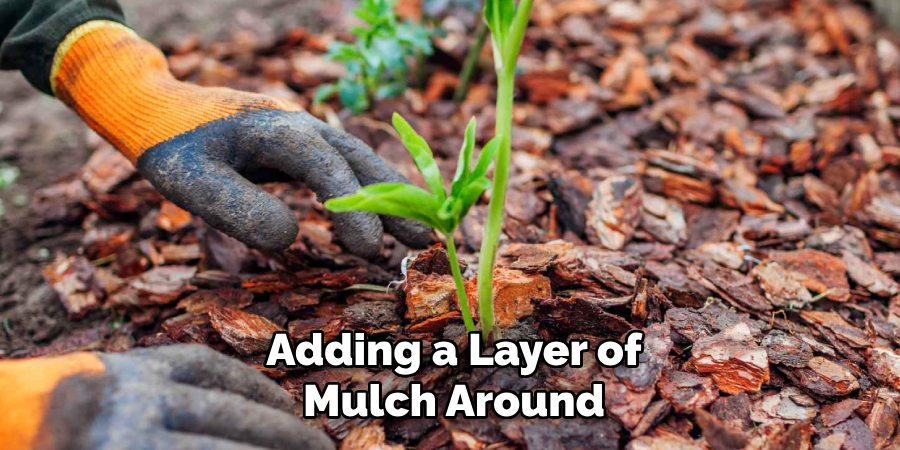
Proper care is essential for healthy celery growth and a successful harvest. Keep the soil consistently moist by watering regularly, as celery thrives in damp conditions. Adding a layer of mulch around the base of the plants helps retain moisture and regulates soil temperature. Feed your celery every few weeks with a balanced fertilizer to ensure it receive adequate nutrients.
Regularly check for pests such as aphids or slugs and take action promptly if needed. Remove any weeds around the plants to reduce competition for resources. With attentive care, your celery plants will flourish and be ready for harvest.
Step 5: Harvesting and Storing
Once your celery plants have reached full maturity, it’s time to harvest them. This usually takes around 80-100 days from planting.
To harvest, simply cut the outer stalks at the base using a sharp knife or scissors. Be sure not to damage the central crown of the plant, as this will continue to produce new stalks for future harvests.
Step 6: Storing
Celery can be stored in the refrigerator for up to two weeks. To keep it fresh, wrap the stalks tightly in aluminum foil or place them in a sealed plastic bag before placing them in the crisper drawer. Alternatively, you can blanch and freeze celery for later use in soups or stews.
Following these steps on how to plant celery plants will provide you with a steady supply of fresh, crunchy celery throughout the growing season. Remember to always harvest carefully and store properly for the best results.
Additional Tips:
- To keep celery stalks crisp, place them upright in a jar or glass filled with water in the refrigerator
- You can also plant celery from scraps by placing the bottom portion of a stalk (with about an inch of root) in a shallow dish of water until new growth appears, then transfer to soil.
- If you are short on space, consider growing dwarf varieties or vertical gardening techniques such as using a trellis.
- Companion planting with other garden vegetables like tomatoes and beans can help improve flavor and deter pests.
Do You Need to Use Professionals?
When it comes to gardening, hiring professionals depends on your goals, available time, and expertise. For beginners or those with limited time, professional landscapers or gardeners can help design efficient layouts, prepare soil, and provide guidance on plant care.

They are also useful for tackling larger projects like building raised beds or irrigation systems. However, with a little research and patience, many gardening tasks can be achieved independently. Whether you choose to seek professional help or go the DIY route, the key is to enjoy the process and create a garden that suits your needs.
How Much Will It Cost?
The cost of gardening can vary widely depending on the scale of the project and whether professional assistance is required. For smaller DIY projects, expenses might include seeds, soil, tools, and compost, which can range from $50 to $200 on average. However, larger undertakings like installing raised beds, setting up irrigation systems, or purchasing mature plants can push costs into the hundreds or even thousands of dollars.
If you choose to hire professional landscapers or gardeners, be prepared to account for labor costs, which may range from $50 to $150 per hour depending on their expertise and location. Setting a budget beforehand and prioritizing key elements of your garden will help manage expenses effectively while ensuring that your vision comes to life.
Frequently Asked Questions:
Q: Can I Create a Garden on My Own Without Any Prior Experience?
A: Yes, anyone can create a garden with the right tools and resources. Consider starting small and doing research beforehand to gain some basic knowledge about gardening.
Q: How Much Time Should I Dedicate to Maintaining My Garden?
A: The amount of time needed for garden maintenance varies depending on the size and complexity of your garden. Generally, weekly watering, trimming, and weeding sessions are recommended to keep your garden looking healthy and tidy.
Q: Can I Create a Garden in a Small Space?
A: Absolutely! You can create a garden in even the smallest spaces using containers, hanging baskets, or vertical gardening techniques. Consider utilizing balcony railings, windowsills, or even walls to add greenery to your space.
Q: Are There Any Environmental Benefits to Gardening?
A: Yes, there are numerous environmental benefits to gardening. Plants absorb carbon dioxide and release oxygen, helping to purify the air. Gardens also provide habitats for pollinators and other beneficial insects. Additionally, growing your own food can reduce your carbon footprint by decreasing the need for transportation of produce.

Conclusion
Gardening is a rewarding activity that offers a myriad of benefits for individuals, communities, and the environment. Whether you have a sprawling backyard or a small balcony, there are countless ways to enjoy the beauty and utility of growing plants.
Beyond creating a serene and aesthetic space, gardening enhances mental and physical well-being, fosters sustainable living, and promotes biodiversity. Start small, experiment with different techniques, and watch as your efforts bloom into something truly remarkable. Gardening is not just a hobby—it’s a pathway to a healthier planet and a more fulfilling life. Thanks for reading this article on how to plant celery plants.