How do you add beautiful dahlias to your garden? Look no further, as we have outlined the steps below for planting this stunning flower.
Planting dahlias is a rewarding endeavor that adds vibrant color and charm to any garden. Known for their stunning blooms and wide array of shapes, sizes, and colors, dahlias are a favorite among gardeners. Whether you are an experienced gardener or a beginner, planting dahlias can be a straightforward and enjoyable process when done correctly. By understanding the right timing, location, and care techniques, you can ensure healthy growth and a spectacular display of flowers throughout the growing season.

This guide on how to plant dahlias will walk you through the essential steps to successfully plant and care for dahlias.
What Are the Benefits of Planting Dahlias?
Dahlias are a popular choice for gardeners for several reasons. Some of the benefits of planting dahlias include:
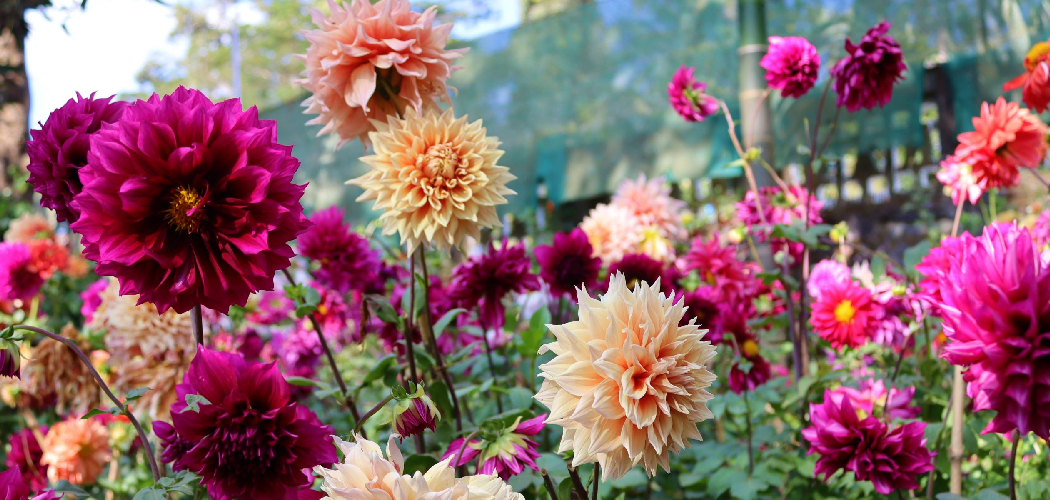
- Variety: Dahlias come in a wide range of colors, shapes, and sizes, making them a versatile addition to any garden.
- Long Blooming Season: Dahlias bloom from mid-summer to early fall, providing an extended period of colorful flowers in your garden.
- Low Maintenance: With proper care, dahlias require minimal upkeep and can thrive in a variety of growing conditions.
- Perfect for Cut Flowers: The vibrant blooms and long-lasting vase life make dahlias an ideal choice for creating stunning flower arrangements.
What Will You Need?
To successfully grow dahlias, you will need the following items:
- Dahlia Tubers or Plants: Dahlias can be grown from either tubers, which are similar to bulbs, or from plants purchased from a nursery. Tubers are usually more affordable and offer a wider variety of options.
- Garden Tools: These include a shovel, trowel, rake, and gloves for planting and maintaining your dahlias.
- Soil: Dahlias thrive in well-drained soil that is rich in organic matter. A mix of equal parts compost, peat moss, and sand is recommended.
- Fertilizer: Dahlias are heavy feeders and require regular fertilization during their growing season. A balanced fertilizer, such as a 10-10-10 or 12-12-12, can be applied every few weeks.
- Water: Dahlias need consistent watering throughout the growing season. They should be watered deeply once or twice a week, depending on weather conditions. Avoid overhead watering to prevent disease, and water directly at the base of the plants.

10 Easy Steps on How to Plant Dahlias
Step 1. Choose the Right Location:
When selecting the perfect spot to plant your dahlias, look for a location that receives full sun for at least 6 to 8 hours a day. Dahlias thrive in bright, sunny areas, and insufficient sunlight may lead to weak, spindly growth and fewer blooms.
Ensure that the chosen site has well-draining soil to prevent waterlogging, as waterlogged soil can cause the tubers to rot. A sheltered spot that is protected from strong winds is ideal, as tall dahlia varieties can be prone to damage from gusty conditions. If your soil is heavy or clay-based, consider amending it with compost, sand, or well-rotted manure to improve its structure and drainage before planting.
Step 2. Prepare the Soil:
Before planting dahlias, take the time to thoroughly prepare the soil to provide the best possible growing environment for your plants.
Start by loosening the soil to a depth of at least 12 to 15 inches, allowing the tubers adequate room to grow and expand. Use a garden fork or tiller to break up any compacted areas, ensuring that the soil is well-aerated. Testing the soil’s pH is also recommended, as dahlias prefer a slightly acidic to neutral range, around 6.5 to 7.0. If the pH is too low (acidic), consider adding lime to raise it; if it’s too high (alkaline), sulfur or organic matter can help lower it.
Step 3. Select Healthy Tubers:
Healthy tubers are the foundation of strong, vibrant dahlias, so selecting high-quality ones is crucial for a successful planting season. When choosing tubers, look for those that are firm to the touch and free from mold, rot, or soft spots.
A good tuber will typically have at least one visible “eye,” or growth point, which will develop into the main stem of the plant. Avoid tubers that are shriveled or excessively dry, as they may struggle to establish roots and grow effectively. If purchasing tubers from a nursery or online supplier, ensure they come from a reliable source and are well-packaged to prevent damage during shipping.
Step 4. Plant at the Right Time:
Planting at the right time is crucial for ensuring healthy growth and a successful yield. The best time to plant tubers depends on your local climate and the specific plant variety, but as a general rule, wait until the danger of frost has passed and the soil temperature consistently reaches at least 50°F (10°C).

Cold or overly wet soil can impede root development and make the tuber susceptible to rot. Typically, this falls in early to mid-spring for most regions. If you’re unsure of the ideal planting window, consult a local gardening guide or agricultural extension office for regional planting advice. Timing matters, as planting too early or too late can significantly impact the tuber’s ability to sprout and thrive.
Step 5. Dig Planting Holes:
When digging planting holes for your tubers, it’s essential to ensure they are of the appropriate depth and spacing to encourage healthy growth. The holes should typically be 4 to 6 inches (10 to 15 cm) deep, allowing enough room for the tubers to be covered with a layer of soil that protects them while promoting sprouting.
Space the holes approximately 12 inches (30 cm) apart to give each tuber ample room to grow and prevent overcrowding. Additionally, leave 30 to 36 inches (75 to 90 cm) of space between rows if you are planting in a garden bed.
Step 6. Position the Tubers:
Place each tuber into the prepared holes with the sprouts, or “eyes,” facing upward. Positioning the tubers properly is essential as the sprouts are the starting points for new plant growth. Gently set the tuber in the hole, ensuring it sits firmly but without applying excessive pressure, which could damage the delicate sprouts.
If the tuber has multiple sprouts, ensure they are evenly spaced to encourage balanced growth. Once positioned, cover each tuber with soil and gently pat it down to secure the tuber in place and remove any air pockets.

Step 7. Stake Tall Varieties:
Staking tall varieties of plants is a crucial step to provide support and prevent them from falling over as they grow. For plants such as dahlias or sunflowers, which can reach considerable heights, inserting sturdy stakes into the ground near the base of the plant ensures their stems remain upright and protected from strong winds or rain.
Choose stakes made from durable materials, such as bamboo, metal, or treated wood, and place them a few inches away from the tuber to avoid disturbing the roots. Use soft garden ties or string to gently secure the stem to the stake, allowing for some flexibility to accommodate natural movement while avoiding any constriction that could harm the plant.
Step 8. Water Sparingly at First:
While watering is essential for plant growth, it’s crucial to exercise caution during the early stages to prevent overwatering, which can lead to root rot or fungal diseases. When you first plant the tubers, water them just enough to moisten the soil, ensuring the ground is not overly saturated.
The tubers need time to establish their roots, and excessive water can inhibit this process. Monitor the soil’s moisture levels regularly and water only when the top inch of soil feels dry to the touch. If your tubers are planted in pots, ensure that the containers have drainage holes to allow excess water to escape.
Step 9. Add Mulch:
Mulching is an essential step in maintaining healthy plants and promoting optimal growth. By adding a 2-3 inch layer of organic mulch, such as shredded bark, straw, or compost, you help retain soil moisture, regulate soil temperature, and suppress weed growth. Mulch acts as a protective barrier, reducing evaporation and keeping the tubers in a consistent environment where they can thrive. Additionally, as organic mulch breaks down over time, it enriches the soil with nutrients, contributing to better overall plant health.
Step 10. Monitor Growth:
Consistently monitoring the growth of your plants is crucial to ensuring a successful and healthy harvest. Begin by checking your plants regularly for signs of pests or diseases, such as discolored leaves, holes, or unusual growth patterns. Early detection makes it easier to take corrective measures, such as applying organic pest control or addressing soil deficiencies. Additionally, observe the soil’s moisture levels and water the plants as needed to prevent both overwatering and drought stress, which can hinder development.
Pay attention to the foliage and overall size of the plants, as these are indicators of their health and growth rate. Lastly, remove any weeds that appear around the plants, as they compete for nutrients and water, which can diminish the resources available to the tubers.
By following these tips, you can ensure a successful potato harvest that is both healthy and flavorful.

Conclusion
How to plant dahlias successfully requires careful preparation and attention to detail. Begin by selecting a sunny location with well-draining soil, as dahlias thrive in environments with plenty of light and moisture-free roots.
Prepare the soil by enriching it with organic compost to provide essential nutrients for growth. Plant the tubers about 6-8 inches deep, with the “eye” or growing point facing upward. Space them at least 12-18 inches apart to allow for proper air circulation. Regular watering is crucial, especially during dry spells, but be cautious not to overwater, as excessive moisture can lead to rot.
Supporting taller varieties with stakes or cages helps them stay upright as they grow.