To plant sprouted red potatoes, prepare well-drained soil and dig shallow trenches. Place the sprouted potatoes in the trenches with the sprouts facing up.

Credit: flickr.com
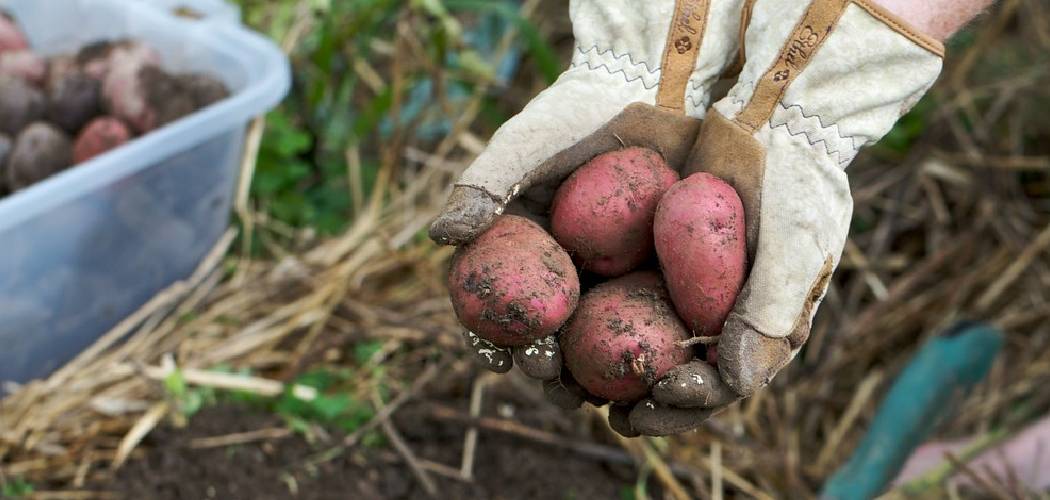
How to Plant Red Potatoes That Have Sprouted : Step by Step Guide
Preparing The Sprouted Red Potatoes
When preparing to plant sprouted red potatoes, it is important to discard any unhealthy sprouts. Unhealthy sprouts can hinder the growth and development of the potatoes, so it is crucial to identify and remove them before planting. Additionally, it is important to wait for the sprouts to reach the optimal length for planting. This ensures that the potatoes have sufficient energy to grow and thrive. Care should also be taken to avoid damaging the sprouts during handling. Any damage to the sprouts can impact their ability to grow and may result in poor potato production. By following these guidelines, you can ensure a successful planting of your sprouted red potatoes.
Selecting The Right Planting Location
When planting red potatoes that have sprouted, it is important to select the right planting location. You should choose a sunny spot with well-draining soil to ensure optimal growth. If you have limited space, consider container gardening as an alternative. This allows you to control the soil conditions and makes it easier to move the plants if needed. Another important factor to consider is the soil pH. Potatoes prefer a slightly acidic soil with a pH level between 5.0 and 6.0. Test the soil in your chosen location and make any necessary adjustments by adding organic matter or soil amendments. Remember to water your potatoes regularly and provide them with sufficient sunlight to promote healthy growth. By following these guidelines, you will be on your way to successfully planting red potatoes that have sprouted.
Planting Techniques For Sprouted Red Potatoes
Preparing the soil is crucial for successfully planting sprouted red potatoes. Start by loosening the soil to a depth of around 8-10 inches using a garden fork or a tiller. This will create a favorable environment for the potatoes to grow their roots. Remove any rocks or debris that might hinder the growth of the tubers.
When planting sprouted red potatoes, it is recommended to dig trenches instead of individual holes. The trenches should be about 6-8 inches deep and spaced around 2-3 feet apart. This will provide enough space for the potatoes to develop without overcrowding.
When it comes to spacing the sprouted potatoes within the trenches, aim for a distance of around 10-12 inches between each potato. This will give them room to grow and prevent competition for nutrients. Place the sprouted potatoes with the eyes facing upward and cover them with about 2-3 inches of soil.
In conclusion, by following these planting techniques, you can ensure a successful growth of your sprouted red potatoes. Remember to provide adequate care in terms of watering and fertilization throughout the growing season to maximize your harvest.
Caring For Sprouted Red Potatoes
Planting sprouted red potatoes is a simple and rewarding process. Start by preparing a well-draining garden bed or container with loose soil. Place the sprouted potatoes in a shallow trench or hole and cover them with soil. Regular watering is crucial to keep the soil consistently moist, helping the potatoes establish roots and sprout more effectively. Moisture maintenance is essential throughout the growing season, particularly during hot and dry periods.
To ensure healthy growth, it’s important to provide adequate fertilization. Apply a balanced fertilizer rich in nitrogen, phosphorus, and potassium when planting the potatoes, and then continue with regular feedings every few weeks. This will supply the necessary nutrients for robust plant development and enhance potato production.
To protect the plants from pests and diseases, take proactive measures. Rotate crops each year to prevent the buildup of pathogens in the soil. Monitor for pests such as Colorado potato beetles and apply appropriate organic controls if necessary. Additionally, keep an eye out for signs of diseases like late blight and promptly remove infected foliage to prevent spreading.
By following these guidelines, you can successfully care for sprouted red potatoes and enjoy a bountiful harvest.
Harvesting And Storing Red Potatoes
Harvesting and storing red potatoes requires careful attention and a few key techniques. One important step is recognizing when the potatoes are mature and ready to be harvested. Look for signs such as a fully developed skin color that matches the variety, a firm and healthy appearance, and a complete die-back of the foliage. Once the potatoes are ready, it’s essential to use proper harvesting techniques to avoid damage. Gently dig around the plants and lift the tubers out of the soil to prevent cuts and bruises. To ensure long-term storage, it’s crucial to properly store the harvested potatoes. Store them in a dark, cool, and well-ventilated area, such as a cellar or basement, to prevent sprouting and decay. Consider storing them in a burlap or paper bag to allow for air circulation. Regularly check the stored potatoes for any signs of spoilage and remove any affected ones promptly to avoid rotting of the entire batch.
Troubleshooting Common Issues
Identifying nutrient deficiencies in red potatoes: To ensure healthy growth and maximum yield, it is crucial to identify and address any nutrient deficiencies in red potatoes. Look for signs such as yellowing leaves, stunted growth, and poor tuber development. A lack of nitrogen may cause pale and small potatoes, while a shortage of phosphorus can result in delayed maturity. Potassium deficiency often leads to weak stems and dark spots on the foliage. Implement a balanced fertilizer regimen and consider soil testing to determine specific deficiencies.
Dealing with pest infestations and diseases: The presence of pests and diseases can significantly impact the success of your red potato crop. Common pests include aphids, Colorado potato beetles, and wireworms. Monitor your plants regularly and take action at the earliest signs of infestation. Consider organic control methods such as introducing beneficial insects or using neem oil. Diseases like late blight and blackleg can be devastating, so practice crop rotation and choose disease-resistant varieties whenever possible.
Preventing rot and other storage problems: Proper storage is vital to preserve the quality and longevity of your harvested red potatoes. Make sure to harvest them when the skins are mature and allow them to dry before storing. Store in a cool, dark, and well-ventilated area, ideally between 40-50°F (4-10°C). Avoid storing with fruits or vegetables that produce ethylene gas, as it can accelerate spoilage. Regularly inspect your stored potatoes and promptly remove any that show signs of decay to prevent the spread of rot.
Delicious Recipes Using Red Potatoes
Red potatoes are a versatile and delicious ingredient that can be used in a variety of recipes. One popular way to prepare red potatoes is by roasting them with herbs. Simply toss the potatoes with olive oil, minced garlic, and your favorite herbs such as rosemary, thyme, and oregano. Roast them in the oven until they are crispy on the outside and tender on the inside.
Another way to enjoy red potatoes is by making a creamy potato salad. Boil the potatoes until they are fork-tender, then let them cool before dicing them into bite-sized pieces. In a separate bowl, combine mayonnaise, mustard, diced onion, chopped celery, and chopped parsley. Add the diced potatoes to the mixture and gently stir until everything is coated in the creamy dressing. Refrigerate the potato salad for a few hours to let the flavors meld together before serving.
If you prefer mashed potatoes, red potatoes make a delicious and flavorful option. Boil the potatoes until they are soft, then drain them and return them to the pot. Add butter, minced garlic, salt, and pepper to taste, and mash everything together until smooth and creamy.
Frequently Asked Questions Of How To Plant Red Potatoes That Have Sprouted
What To Do With Red Potatoes That Have Sprouted?
If your red potatoes have sprouted, it’s best to remove the sprouts. They can make the potatoes taste bitter and affect their quality. Cut the sprouts off and use the potatoes as soon as possible to avoid further sprouting.
How Do You Grow Sprouted Red Potatoes?
To grow sprouted red potatoes, follow these steps: 1. Select potatoes that have sprouts. 2. Cut the potatoes into small pieces, ensuring each piece has at least one sprout. 3. Plant the pieces in well-drained soil, about 4 inches deep.
4. Water the plants regularly to keep the soil moist. 5. Harvest the potatoes once the plants have died down and the skins are firm.
Do You Cover Potato Sprouts When Planting?
No, you don’t need to cover potato sprouts when planting. Sprouts should be exposed to sunlight for photosynthesis.
How Do You Plant Red Potatoes That Have Sprouted?
To plant red potatoes that have sprouted, start by preparing a well-draining soil bed with organic compost. Cut the sprouted potatoes into small pieces, making sure each piece has at least one sprout. Plant the potato pieces about 3-4 inches deep and 12 inches apart.
Water regularly and provide ample sunlight for optimal growth. Harvest when the potatoes are fully matured.
Conclusion
Planting red potatoes that have sprouted is a simple and rewarding process. By following the steps outlined in this guide, you can ensure that your potatoes thrive and provide a bountiful harvest. From selecting the right seed potatoes to preparing the soil and providing proper care, every step is crucial for successful cultivation.
So, get ready to enjoy delicious homegrown red potatoes straight from your garden!