Are you ready to grow your own fresh, fragrant sage right at home? Planting sage seeds is easier than you might think, and with a little care, you’ll soon enjoy the vibrant green leaves perfect for cooking, tea, or even natural remedies.
In this guide, you’ll discover simple, step-by-step tips that make planting and nurturing sage seeds a breeze. Keep reading to unlock the secrets to a thriving sage garden and bring a touch of nature’s magic to your space. Your garden—and your kitchen—will thank you!
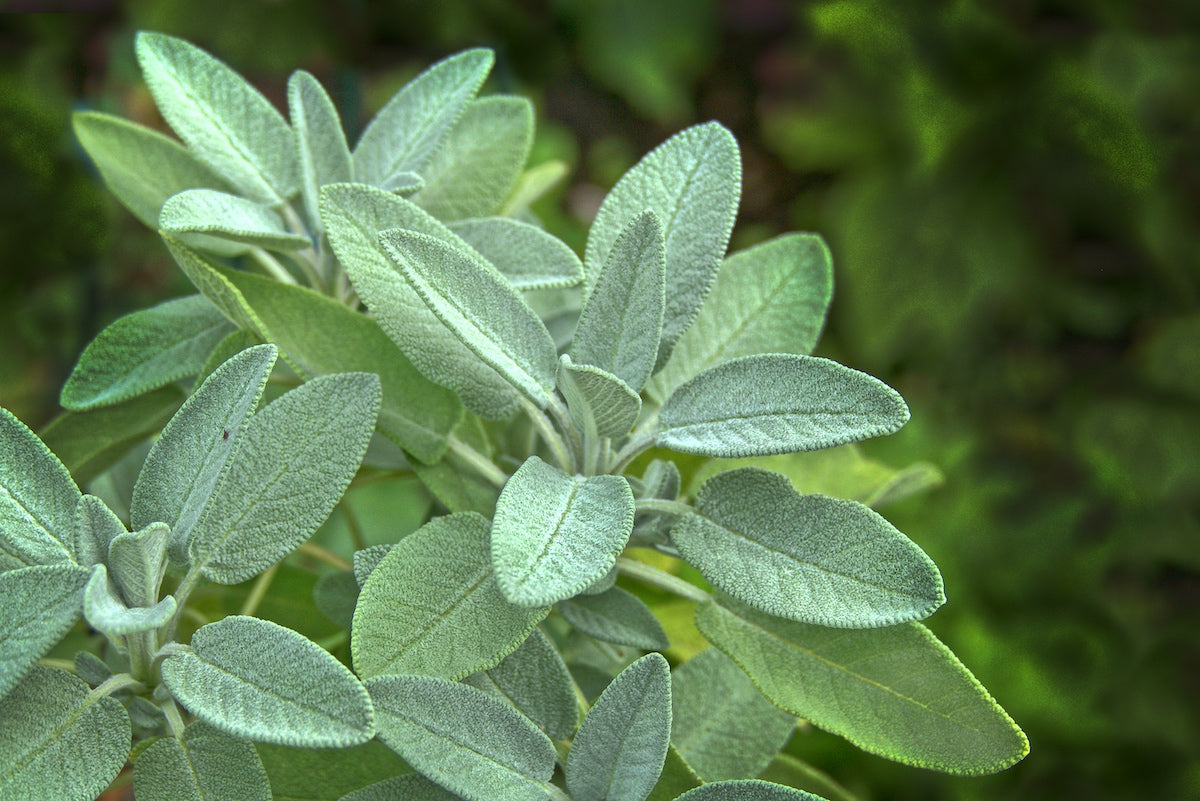
Choosing The Right Sage Variety
Choosing the right sage variety is key to a successful herb garden. Sage comes in many types, each with unique flavors and uses. Some types grow better in certain climates. Knowing the right variety helps you plant with confidence. It also ensures your sage thrives and tastes great.
Common Sage Types
Common sage, or Salvia officinalis, is the most popular type. It has gray-green leaves and a strong aroma. Culinary sage is great for cooking and easy to grow. Pineapple sage produces bright red flowers and a sweet scent. It adds color and flavor to dishes. Purple sage has deep purple leaves, often used for decoration and cooking. Clary sage is used more for its fragrance and oils than cooking.
Best Varieties For Beginners
Start with common sage for an easy experience. It grows well in many places and needs little care. Tricolor sage is good too, with green, white, and pink leaves. It looks nice and tastes mild. Golden sage has bright yellow leaves and a soft flavor. These types are forgiving and grow quickly. They help beginners learn how to care for sage plants.

Credit: sowrightseeds.com
Preparing The Soil
Preparing the soil is an important step before planting sage seeds. Good soil helps the seeds grow strong and healthy. Sage prefers soil that drains well and has the right nutrients. Taking time to prepare the soil improves your chances of success.
Soil Requirements
Sage needs loose, well-drained soil. Heavy clay or very wet soil can harm the plant. The soil should be rich in organic matter but not too heavy. Mixing compost into the soil adds nutrients and improves texture.
Improving Drainage
Drainage is key for sage plants. Water should not stay around the roots. To improve drainage, mix sand or small gravel into the soil. Raised beds or mounds can also help water flow away from the plants.
Ph Levels For Sage
Sage prefers a slightly acidic to neutral soil pH. The ideal range is between 6.0 and 7.0. You can test your soil with a simple pH kit. Adjust the pH by adding lime to raise it or sulfur to lower it.
Starting Sage Seeds Indoors
Starting sage seeds indoors gives young plants a strong beginning. It helps control the environment and protects seeds from pests. This method allows early growth before transplanting outdoors. Sage grows best with careful attention to seed selection, planting depth, and light. Follow simple steps for healthy seedlings.
Seed Selection
Choose fresh, high-quality sage seeds for better germination. Organic seeds often grow stronger plants. Check the seed packet for the best planting season. Avoid old or damaged seeds. Healthy seeds increase chances of sprouting quickly.
Planting Depth And Spacing
Plant sage seeds about 1/4 inch deep in seed trays or small pots. Cover lightly with soil but do not bury too deep. Space seeds at least 2 inches apart to avoid overcrowding. Good spacing lets seedlings grow without competition for light and nutrients.
Ideal Temperature And Light
Keep the soil temperature between 65°F and 70°F for fast germination. Place trays in a warm spot away from cold drafts. Sage seeds need plenty of light—at least 6 hours daily. Use a south-facing window or grow light for best results.
Transplanting Seedlings Outdoors
Transplanting sage seedlings outdoors is a key step in growing healthy plants. It moves young plants from pots to the garden soil. This stage helps sage develop stronger roots and better growth. Proper care during transplanting can prevent shock and boost survival.
Timing For Transplanting
Choose a day when the weather is mild. Avoid very hot, cold, or windy days. Transplant after the last frost date in your area. Sage seedlings usually need 6 to 8 weeks indoors first. The plants should have at least two sets of true leaves before moving.
Hardening Off Process
Harden off seedlings before planting outside. This means slowly exposing them to outdoor conditions. Start with a few hours in shade, then increase time daily. Protect from strong sun and wind at first. After 7 to 10 days, seedlings will adjust well to the garden.
Spacing In The Garden
Space sage seedlings 18 to 24 inches apart in the garden. This gives each plant enough room to grow. Proper spacing improves air flow and reduces disease risk. Crowded plants may grow poorly and compete for nutrients. Mark spots before planting to keep even spacing.
Watering And Care Tips
Watering and caring for sage seeds is crucial for healthy growth. Sage plants need balanced moisture and proper care. Too much or too little water can harm young plants. Follow simple steps to keep your sage thriving.
Watering Frequency
Water sage seeds gently after planting. Keep the soil moist but not soaked. Water every two to three days in dry weather. Reduce watering once seedlings appear. Let the top inch of soil dry before watering again.
Mulching Benefits
Apply a thin layer of mulch around sage plants. Mulch helps keep soil moist longer. It also reduces weeds and protects roots from heat. Use straw, wood chips, or dried leaves as mulch. Refresh mulch as needed to maintain coverage.
Preventing Common Issues
Watch for overwatering signs like yellow leaves. Avoid soggy soil to prevent root rot. Ensure good air circulation around plants. Remove any dead or damaged leaves quickly. Check regularly for pests like aphids or spider mites.
Harvesting And Using Sage
Harvesting sage at the right time ensures the best flavor and aroma. Using sage properly can enhance meals and support health. This section guides you through harvesting and using sage effectively.
When To Harvest
Harvest sage leaves just before the plant flowers. This is when the oils are strongest. Pick leaves in the morning after the dew dries. Avoid harvesting too late in the season. The taste may become bitter then.
Proper Harvesting Techniques
Use clean scissors or pruning shears to cut leaves. Cut stems about 5 to 6 inches from the top. Do not remove more than one-third of the plant. This helps sage grow back healthy. Always leave some leaves on the plant.
Culinary And Medicinal Uses
Sage adds a warm, earthy flavor to many dishes. Use fresh or dried leaves in soups, meats, and sauces. Sage tea can soothe a sore throat or aid digestion. The herb has antioxidants and anti-inflammatory properties. Use sage in small amounts for best effects.
Troubleshooting Growth Problems
Planting sage seeds can sometimes lead to challenges. Growth problems can stop your sage from thriving. Identifying and fixing these issues early helps your plants grow healthy and strong.
Pests To Watch For
Sage plants attract certain pests that can damage leaves. Aphids, spider mites, and whiteflies are common. These pests suck sap and weaken the plant. Check leaves often for small bugs or sticky residue. Use insecticidal soap or neem oil to control pests. Remove heavily infested leaves to protect the plant.
Dealing With Diseases
Sage can suffer from fungal diseases like powdery mildew and root rot. Powdery mildew shows as white powder on leaves. Root rot causes wilting and yellowing due to poor drainage. Avoid overwatering and plant sage in well-drained soil. Remove infected leaves and improve air circulation. Fungicides can help if the problem persists.
Reviving Struggling Plants
Yellow or drooping leaves signal stress in sage plants. Check soil moisture and adjust watering habits. Sage prefers dry soil between waterings. Thin out crowded plants to improve airflow. Trim dead or damaged leaves to encourage new growth. Fertilize lightly with balanced nutrients for a boost. Patience and care bring your sage back to life.
Credit: sowrightseeds.com

Credit: shopaquariansoul.com
Frequently Asked Questions
How Long Does It Take For Sage Seeds To Germinate?
Sage seeds typically germinate within 7 to 21 days. Keep the soil moist and warm, around 70°F. Germination speed depends on temperature and seed freshness. Using a seed tray indoors can improve success rates.
What Soil Is Best For Planting Sage Seeds?
Sage seeds thrive in well-draining, sandy loam soil. The soil pH should be slightly acidic to neutral, around 6. 0 to 7. 0. Avoid heavy clay soils to prevent root rot. Adding organic matter improves soil fertility and drainage.
How Much Sunlight Do Sage Seeds Require?
Sage seeds need full sunlight for at least 6 to 8 hours daily. Adequate sunlight promotes healthy growth and strong flavor. If growing indoors, place them near a south-facing window or use grow lights.
When Is The Best Time To Plant Sage Seeds?
The best time to plant sage seeds is in early spring after the last frost. You can start seeds indoors 6 to 8 weeks before transplanting outdoors. Sage prefers warm soil to encourage germination and growth.
Conclusion
Planting sage seeds is simple and rewarding. Start with good soil and keep it moist. Place seeds where they get enough sunlight. Watch them sprout in one to three weeks. Thin seedlings to avoid crowding and help growth. Sage grows best with regular watering and care.
Harvest leaves carefully to keep the plant healthy. Growing sage adds fresh flavor to your kitchen. Enjoy the process and the herbs you grow. Small steps lead to a thriving sage plant. Gardening brings joy and fresh herbs to your home.