
Pollination is a vital process for plant reproduction, allowing flowers to develop into fruits and seeds. While outdoor plants often rely on wind or insects for pollination, indoor plants may not have access to these natural mechanisms. Learning how to manually pollinate indoor plants can ensure their health and productivity, especially for fruit-bearing species.
This guide on how to pollinate indoor plants will walk you through the steps and techniques needed to effectively pollinate your indoor plants and help them thrive.
Benefits of Pollinating Indoor Plants
Pollination is a crucial process for plants, as it ensures the continuation of their species by producing fruits and seeds. For indoor plants, pollination has additional benefits that can improve their overall health:
Increased Fruit Production:
By manually pollinating your indoor plants, you can ensure that each flower receives enough pollen to develop into a fruit. This can lead to larger and more abundant fruits compared to relying on natural pollinators.
Controlled Pollination:
Manually pollinating your indoor plants allows you to have control over the pollination process. You can choose which flowers to pollinate, leading to a higher success rate in producing fruits. This is especially helpful when dealing with plants that have a short blooming period or are self-incompatible and require specific pollen to produce fruits.
Protection from Pests:
Indoor pollination also helps protect your plants from pests such as bees, which may damage the flowers or steal the nectar. By manually pollinating, you can avoid attracting unwanted insects into your home while still ensuring successful fruit production.
Increased Genetic Diversity:
When relying on natural pollinators, there is a higher chance of cross-pollination among different plant varieties. While this can lead to new and interesting hybrid plants, it may also result in lower-quality fruits.
Understanding Squash Plant Flowers
Squash plants have unique flowering habits that are essential to their pollination process. They produce two types of flowers—male and female—which are easily distinguishable. Male flowers typically appear first and are attached to long, slender stems. Female flowers, on the other hand, have a small swelling at their base, which is the ovary that will develop into the squash fruit if pollinated.
Understanding this difference is key for successful pollination, as pollen must be transferred from the male flower to the female flower. This transfer can be achieved through natural pollinators like bees or by using manual techniques if the plant is grown indoors or in an environment with limited pollinator activity. Ensuring proper pollination not only supports fruit development but also promotes healthy plant growth.
Needed Materials
To successfully grow and pollinate squash plants, you will need a few key materials.
- Squash Plants (Either Seeds or Seedlings)
- Pollinators (Such as Bees) or Manual Pollination Tools
- Garden Space or Containers
- Fertilizer
- Water Source
- Protective Netting (Optional)
7 Simple Steps on How to Pollinate Indoor Plants
Step 1: Choose Your Squash Plants
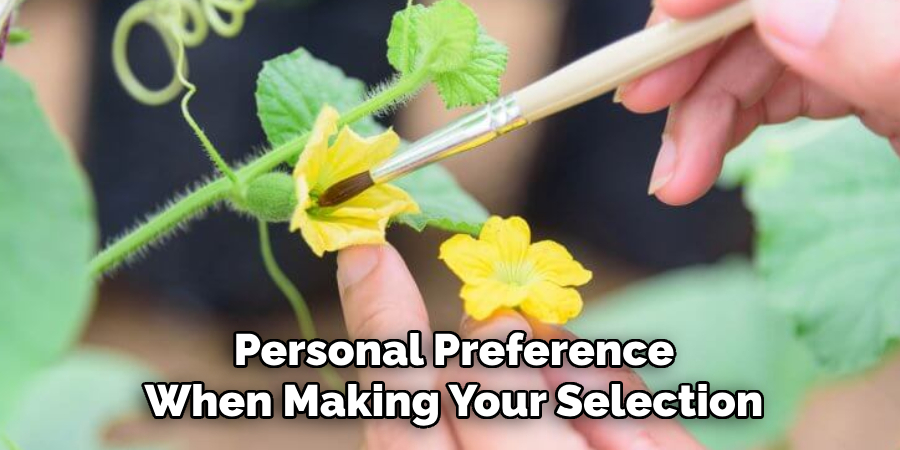
The first step in growing and pollinating squash plants is selecting the right variety for your space and needs. There are many types of squash to choose from, including zucchini, butternut, acorn, and summer squash. Consider factors such as your growing climate, available space, and personal preference when making your selection.
If you’re working with limited space, opt for compact or bush varieties that thrive in containers. Ensure that the seeds or seedlings you purchase are of high quality and sourced from a reputable supplier to set a strong foundation for successful growth.
Step 2: Set Up Your Garden Space or Containers
Proper preparation of your garden space or containers is essential for growing strong, healthy squash plants. Begin by selecting an area that receives at least 6-8 hours of sunlight daily, as squash thrives in full sun. If you’re planting in the ground, loosen the soil to a depth of at least 12 inches and mix in organic compost or well-rotted manure to enrich it with nutrients.
For container gardening, choose pots with good drainage holes and use a high-quality potting mix designed for vegetables. Ensure each container is large enough to accommodate the mature size of the plant, as squash requires plenty of space for its roots. By taking the time to prepare a suitable growing environment, you’ll provide your squash with the best chance for healthy and abundant growth.
Step 3: Provide Proper Care
Once your squash is planted, consistent care is essential to ensure healthy growth and a bountiful harvest. Water your plants deeply and regularly, aiming to keep the soil consistently moist but not waterlogged. Mulching around the base of the plants can help retain moisture and suppress weeds. Squash plants are heavy feeders, so apply a balanced fertilizer every few weeks to support their growth.
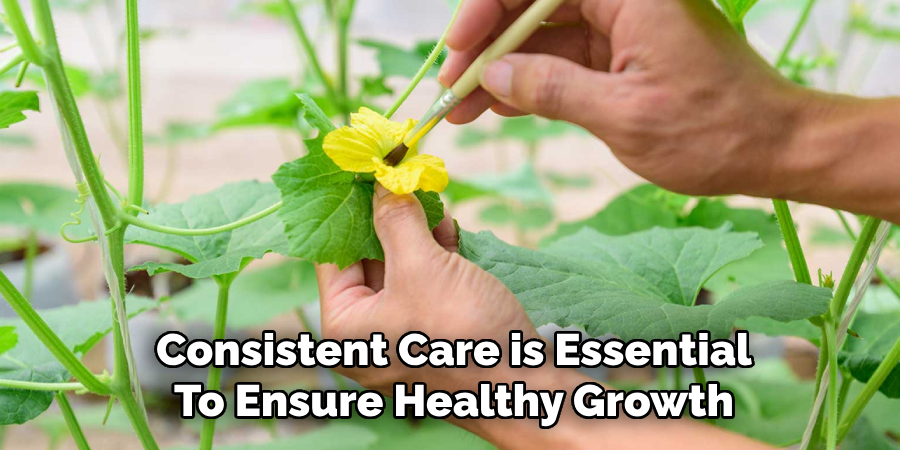
Keep an eye out for pests, such as squash bugs or vine borers, and remove them promptly to protect your plants. Additionally, provide support for vining squash varieties by using trellises or stakes to keep the foliage and fruits off the ground, reducing the risk of diseases. With attentive care, your squash plants will thrive and reward you with a plentiful yield.
Step 4: Harvest and Enjoy
Harvesting squash at the right time is crucial for the best flavor and texture. Summer squash, like zucchini, should be picked when they are small and tender, typically around 6 to 8 inches long. Winter squash, such as butternut or acorn, should be harvested when the skin is hard and the color is rich and uniform.
Use a sharp knife or pruning shears to cut the squash from the vine, leaving a small portion of the stem attached to prolong freshness. After harvesting, store summer squash in the refrigerator for a few days and winter squash in a cool, dry place for several months. Once harvested, enjoy your squash in a variety of recipes, from roasted dishes to soups, or even baked goods. There’s nothing more satisfying than savoring the fruits of your labor!
Step 5: Try Different Varieties
Growing squash offers the opportunity to experiment with a wide range of varieties, each with unique flavors, textures, and uses. Summer squash types like zucchini and yellow squash are perfect for light, quick dishes, while winter squashes such as butternut, acorn, and spaghetti squash bring hearty flavors to fall and winter meals.
Don’t hesitate to try uncommon or heirloom varieties, as they can add diversity to your gardening and culinary experiences. Exploring different types will not only enhance your garden’s appeal but also inspire creativity in the kitchen!
Step 6: Store Properly
Squash can be stored for several weeks if kept in a cool, dry place with good air circulation. Make sure to remove any damaged or bruised squash before storing, as they can cause the rest of your squash to spoil.
You can also freeze squash by blanching it first and then placing it in an airtight container or freezer bag. This is a great way to preserve your harvest for use during the colder months.
Step 7: Enjoy Your Squash
Now comes the best part – enjoying your delicious homegrown squash! There are countless ways to prepare and enjoy squash, from roasting and grilling to soups and stews. You can even
Following these steps on how to pollinate indoor plants will ensure that you have a healthy and bountiful harvest of squash. Whether you’re growing them for their tasty flesh or decorative purposes, taking the time to pollinate your indoor squash plants is well worth the effort.

Additional Tips
- Always use clean tools when working with your plants to avoid introducing any harmful bacteria or pests.
- To help attract pollinators, you can also plant companion flowers such as marigolds or lavender near your squash plants.
- Don’t be afraid to experiment with different methods of hand pollination to see which works best for your plants. You may find that a particular technique is more successful for your specific variety of squash.
Frequently Asked Questions
Q1: Can I Hand-Pollinate Any Type of Squash?
A: Yes, you can hand-pollinate any variety of squash, such as zucchini, butternut, or acorn squash.
Q2: How Often Should I Hand-Pollinate My Squash Plants?
A: It is recommended to hand-pollinate every 1-2 days during the flowering season to ensure a successful harvest.
Q3: What Happens if I Don’t Hand-Pollinate My Squash Plants?
A: If your squash plants are not properly pollinated, they may produce misshapen or underdeveloped fruits. This can also result in a lower yield overall.
Q4: Is there a certain time of day that is best for hand pollination?
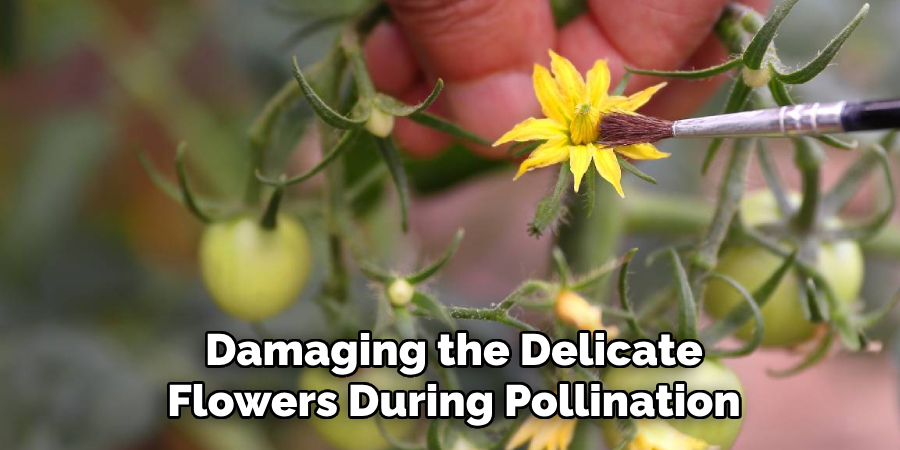
A: It is best to hand-pollinate in the morning when the flowers are fully open and before the heat of the day sets in. This will give you a better chance of successful pollination. Additionally, avoid pollinating on rainy or overly windy days as this can disrupt the process. Remember to also use clean tools and avoid touching or damaging the delicate flowers during pollination.
Conclusion
Hand pollination can be an effective and rewarding method to boost plant productivity, especially when natural pollinators are scarce. By understanding the right techniques, timing, and care required, gardeners and farmers can ensure successful pollination and maximize their yield.
Always remember to handle plants delicately, work during favorable conditions, and stay consistent with your efforts. With a bit of practice and patience, hand pollination can significantly contribute to a bountiful and healthy harvest. Thanks for reading this article on how to pollinate indoor plants.