
Propagating ponytail palm plants can be a rewarding experience for plant enthusiasts. These unique and low-maintenance plants, known for their bulbous base and elegant, cascading leaves, are a popular choice for both indoor and outdoor gardens. While they grow slowly and don’t require much attention, learning how to propagate them properly can help you expand your collection or share them with others. This guide will walk you through the steps of how to propagate ponytail palm plants.
Why Propagate Ponytail Palms
Propagating ponytail palms is not only a great way to grow your collection, but it also allows you to rejuvenate older plants and create new, healthy specimens. These plants are prized for their distinctive appearance, making them excellent gifts for fellow plant lovers. Propagation is also an economical and satisfying way to ensure you always have these unique plants on hand, especially since mature ponytail palms can be costly to purchase. Additionally, propagating allows you to explore the fascinating growth process of this hardy and resilient plant, deepening your connection to nature and gardening.
When to Remove Pups for Propagation
The best time to remove pups from a ponytail palm for propagation is during the active growing season, typically in spring or early summer. This ensures that the plant is in its most vigorous state, providing the pups with the highest chance of successful growth. Pups should only be removed when they are at least 4 inches tall and have developed a healthy root system of their own. Waiting until the pup is mature enough helps reduce stress on both the parent plant and the pup itself. It’s also important to use sterilized tools to make clean cuts and to allow the parent plant time to heal after removal.
10 Methods How to Propagate Ponytail Palm Plants
1. Identify and Wait for Healthy Offsets (Pups)
The most reliable method to propagate a ponytail palm is by using the offsets, commonly known as pups, which grow around the base of a mature plant. These are essentially clones of the parent plant and typically emerge when the plant is well-established, often after several years.
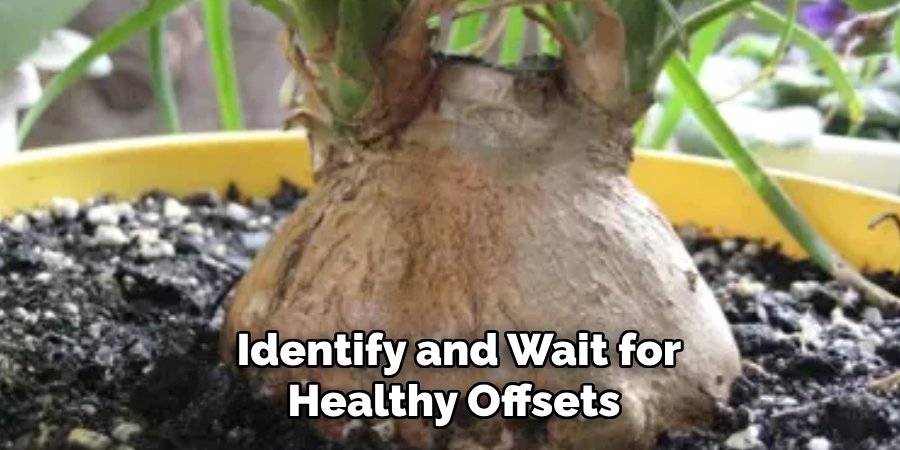
Wait until the pup is at least 4 inches tall and has its own small base; this indicates it’s mature enough to survive on its own. Larger pups have a better success rate, so resist the urge to remove tiny shoots too early. Keep the area around the base of the plant visible and clean to monitor pup development.
2. Prepare Your Tools and Supplies
Before separating the pup, gather the necessary supplies: a sharp, sterile knife or pruning shears, a small pot, a well-draining potting mix (such as cactus or succulent soil), gloves, and optional rooting hormone. It’s crucial to sterilize your cutting tools with rubbing alcohol or a flame to prevent disease transmission. Also, choose a pot with good drainage to help the new plant avoid excess moisture, which can lead to rot. Proper preparation helps ensure a smooth and successful propagation process.
3. Gently Remove the Pup from the Parent Plant
To separate the pup, gently dig away the soil around its base, exposing where it connects to the main plant. Carefully cut the pup away, ensuring you include a portion of its own root system, if visible. If there are no roots yet, don’t worry—it can still root independently, though success may vary. Make clean cuts and avoid tearing the tissue, which can leave the plant vulnerable to rot or infection. If multiple pups are available, consider removing just one or two to reduce stress on the parent plant.
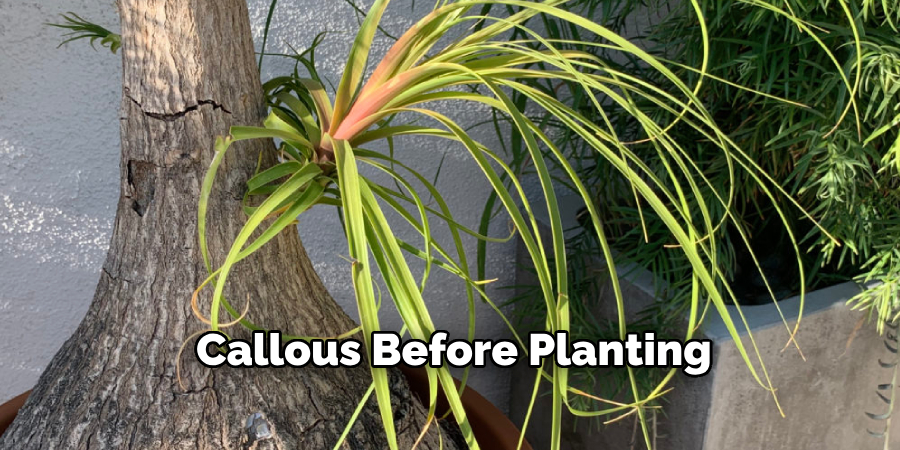
4. Allow the Pup to Callous Before Planting
Once the pup is removed, set it aside in a dry, shaded location for a few days to allow the cut area to callous over. This step is critical, especially if the pup does not have any roots. Allowing the wound to dry prevents bacterial or fungal infections once it is planted. This natural drying process mimics how succulent-type plants protect themselves in their native environments. Don’t rush this step—it improves the chances of successful rooting significantly.
5. Use Rooting Hormone to Encourage Root Development
While not required, dipping the calloused base of the pup in rooting hormone can enhance root development and speed up the propagation process. This powder or gel helps trigger root cell production and adds an extra layer of protection against rot. Simply dust the base lightly with the hormone and tap off any excess before planting. Rooting hormone is particularly helpful when propagating pups that have no established root system.
6. Plant in a Small Pot with Well-Draining Soil
Choose a small container, just large enough to accommodate the pup and provide stability as it roots. Fill the pot with a fast-draining soil mix, such as one made for cacti or succulents. Avoid standard potting soil, which retains too much moisture and can suffocate young roots. Plant the pup shallowly, just deep enough to support its base, and press the soil lightly around it. Be gentle and avoid compacting the soil too tightly. Place the potted pup in bright, indirect light for best results.
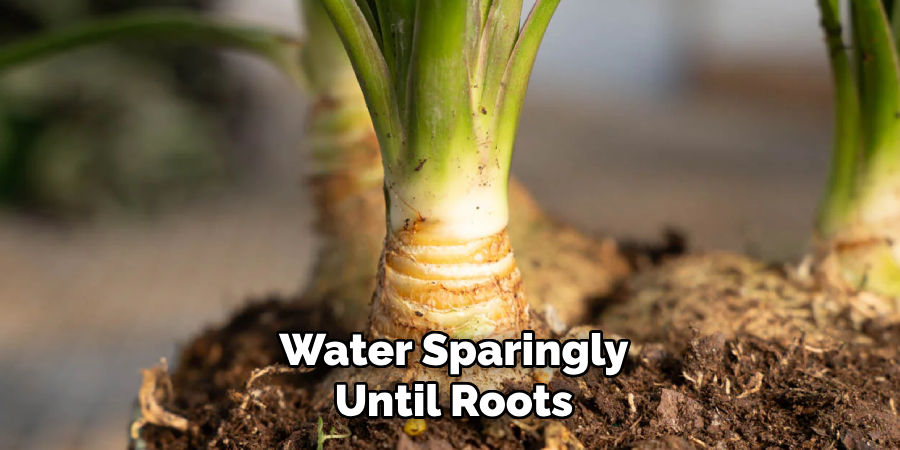
7. Water Sparingly Until Roots Form
After planting, mist the soil lightly to settle it, then refrain from watering again until the top 2 inches of soil are dry. Overwatering is one of the most common reasons for failure when propagating ponytail palms. Young pups are sensitive to moisture and are easily affected by root rot. Stick to a light watering schedule, using a spray bottle or small cup, and be patient. Roots may take several weeks to form, especially in cooler environments.
8. Provide Warm Temperatures and Humidity
Ponytail palms thrive in warm, arid climates, so maintaining a suitable environment during propagation is key. Keep the pup in a location where temperatures remain consistently between 65°F and 80°F (18°C–27°C). If you live in a cooler climate, consider using a seedling heat mat or placing the pot near a warm window. Although ponytail palms don’t need high humidity, too dry an environment can slow rooting. A humidity dome or a clear plastic bag tented over the pot can help maintain a microclimate without sealing in excessive moisture.
9. Monitor Growth and Transplant When Necessary
Once the pup begins to establish roots and new leaf growth is visible, it can be treated more like a mature plant. This typically takes about 4–8 weeks, depending on environmental conditions. As the plant grows, you may notice the base starting to thicken, a sign that the plant is storing water and developing strength. Once it outgrows its starter pot or becomes root-bound, transplant it to a slightly larger container with continued attention to drainage and light exposure. Avoid planting in oversized pots, which retain unnecessary moisture.
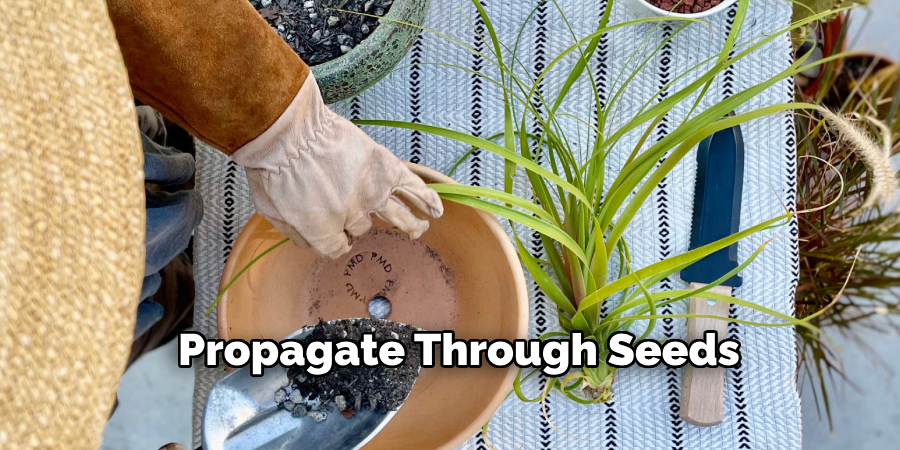
10. Propagate Through Seeds (Advanced Method)
While not commonly done due to the difficulty, ponytail palms can also be propagated from seeds, particularly by advanced growers. This method requires access to a flowering ponytail palm, which is rare indoors and takes many years to achieve. After collecting and drying the seeds, plant them in a moist, sandy seed-starting mix and cover them lightly. Keep the container in a warm, well-lit area with consistent moisture but not saturation. Germination can take several weeks, and young seedlings grow slowly. This method is best suited for hobbyists who are patient and want to explore the full lifecycle of the plant.
Things to Consider When Growing Ponytail Palms
When cultivating ponytail palms, several factors should be taken into account to ensure their health and longevity. Firstly, these plants thrive in bright, indirect sunlight, making them ideal for sunny indoor spaces or mild outdoor climates. Overwatering is a common mistake; their bulbous trunk stores water, so allowing the soil to dry out between watering is crucial. They prefer well-draining soil to prevent root rot, and using a cactus or succulent mix is often recommended.
Additionally, while they grow slowly, repotting every few years is essential to accommodate their expanding root system. Lastly, ponytail palms are low-maintenance, but occasional fertilization during their growing season can promote healthier foliage. Understanding these considerations can help both novice and experienced gardeners successfully grow these unique and attractive plants.
Common Mistakes to Avoid
When caring for ponytail palms, there are a few common mistakes that can hinder their growth or even harm the plant. Overwatering is the most frequent issue, as their bulbous trunk stores water, making them susceptible to root rot if the soil remains too moist. Using a pot without adequate drainage can exacerbate this problem. Another mistake is placing the plant in low-light conditions for extended periods; while they can tolerate shade, ponytail palms thrive in bright, indirect sunlight.
Neglecting to periodically check for pests such as spider mites or mealybugs can also impact their health. Lastly, over-fertilizing or using the wrong type of fertilizer can lead to salt build-up in the soil, potentially damaging the roots. Avoiding these pitfalls can ensure a thriving and vibrant ponytail palm.
Conclusion
Propagating ponytail palm plants is a rewarding endeavor, especially when done through their natural offsets. With a careful hand and patience, these ornamental plants can be multiplied and shared or simply expanded in your own collection. Following the above ten methods will increase your success rate and help you nurture strong, healthy new plants from pups. While seed propagation is less common, it remains an option for the truly dedicated grower. Now that you know how to propagate ponytail palm plants, try it yourself today and feel good about completing such a big DIY job!